Curly Cherry Highboy, Part Three
Flame finials and carved fans complete this classic
Synopsis: In this, the third of three articles on making a curly cherry highboy, Randall O’Donnell explains how he enjoys carving the details – the fans in the two center drawers and the flame finials that crown the bonnet. He uses a compass and coins to lay out the fans’ ray spacing and scalloped edges. Then he carves them; detailed photographs accompany the explanation. He uses a lathe to start the finials and carves the flame with gouges. The article also describes the details of finishing the waist molding, plinths, and mounting the finials. Drawings illustrate each step.
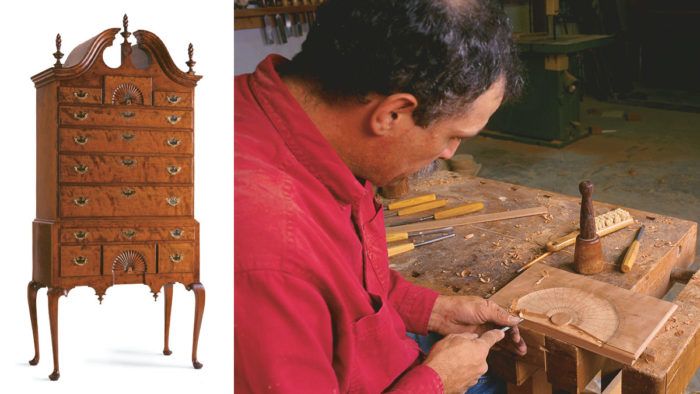
Imagine moving your household and three days later, packing up and moving again. That’s what it’s like to be an exhibitor at a furniture show. Setting up a booth is hard work. After the carpet was down and everything in place at a recent show, I caught my breath and watched as prospective customers walked into my booth to take a closer look at this highboy. It’s almost ft. tall, and the figure of the curly cherry is exceptional.
Invariably, admirers would walk up to the highboy and somewhat tentatively run their fingers over the fans carved into the two center drawers. Carving seems to serve as the touchstone of a piece. If the carvings look and feel right, customers stay to ask questions, take a brochure and, perhaps, place an order.
I make 18th-century-style furniture. Working within this form, I like to play with the details—to put my stamp on a piece. And nowhere is the ground more fertile for expressing individuality than in carving. Although I have no reservations about using machines for preparing stock, carving is one of several things that I do completely by hand.
In the last two issues of Fine Woodworking, I described building the base and upper case of the highboy. Now it’s time to carve the fans in the two center drawers and turn and carve the flame finials that crown the bonnet.
This highboy also has two smaller drop finials in the base and a small, round fan carved in the center of the pediment. These parts use the same carving and turning techniques.
Lay out the fans with a compass and coins
The fans (or shells) in the center of the upper chest and lower base are one of the most eye-catching details on a highboy. There are many regional variations. I adapted these fans from several Boston pieces.
To lay out a fan, I start by drawing a vertical centerline on the drawer front and then marking the horizontal baseline by eye (see the drawing on p. 53) The intersection of these two lines forms the center point of the fan. From this point, I scribe the outer radius, inner radius and hub diameter with a compass. These lines establish the overall size of the fan.
From Fine Woodworking #119
For the full article, download the PDF below:
Fine Woodworking Recommended Products

Dubuque Clamp Works Bar Clamps - 4 pack

Jorgensen 6 inch Bar Clamp Set, 4 Pack

Stanley Powerlock 16-ft. tape measure


Log in or create an account to post a comment.
Sign up Log in