Synopsis: The posts on this bed are the toughest part; after that, says Philip C. Lowe, the rest is simple. Lowe makes full-scale drawings for his projects, and he shares tips on doing so on this job. He explains how to make the blanks for the bedposts, how to turn and reed the posts, and how to put it all together. He also offers side information on indexing wheels for the lathe.
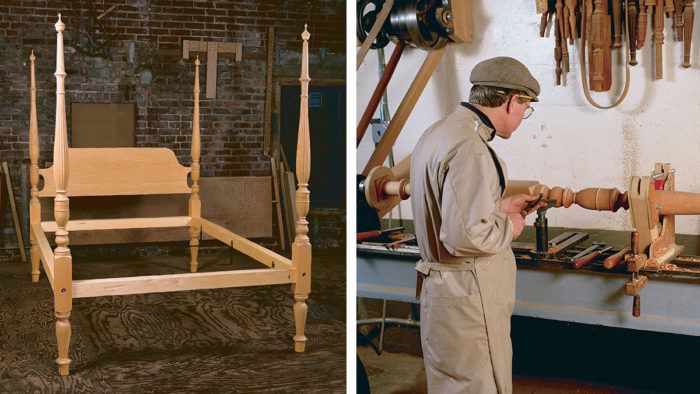
Beds often are very simple, even if they look as complicated as the Sheraton bed in the photo on the facing page. The joinery isn’t complicated, and there aren’t many parts. In fact, once you’ve made the posts for this bed, the hard work is behind you. Think about the posts as different circular-shaped moldings stacked on top of one another. The posts can be made in one piece, as I do, or made in several pieces, which are glued together later. The posts also can be made without decorative reeding, which cuts out many hours of work on the project and still results in a pleasing design.
I always make full-scale drawings for pieces that I’m about to make. For this bed, I have to draw only one of the posts, half the shape of the headboard and the joinery detail for the rail-post connection. I use the drawing to make a story stick (a scrap of wood where dimensions and profiles are marked), so laying out the bed posts is both easy and accurate.
Mounting the blank
The bedpost blanks are milled to in. sq. from 16/4 stock and rough cut to length, leaving a couple of inches at each end for mounting in the lathe. Turning the fulllength blanks is no problem on my lathe, with its 10-ft-long bed. But if you don’t have this luxury, you will have to turn the post in sections, and join them together by boring a hole in one part and turning a mating tenon on the adjoining member. The joints should be cemented with yellow glue or epoxied for extra strength. I’ve marked a few joining points, as shown in the drawing below. As a rule, the best place to join these parts is at a fillet above or below a cove, torus or ogee shape.
I mount the blank at the headstock end with a faceplate and plywood disc drive center, which provides a more positive drive than a spur center. This arrangement also lets me add an indexing wheel and makes it easy to remount the blank.
The drive center is a circular piece of -in.-thick plywood screwed to the faceplate. The plywood has a square hole the size of the turning blank cut out of its center. To mount the blank, one end is slipped into the square hole, and the ball-bearing center in the tailstock is slid into position at the opposite end and locked in place.
From Fine Woodworking #113
For the full article, download the PDF below:
Fine Woodworking Recommended Products

Stanley Powerlock 16-ft. tape measure

Compass

Jorgensen 6 inch Bar Clamp Set, 4 Pack


Log in or create an account to post a comment.
Sign up Log in