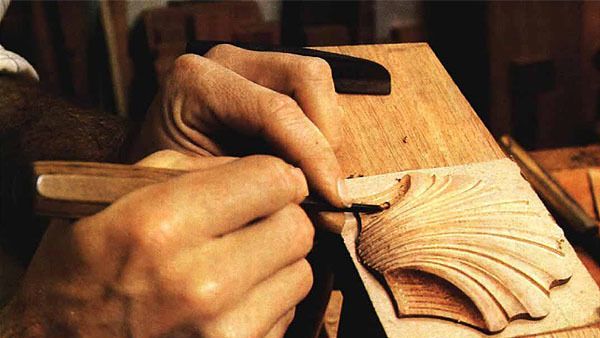
Synopsis: Colonial Williamsburg’s Mack Headley, Jr., offers step-by-step instruction how to carve a shell. He explains the numbering system of carving tools and the importance of making a drawing first. Step one involves laying out the shell on a board and sawing out the blank. Next, you use a gouge to cut to the line and remove wood from the concave rays. Glue the shell down to a board and sculpt the surface of the shell. Next, remove extra wood at the wings, and draw the rays on the sculpted surface, pivoting on your knuckle to control curves. Begin to separate the rays. Shape the areas between the parting tool cuts into convex and concave rays. You’ll use a series of gouges. The last step is cutting small veins on the wings; this breaks up the large, flat surface and accents the linear quality of the hinge area.
The shell was a very popular detail on English and Colonial furniture throughout the 18th century. Carved on drawer fronts, knees of cabriole legs, and the crest and seat rails of chairs, the shell was appreciated as more than just decoration. The study of nature was fashionable at the time and artisans attempted to analyze, and capture in their designs, the symmetry and proportion they found in natural forms. Classicism was also in vogue, so symbolic meanings (the Greek goddess Aphrodite arose from the sea on a scallop shell) would have added a dimension to its popularity which is hard for us to appreciate today. Yet the shell’s appeal as a decorative detail endures.
In this article, I’ll go through the step-by-step development of a shell. This particular shell is a style common on Pennsylvania furniture. I’ve chosen to carve an applied shell—one that will be glued onto a flat surface. You can apply the carving techniques to carve shells directly on drawer fronts or crest rails.
Carving gouges are made in various widths and curvatures. The curvature, or sweep, is designated by a number from 1 to 11. The higher the number, the more pronounced the curve. Curves are carved by selecting gouges with the appropriate curvature and transferring their shapes to the wood.
Make a full-size drawing of the shell on paper or wood, following the layout shown above. The perimeter is defined by the imprints of the gouges shown. These same tools will later be used to carve the shell. The sweep numbers given correspond to my gouges. Because sweeps are not standardized, however, you may find that your gouge doesn’t exactly match the curve in the drawing. In that case, choose another gouge to get the right shape.
This shell measures in. high and in. wide, based on proportions of 9 units high by 10 units wide. By using these proportions, you can scale the shell up or down to suit your needs. The lines between the rays are drawn freehand, pivoting off the knuckle of the little finger to control the curve. Save the final drawing as a reference for laying out the rays on the carving.
From Fine Woodworking #61
For the full article, download the PDF below:
Fine Woodworking Recommended Products
Lie-Nielsen No. 102 Low Angle Block Plane

Starrett 4" Double Square

Marking knife: Hock Double-Bevel Violin Knife, 3/4 in.






Log in or create an account to post a comment.
Sign up Log in