Synopsis: Silas Kopf says veneers, sold in hundreds of colors and textures, are quite workable for making rich designs and pictures. The techniques are easily learned; the real challenge is in creating patterns complementary to the furniture being decorated. Perfectly satisfactory pictures can be made with a good hand-held fretsaw or knife, though Kopf explains how to use a power scrollsaw, too. He prefers the double-bevel cut technique, building up the picture around pieces of veneer part by par, taping each piece into position until the picture is complete and ready for mounting. He talks about designing and making a picture and selecting veneer, and offers tips on mounting the parts and avoiding seasonal movement.
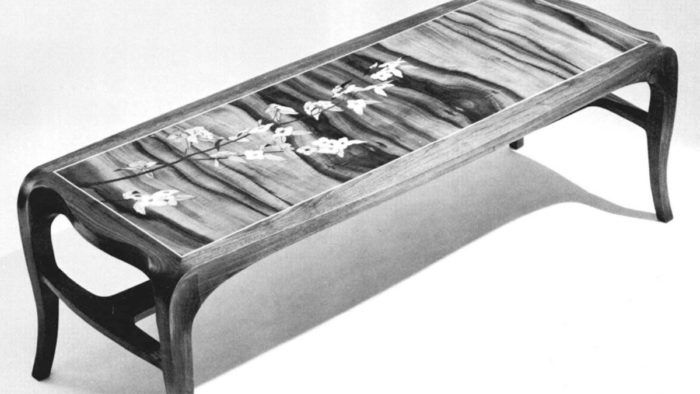
Although we really don’t have a long tradition of using marquetry in American furniture, applying assemblages of colored veneers to add visual interest to a piece is gaining favor. Veneers, sold in hundreds of colors and textures, are quite workable for making rich designs and pictures. The techniques involved, though not simple, are easily learned; the real challenge is in creating patterns complementary to the furniture being decorated.
One of the beauties of marquetry is that it requires very little equipment. Perfectly satisfactory pictures can be made with a good hand-held fretsaw or a knife, although, as I’ll explain later in this article, a power scroll saw has advantages. There are several methods for making a marquetry picture. I favor a technique called the double-bevel cut, as it offers both speed and precision when making just one or a few pictures. With relative ease, many pieces of veneer can be fitted together without gaps between the parts. I mount, or press, my marquetry work onto panels, which can then be applied to small boxes and furniture of all sizes. This double-bevel method is applicable to about 95% of the work I do.
Double-bevel cutting is an additive process. You start with two pieces of veneer, one of which will fit into the other, and you build up the picture around them part by part, taping each piece into position until the picture is complete and ready for mounting. One piece is set on top of the piece it will fit into, and the saw, angled to cut a bevel, cuts through both at once. The waste is set aside and the two pieces are placed together. The gap that is created by the sawblade is taken up by the bevel, so when the piece on top “falls into” the lower one, it will wedge in place with no space or an invisibly small space between, as in figure 1 (p. 62). The angle of the bevel is a function of the thickness of the sawblade and the thickness of the veneer. Using 1/28-in. thick veneer and 2/0 jewelers’ blades, the gap will be filled if you cut a bevel of around 13°.
Designing and making a picture—I try to make the picture the focus of my work and then design the furniture to best display it. This rules out mounting pictures close to the floor; eye-level application on cabinet doors or on tables seems ideal. Surfaces subjected to a lot of abrasion and wear aren’t good locations for marquetry, but tabletops will hold up fine if they are protected with a hard surface finish such as polyurethane. Keep in mind that tabletops are horizontal surfaces that are frequently cluttered, so your efforts may be invisible much of the time.
 From Fine Woodworking #38
For the full article, download the PDF below:
Fine Woodworking Recommended Products

Starrett 12-in. combination square

Bahco 6-Inch Card Scraper

Veritas Wheel Marking Gauge


Log in or create an account to post a comment.
Sign up Log in