Synopsis: Linenfold carving originated around 1450, and surviving pieces show how stylized it became before being replaced in the Renaissance by floral patterns. Rick Bütz recommends using hand tools, though you can make linenfold using routers and circular saws. He uses a rabbet plane to raise the panel, a plow plane to define the straight, parallel grooves, one or two round planes to waste the hollows, a small block plane for the convex folds, and a few gouges to carve the end folds. He shows typical linenfold designs and then shows and explains how to carve them, with tips such as not taking the background down any more than half the thickness of your panel.
Linenfold carving creates in wood the effect of creases and undulating folds of cloth or parchment. The design seems to have originated with French and Dutch woodworkers around the year 1450, and was probably inspired by the shapes and patterns of draped altar cloths. Several surviving pieces show intricately carved borders reminiscent of the rich embroidery found on ecclesiastical appointments. During the late 15th century, linenfold was introduced into England, where it quickly caught on among the tradesman woodcarvers. The style became so popular that it is now the hallmark of Tudor-Gothic design.
Linenfold was usually carved on a rectangular panel, which was then fitted into a grooved framework. The design could easily be altered in length, and today can be seen as paneling in houses, public buildings and churches, including Westminster Abbey. Linenfold was also popular for paneled doors, chests, beds and other household furnishings of the 15th and 16th centuries. Although many of the early examples were realistic interpretations of cloth folds, the design eventually became quite stylized, and it is even found sideways at times, as if the idea of a hanging drapery had become quite forgotten. As tastes changed toward the end of the 16th century, linenfold carving was replaced by the elaborate floral themes of the early Renaissance.
There are many traditional designs to choose from. I’ve included drawings of a few to give you an idea of the range. The old woodcarvers varied each panel slightly, achieving a vitality that let them cover an entire room or hallway with linenfold without it seeming monotonous or repetitious. This variety sets the original Gothic woodcarvings apart from later imitations. So don’t be afraid to modify the design, but keep in mind that it will be difficult to visualize the end result. Make precise drawings: a full-scale cross section and a clearly defined sketch of the end folds, as shown at right.
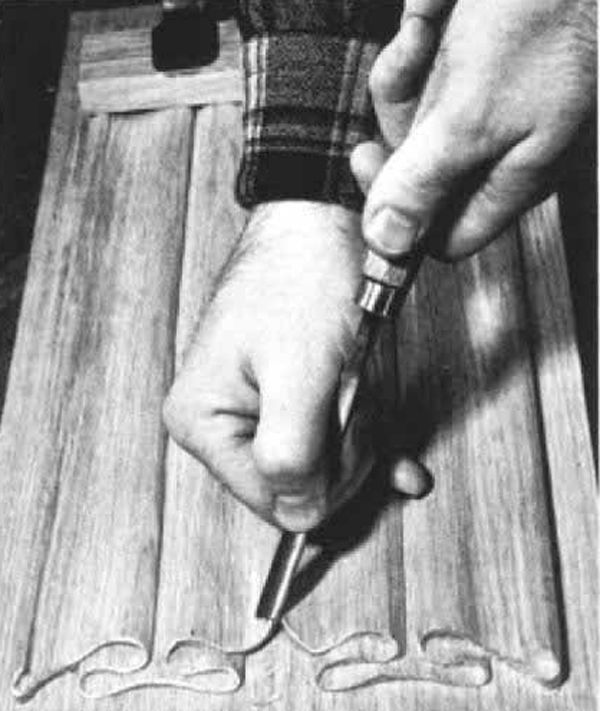
The carving of linenfold is basically a two-step procedure. The long folds and undulations are planed out, then the ends are shaped with various carving tools. One aspect that makes carving a linenfold panel so enjoyable and interesting is the variety of tools that are used. While you could use routers and circular saws, it’s just as quick and more satisfying to do it with traditional hand tools. For cutting down the background and shaping the contours of the long folds and creases, use a rabbet plane, a plow plane, one or two round planes, and a small block plane (photo A, top of facing page). For carving the end folds, you will need one or two fishtail gouges of medium sweep and a back-bent gouge. If you don’t own all of these tools, you can modify the design to suit the ones you have.
From Fine Woodworking #36
For the full article, download the PDF below:
Fine Woodworking Recommended Products

Tite-Mark Marking Gauge

Stanley Powerlock 16-ft. tape measure

Bahco 6-Inch Card Scraper


Log in or create an account to post a comment.
Sign up Log in