Repairing Finishes: Two Ways
Burn-in resins hide deep scratches; knife technique makes the difference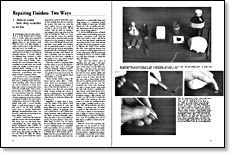
Synopsis: Rick Bütz and John Revelle discuss two ways to repair finishes: using burn-in resins and using a knife. Burning-in involves filling the scratch with melted shellac resin and then topping off with an appropriate finish. This method is effective for oil, varnish, shellac, and lacquer finishes. He gives step-by-step instructions on how to repair scratches this way. Revelle’s method is good for repair and restoration work where the piece won’t be finished over again. His description of knife technique is only part of the article; he also offers tips on steps to skip and how to make the repair less conspicuous.
It’s frustrating to discover a deep scratch in a nicely finished piece of furniture. A scratch rarely goes unnoticed and it may be unfairly interpreted as a glaring defect in the furniture itself. With any luck—and light damage—a surface scratch may be easily rubbed out with steel wool, but usually not.
Over the years, furniture makers have developed lots of tricks for touching up damaged finishes. A favorite method for repairing deep scratches is called “burning-in.” The repairer fills the scratch with melted shellac resin, matches the color and grain of the surrounding wood with stains and a small brush and, finally, touches-in the appropriate finish. Damage to oil, varnish, shellac and lacquer finishes can be burned-in; polyurethane and other plastic finishes sometimes blister.
For burn-in work, you’ll need shellac sticks of various colors, a special knife, a heat source, padding lacquer and powdered blending stains. Burn-in sticks are sold in hundreds of colors, but I keep only a dozen on hand in the colors of woods I usually repair. Clear or translucent sticks are available and they can be color-matched using the blending stains. Burn-in or shellac sticks are made of various pigments and resins and have a consistency similar to the wax used for sealing letters. My burn-in knife is like a palette knife with a curved, flexible blade. A small alcohol lamp is a good heat source. Use the lamp carefully; never leave it burning unattended. Although electrically-heated knives can be used, I prefer the alcohol lamp for its more delicate heat control.
To repair a scratch heat the knife tip with the concave side toward the flame. This keeps any soot that forms from contaminating the resin. Judging the proper temperature takes practice. If the resin bubbles and smokes when it touches the knife, it’s too hot. If it forms drops that quickly re-solidify, it’s too cool.
From Fine Woodworking #34
For the full article, download the PDF below:
Fine Woodworking Recommended Products
Osmo Polyx-Oil

Bahco 6-Inch Card Scraper




Log in or create an account to post a comment.
Sign up Log in