
When the staff at Fine Woodworking isn’t busy producing the magazine and website, we can often be found in the shop working on personal projects. Recently, I completed a Shaker blanket chest from cherry that provided a number of lessons in traditional techniques, as well as fixing mistakes.
One mistake happened when I was installing the hinges on the lid. I drilled the pilot holes for the hinge screws slightly out of place and it created a gap around the hinge inside the mortise. Take a look at a photo essay of how I made the repair with a creative fix:

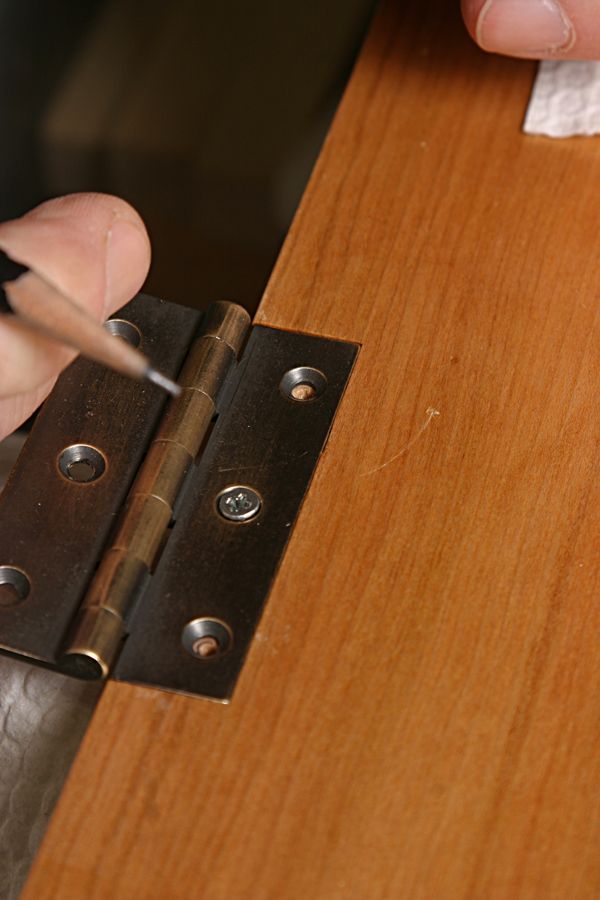
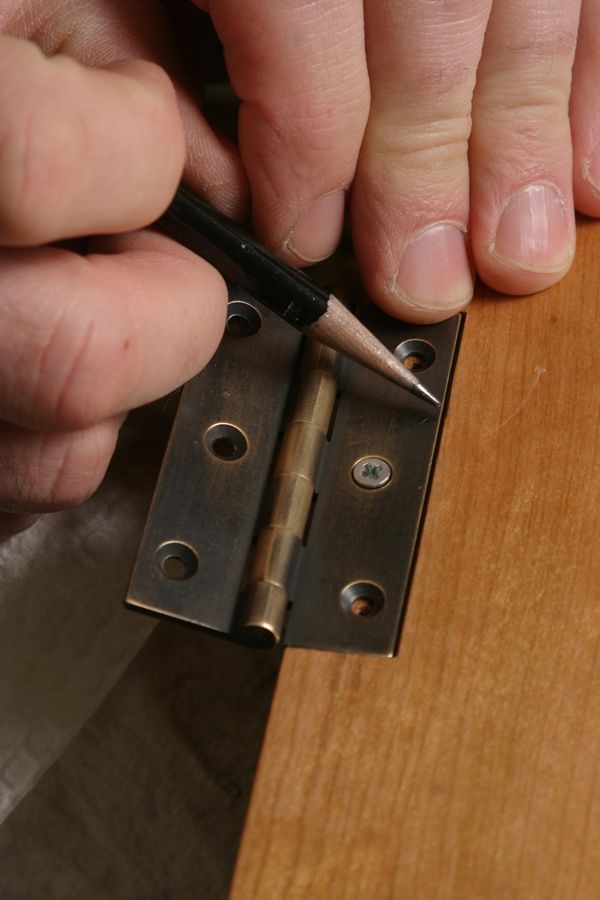
The problem. The tip of my pencil points to an unsightly gap that resulted
from a imprefect hinge mortise. Unfortunately, I already drilled
the pilot holes for the hinge by the time I figured this out.

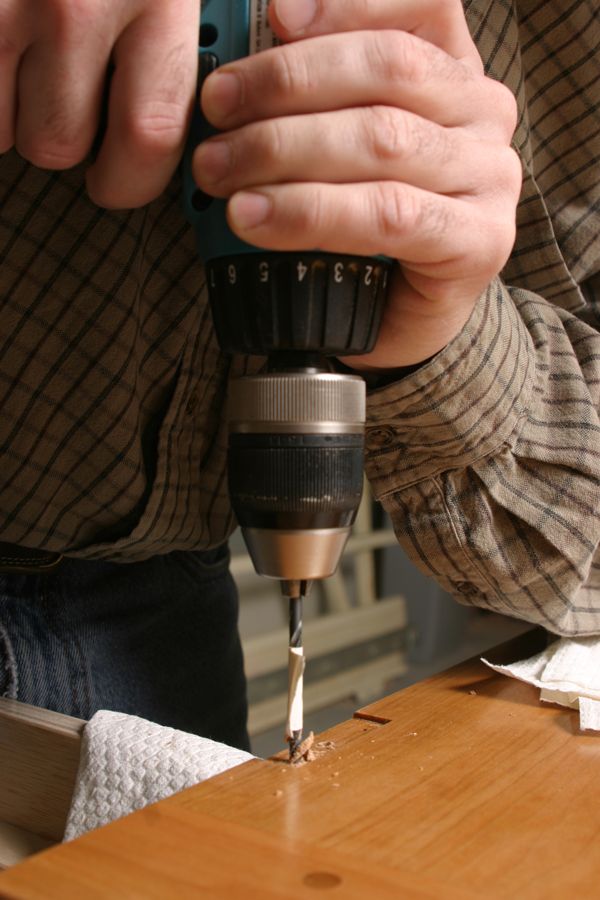
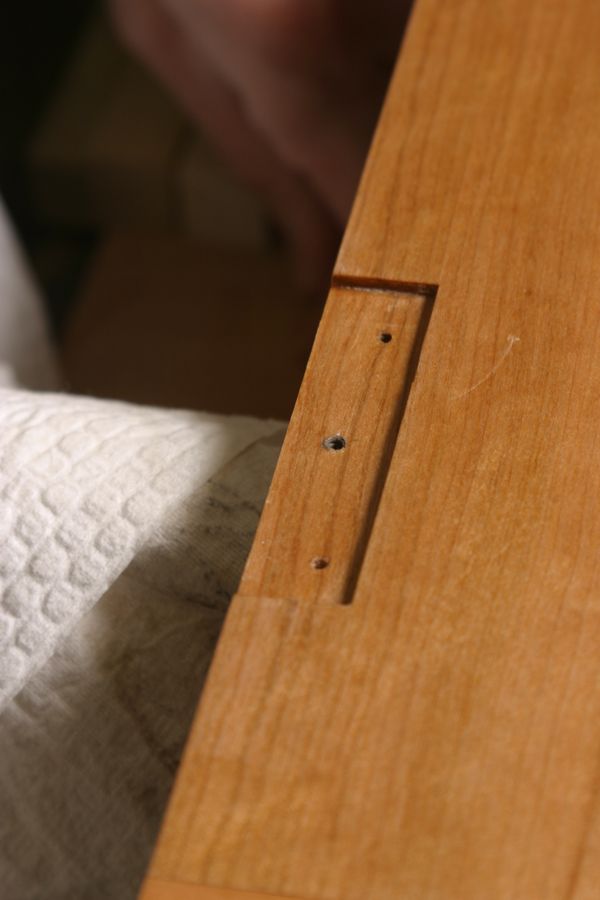
Start over with new pilot holes. The first step is to fill the old holes
so they can be re-drilled in the correct location.

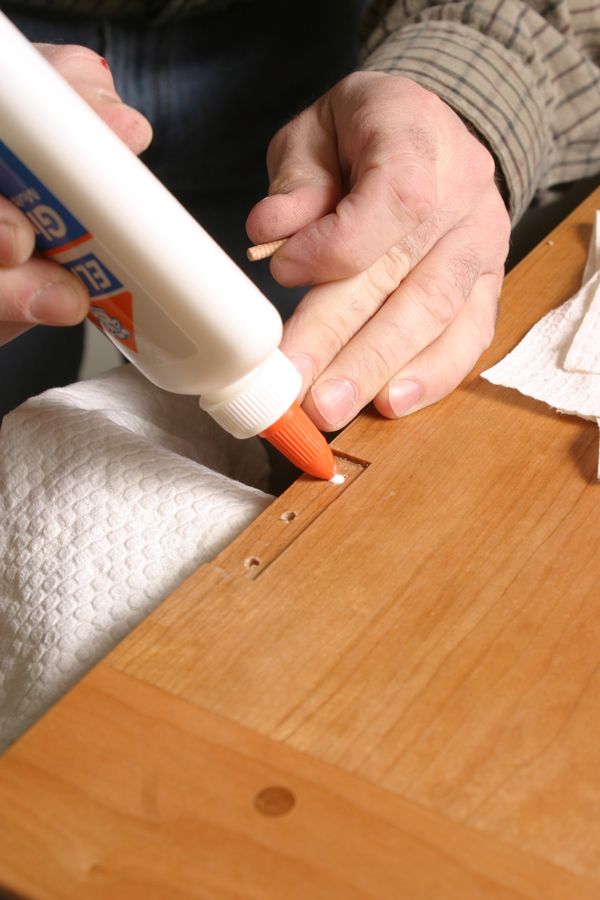
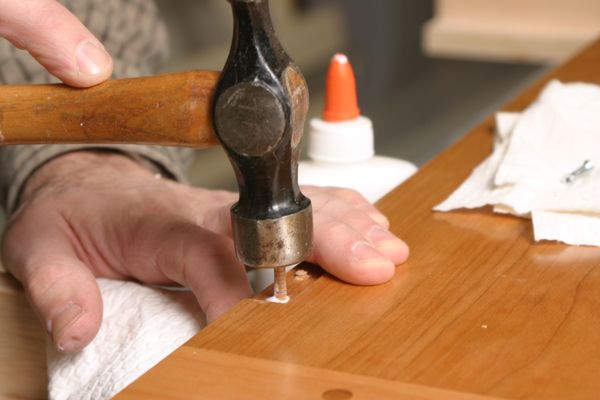
Plug the holes. Next, I drove hardwood dowels into the holes to
create a solid surface for the screws to grab.

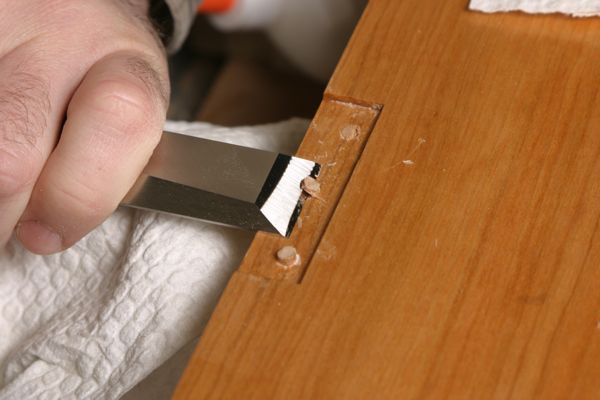
Trim the dowels flush. After the glue dried, I removed the excess
dowel material with a chisel.

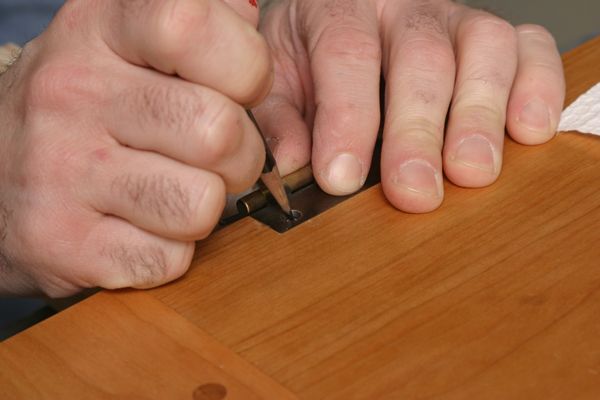
Back to square one. With the hinge placed correctly in the mortise,
I marked new locations for the pilot holes.

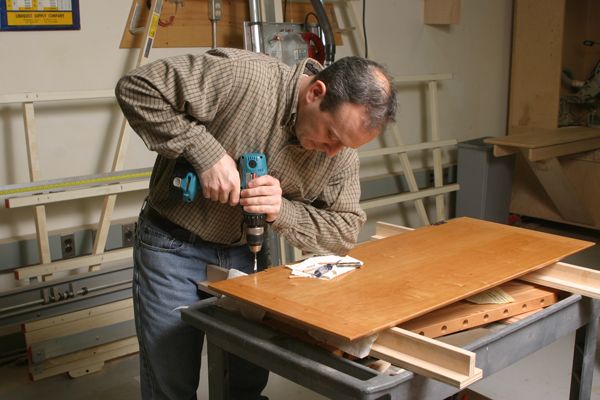
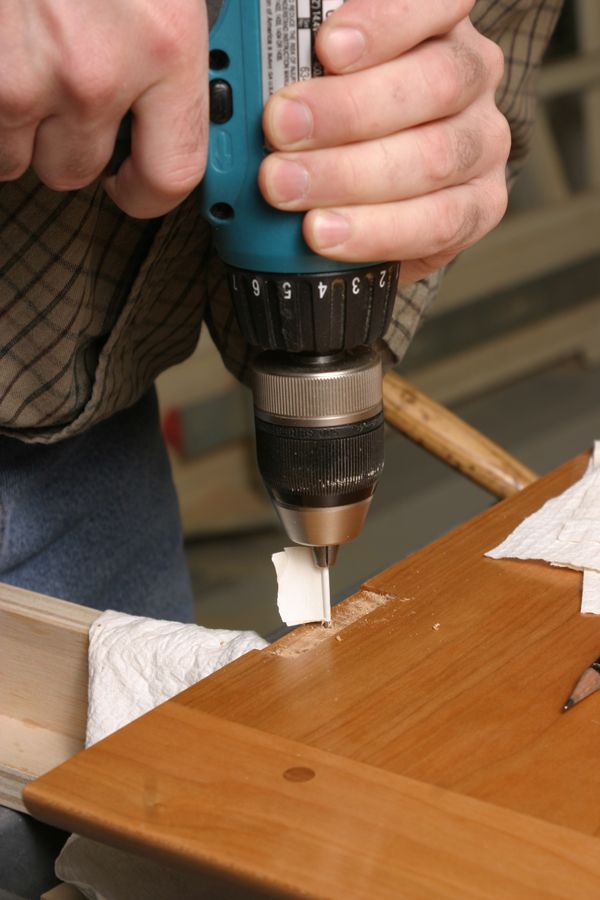
Drill new holes. I carefully drilled the new holes using a depth-stop
on the drill bit to prevent drilling through the lid.

A perfect fit. A little extra effort goes a long way toward making
the finished piece the best it can be.
-
-
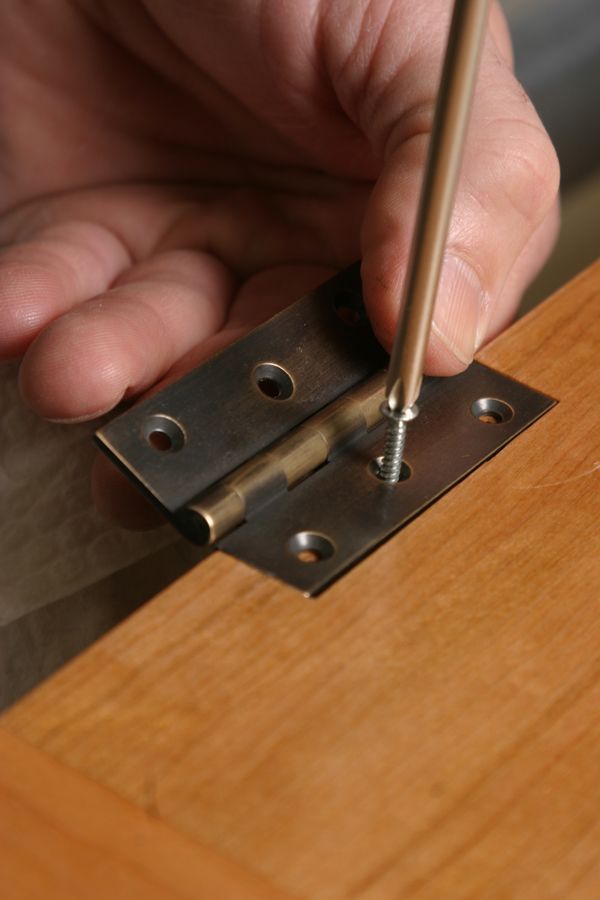
With the repair complete, I redrilled the pilot holes and installed the hinges with a tight fit.
-
-
-
-
To make the repair, I plugged the original pilot holes so I could start over from scratch.
-
-
-
When installing hinges on the lid of a Shaker blanket chest I built recently, I ended up with an unsightly gap. Find out how I repaired it.
-
-
-


Comments
This is a good place to use a guided centering drill bit (Google for 'Vix-bit' to see what they look like). Use a bit of duct tape to hold the hinge in place, then drill directly through the tape and hinge hole with the Vix-bit. The holes will be exactly right, every time.
A self centering bit beats marking and tilting the hole a tad towards the mortise makes sure the screw contacts the mortise side of the hole first driving the hinge in tightly . Ty.
Self-centering bits...why didn't an editor "revise" Mr. Dunton's well-intended fix? Plugging holes...we all have done this, and no shame! But I count on FWW editors knowing MORE than I do! Sheesh!
Now that the hinge is in place, how do you get rid of that scratch from a slipped screwdriver that we've all done?
Thanks to the terrific photographic resolution, I can also see the circular scratch just above the first screw hole. Judging by the arc of the scratch, it looks like the hinge probably spun with the screw in the second hole, or a burr in the second hole and marred the finish (been there, done that). I've learned to install all my hinges and hardware before finishing, then fix all my mistakes, then uninstall everything, then finish. This way, the final finish doesn't get marred by hardware installation.
Thanks to the terrific photographic resolution, I can also see the circular scratch just above the first screw hole. Judging by the arc of the scratch, it looks like the hinge probably spun with the screw in the second hole, or a burr in the second hole and marred the finish (been there, done that). I've learned to install all my hinges and hardware before finishing, then fix all my mistakes, then uninstall everything, then finish. This way, the final finish doesn't get marred by hardware installation.
I guess I am not as experienced as some of the other readers. I appreciated Mr. Dunton's article.
Re: the comments on self centering bits. The self centering bit is a good suggestion for previnting this type of mistake, but sometimes a mistake is made. This article was on how to correct a mistake. It is good for me, because I have some kitchen cabinets that do not fit properly due to mis-located hinges and I can use this technique to fix my problem.
I know I'm in the minority here as a beginner woodworker but I really appreciate when an article on basics comes up. I'm trying to teach myself as I go but with many projects I look at I'm left with multiple questions because often the issues or techniques that are simply common knowledge to the novice and advanced woodworkers are not covered. Thanks FWW
Just a precaution: When filling the original screw hole prior to redrilling, remember to use a dowel of the same or very similar wood to your piece. Otherwise when you try to redrill, the bit will drift in the direction of the softer wood and you'll be worse off than ever. Ash and oak are close, but oak and maple, for instance, are too dissimilar and a small bit will drift. Been there, done that.
I am also a beginner to woodworking. My questions are also very basic one. How do you know what size dowels you would need to fill the holes? Also, do you keep dowels of various size and species around the shop or do you make them as needed? I have to order my through the mail. What sizes would you suggest I order? I know this is a broad question but I have to stock things in advance before I start making a new project.
This reminds me of an old carpenter's trick. He showed me how he used short lengths of bamboo skewers (the kind used for kebabs) to fill the misplaced screw holes much like your method with dowels. Of course this wasn't for fine furniture, but very quick and effective. The hinge hides any unsightliness.
I see several comments about using self-centering bits to drill the pilot holes. But if you look closely at the pictures you can see that the pilot holes are drilled slightly off center toward the edge of the hinge. That is the way I would do it. Then when you drive in the screws it will snug the hinge into the mortise and close any gap.
Expounding on Neopanax's comment.
I'd like to comment on his "Not for fine furniture" disclaimer.
Purists might object on ideological grounds to using dissimilar materials and part of my motivation for this post is to mess with their brains, but the real issue for me is having a drill bit drill into a surface that has different densities and grain directions for one half of the bit than the other. Denser material might shift the bit's center toward softer material. Bamboo can be a pretty hard material. I've done flooring and found it wears carbide tipped blades, but those skewers seem splintery to me and not the same material as the flooring or my old bamboo flyrod. On the other hand, drilling an oversized repair hole and inserting a plug that will completely contain the new screw doesn't sound like a great idea.
I've pounded wooden match sticks with plenty of glue into stripped holes in door hinges with good results. You have to consider the glue is as significant a component of the new material as whatever is used as a plug. In demanding applications, 5-minute epoxy used with the bamboo or with several wood toothpics driven in with a hammer might provide a better anchor than the endgrain of a wood dowel. (My flyrod has an extra tip but I'm not using it for this purpose.)
Cajunmama- If you want to always have the correct size and type of material for a dowel to use to for repairs, pegs and other uses, then what you need is a dowel plate. Basically a thick steel plate with various sizes of holes drilled in them to be used to pound a square peg through to cut into a dowel. You must whittle the end of the peg down a bit to get it started into the dowel plate, but after that you simply pound it through with a steel hammer.
Lie-Nielsen makes a very nice model in which the holes taper to a slightly larger diameter at the bottom.
I, however, decided to make my own. I basically copied the hole sizes of the unit offered by L-N and used a piece of 4140 scrap acquired from a machine shop and drilled my own holes.
My father happens to be a machinist and works at that shop, but if you find a shop and ask nicely, they will likely help you out, at most for just a few dollars.
You can even use a large washer and simply drill a hole in it to use also. It doesn't need to be fancy to work.
I'm curious about the author's technique for locating the new screw holes, in the second and third from the last photos, titled "Back to square one" and "Drill new holes". That is a critical part of the repair, but the text is silent concerning the technique used. As other commenters have mentioned, I use self-centering bits and self-centering center punches. They help, although I don't find them fool-proof. But if you don't use those tools, what other approach is available for drilling the holes in the proper location?
It takes very tight tolerances to get three flathead screws installed perfectly in a hinge. I don't like angled holes, unless the angle is very slight, because the screw head doesn't sit flush with the hinge. Similarly, any offset in drilling the holes toward the inside of the mortise must be very slight, if you want the screws to sit perfectly in the hinge.
I find it hard to get a visually flawless fit for all three screws in their countersinks in the hinge, even when I use self-centering bits. I would enjoy reading more tips on how to locate and drill the holes, so that the screws and the hinge look perfect.
I had a number of hinges to fit in a cabinet so I made up a drill guide that located in the countersunk hinge hole [ a simple 2 piece devise ] which guided the pilot drill central to the hole in the hinge. Have since made others with different size pilot holes for different hinges. I always drill the middle hole first and secure the hinge hinge in place before drilling the outer holes.
Handtool37
Log in or create an account to post a comment.
Sign up Log in