How to cut fast, accurate hinge mortises
The key is to build a routing template around the hinge itself
Synopsis: Router templates are a quick and accurate way to get a great-fitting hinge mortise. The key is a pattern bit that allows you to create a template sized to the hinge, eliminating the need to measure. Once you’ve made the template, clamped it in place, and routed the mortise, all that’s left is squaring up the corners with a chisel.
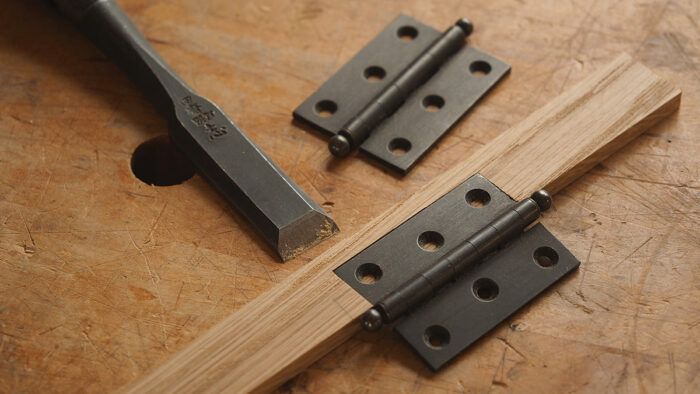
There are a lot of ways to go about cutting a hinge mortise. One option that I didn’t use for a long time was a routing template. I never knew what hinge I would use for a project, and it didn’t seem worth it to make a new template for each time. Second, I assumed templates would be a pain to make. And last, I doubted their accuracy. However, teaching had a way of changing my view. In trying to figure out a way to get a class through the process of hanging a door at the end of a long week, I decided to give router templates a look. It turns out that making a template is fast and a good fit is just about automatic. The key is to build the template around the hinge itself. From there, a short pattern bit makes quick work of the mortising, leaving just the rounded inside corners to take care of with a chisel. It’s important to use a good quality hinge (which you should do anyway) because the sizes are more consistent from hinge to hinge, which makes for a more consistent fit. I’ve had good luck with hinges from Horton Brasses, Brusso, and Whitechapel Ltd.
This technique is so fast and accurate, I no longer use it just for teaching. I’ve been putting it to use in my own shop as well.
Start by making the template
The hinge mortising jig consists of two parts, an MDF plate that supports the router, and a solid-wood fence that gets clamped to the workpiece. The plate is notched to create a recess for routing, and cutting that notch is the most critical step. The pattern bit I’ll use to rout the mortise simplifies the task. Its bearing exactly matches the diameter of the cutter. Be careful when buying a bit because not all brands have this feature. I’ve had good luck with a 1/4-in.-long pattern bit from Whiteside, model 3000. With this type of bit, you can cut the notch in the template precisely to the hinge dimensions; you don’t have to account for any offset between bearing and bit. (This offset issue can also arise if you use a router equipped with a guide bushing.)
I’ll begin with a hinge template designed to cut one mortise at a time. Later I’ll show you how to speed the process by making a jig to cut both mortises at once. First you’ll establish the ends of the template notch with a pair of deep cuts at the tablesaw. The spacing of the cuts will determine the fit of the final mortise, so take a minute to get it right. Start by tracing the hinge onto the plate. The depth of the notch will need to account for the thickness of the fence as well as the width of the hinge. Align the fence to the edge of the plate and set the hinge against the fence. With a sharp pencil, mark along each end of the hinge. Also make a mark to indicate how deep the notch should be. The type of hinge you use will determine this dimension. For a standard butt hinge, a rule of thumb is to cut a hinge mortise so that half of the barrel is inset into the door. For a ball-tip hinge, inset the hinge to the edge of the barrel to leave clearance for the ball tips at the ends.
To cut the notch, clamp a pair of stop blocks to a crosscut sled. Drive a pan-head screw into the end of one stop to allow for fine adjustments without the need to unclamp a block. Set the stops to cut a notch slightly narrower than you need. After cutting the ends of the notch, head to the bandsaw to remove most of the waste. To get to final depth, head back to the tablesaw. Place the plate between the stops and slide it back and forth, advancing the sled slowly as you do so. Once the notch is cut, set the hinge in place to check the fit. Ideally the hinge doesn’t quite fit at this point. To widen the notch, drive the screw stop in slightly and make another cut. It may take a couple of tries, but when the hinge just slips into the notch, you’re set. Now attach the fence to the plate. I use glue and 18-gauge brad nails to hold it in place.
Michael Pekovich is editor and creative director of Fine Woodworking, and author of Foundations of Woodworking (2021, The Taunton Press).
Photos: Rachel Barclay

To view the entire article, please click the View PDF button below.
 |
Perfect Hinges Every Time |
 |
Flawless Hinges in Fine Furniture |
 |
Rout Perfect Hinge Mortises |
Fine Woodworking Recommended Products

Festool DF 500 Q-Set Domino Joiner

Starrett 4" Double Square

Leigh D4R Pro


Comments
What could make a "fun" video or article would be to time how long it takes to prepare the hinge recess by router vs. a chisel (similar to the article many moons ago making a set of dovetails by hand vs. router).
One hinge, or the real life 2-8 hinges?
Real life number. Maybe we could have the reigning dovetail speed champion Christian Becksvoort do the mortises by hand (like the LieNielsen event d0ne for doevtails) and Mike do it via router. Maybe use it as a FWW livestream event.
They used to do that stuff back in the day. Livestream event and all. It was all... a little... circusy. There is a video of Garrett doing a hinge mortise. It's seven minutes long. Let's say he can do it in half the time without talking. My money is still on Mike and the jig. Make the jig once, and keep it on the wall. It's a one time investment.
You raise a good point. The more I think about the hinges I use, there really are only maybe three or four sizes overall. Wouldn't take long before you have all the jigs you would realistically need.
I have used templates like this for years and they work flawlessly. It is easy to make different templates for different hinges, too.
Excellent recommendation.
Log in or create an account to post a comment.
Sign up Log in