
Roland Mattison's method for trimming plywood edging flush is a perfect example of "better to bring the workpiece to the tool."
If you’ve ever tried to flush trim hardwood edging on plywood shelves using a handheld router, you know how dicey a proposition that can be. The router’s base needs to balance atop an edging that’s just a bit more than 3/4-in. wide. Ever try to balance an elephant on a teacup? Alright, that may be an extreme metaphor, but you get the idea.
Fine Woodworking reader Roland Mattison’s recent tip, published in FWW #226, solves this problem by taking the work to the router. His router table approach is faster, safer, and more precise.
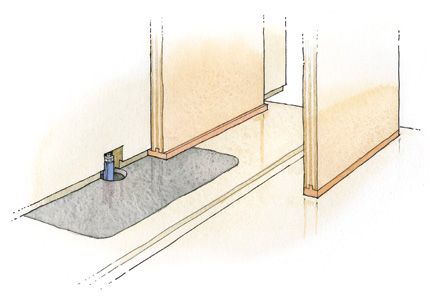
Along the bottom edge of an auxiliary fence, Mattison cuts a shallow rabbet that is slightly wider than the thickness of the edging he wants to trim. Then it’s simply a matter of notching out for a flush trim bit and mounting the auxiliary fence to the router table. Just be sure to align the face of the fence with the cutting edge of the flush trimming bit.
To make the cut, firmly hold the plywood panel vertically against the fence, so that the excess edging fits neatly into the rabbet. Turn on the router, push it on through, and voila!


Comments
If you add a stack of feather-boards in front of that set up it keeps the plywood from tipping away from the fence. Any tipping out results in a divot in your banding. I use 3 feather boards and 3 spacers , a spacer on the bottom allows the banding to clear.
I work at Palomar college in ca. as a teachers assistant and frequently aid students
in doing that exact procedure . It works very well.
This is one of those "duh, why didn't I think of that" moments!
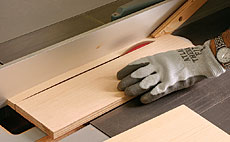
I have used this method but the drawback is that you often get chip-out, if the grain of the wood isn't straight. I have found that a similar setup, on the tablesaw, works better. Raise the blade just high enough to cut through the edging and you should get a cleaner and faster result than on a router.
If it tips away from the fence, it should move away from the bit, and a divot should not be possible, as the entire bit should be buried in the fence.
But I too have been doing this on a table saw for years.
Much, much faster and no danger of tearout.
wdwerker is correct. If the top of workpiece tips away from the fence while the bottom is held against the fence it will pivot at the top of the rabbet. Everything above the pivot will move away from the bit but the banding below the pivot will move into the bit causing a shallow but certainly visible divot. If the depth of the rabbet happened to be exactly the same as the overhang of the banding the effect would be mitigated but that is not how the fence is designed. This problem is peculiar to the design of the fence and has nothing to do with the cutter. A fence of similar design mounted on a tablesaw would produce a similar divot if the top of the work pivots away from the fence. Using featherboards to keep the work against the fence works equally well for both router and tablesaw.
I've used this method many times with a spiral bit to reduce chip out, but it does not eliminate chip out on gnarly wood. I like dchyatt's idea of trimming it on a tablesaw, and I'm going to give that a try.
I've found that chip-out is worse if the edge banding is considerably wider than the plywood, resulting in too much material being removed at one time. I do two thing to mitigate this. First, I sometimes remove excess material on the table saw before moving to the router table. Second, I make multiple passes on the router table, not shooting for flush on the first pass.
I've also found that bits with a 1/2" shank chatter much less than 1/4" bit, resulting in fewer issues all around.
The probability of tilt (and the resulting divots that can occur) can be reduced by creating a taller fence (or auxiliary fence) I created a tall fence (about 9-10") just for this task. The larger surface makes loss of control less likely.
Log in or create an account to post a comment.
Sign up Log in