I sometimes regret not capturing and documenting successful shop construction procedures, particularly those complex ones not used frequently. I easily forget how I worked it out before, and end up trying out various schemes, until I again discover a successful way that works for me.
This happened recently when trying to implement a small sideboard requiring a significant amount of inlay and stringing work. I had done similar inlay work years ago, but could not remember how I did it.
This time, after finishing the sideboard, I decided to document my resulting procedure for future reference, and to have as a training tool at school.
Naturally, I turned to SketchUp as a tool for capturing this procedure. After all, SketchUp already had the sideboard model and drawing details that would be useful in preparing the document.
I decided to use Layout (SketchUp Pro’s companion application) for this task. Layout offers more flexibility and capability in assembling a document, and also allows me to distribute to students in PDF format.
The following illustrations are snapshots of the Layout pages in the document. I realize that the text will be unreadable in this blog format, so I will summarize some of the steps that are described in the document. Note that I used hammer veneering methods with hot hide glue.
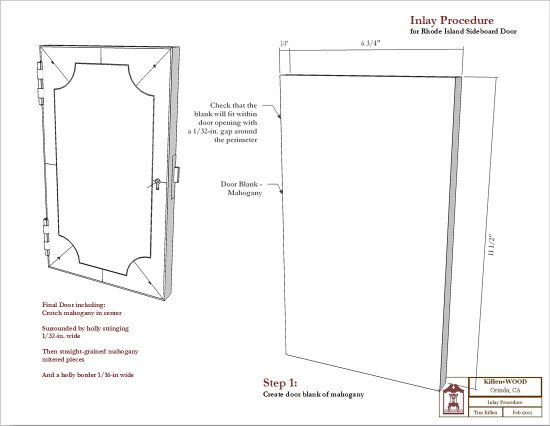
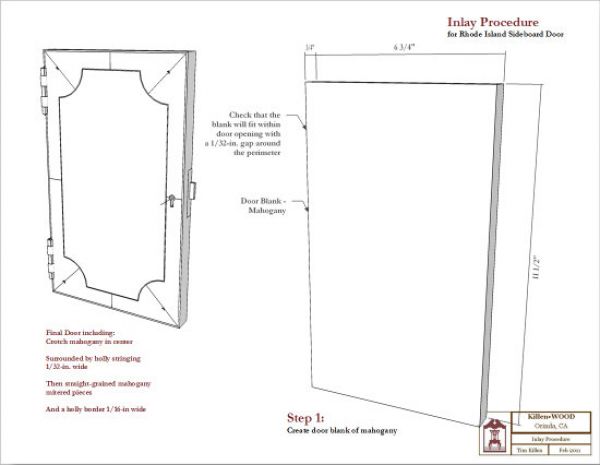
Page 1: This page shows the final assembled door with inlay. It also shows Step 1 identifying critical sizing information for making the door substrate (in this case, mahogany).
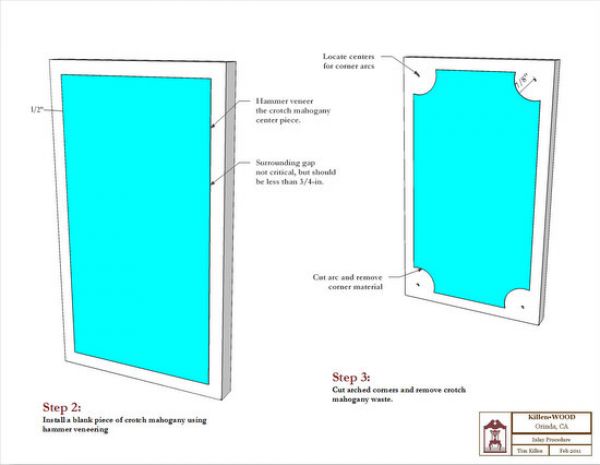
Page 2: Step 2 describes the placement of the crotch mahogany veneer center panel (shown in cyan). Step 3 cuts the corner arcs.
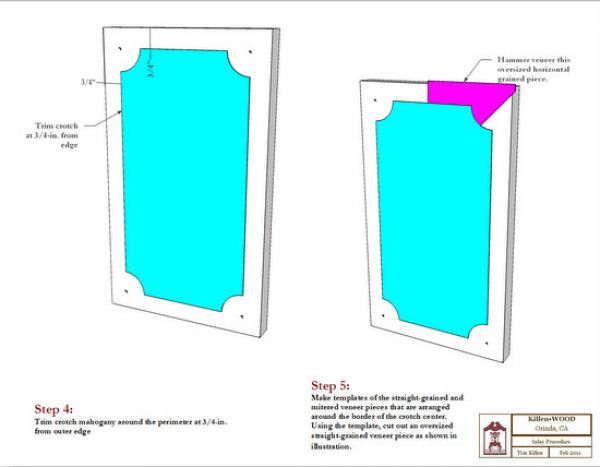
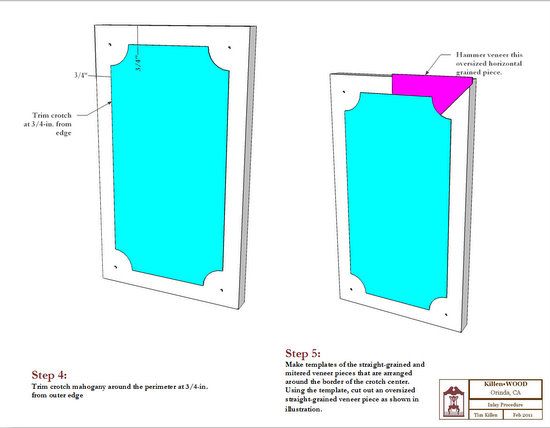
Page 3: Step 4 trims the crotch mahogany for the proper margin from the perimeter of the door. Step 5 places an oversized piece of straight-grained mahogany veneer (shown in magenta).
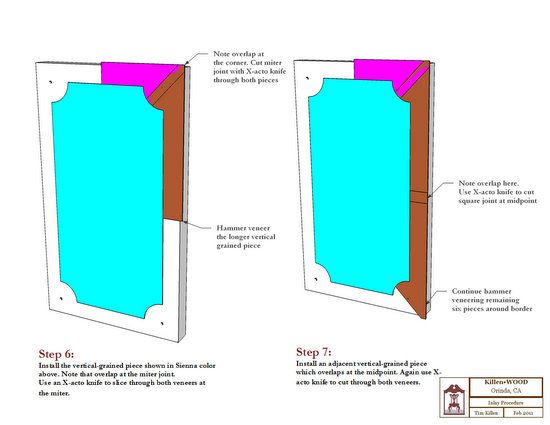
Page 4: Step 6 places an oversized vertical grained veneer piece (shown in brown) which overlaps the previous veneer piece at the miter joint. The miter is now cut through both pieces of veneer with an X-acto knife.

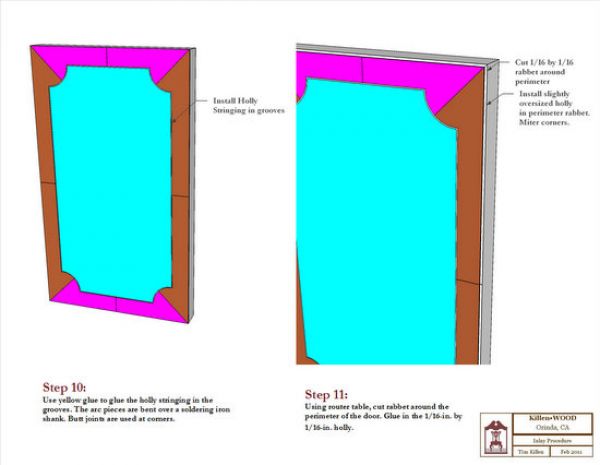
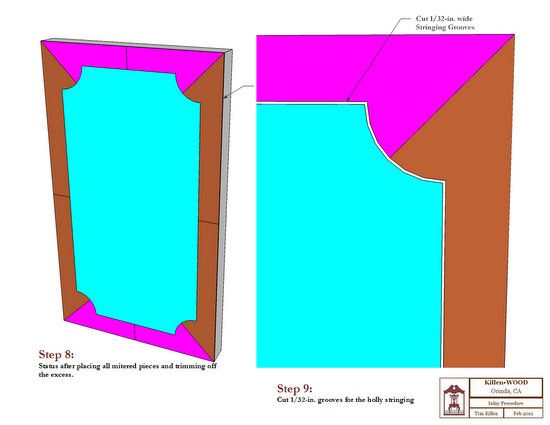
Page 5: Step 8 completes the gluing and cutting of border pieces of straight-grained veneer. In Step 9, I cut the grooves for the holly stringing.

Page 6: Step 10 describes the process for placing the holly inlay stringing. Step 11 describes placement of a holly border on the outside edges of the door.
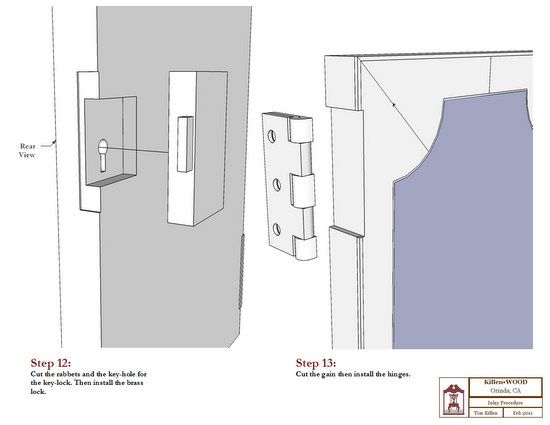
Page 7: Step 12 describes installation of the key-lock; Step 13, the hinges.


Comments
A good idea and a great use of Sketchup and Layout. In my one-man shop, I've been making much less sophisticated procedure sheets. Even those simple sheets have really accelerated production.
Now I will be looking at adding illustrations to make even better productivity improvements. Thanks!
Dear Tim
I commend your desire to record your skills for future reference. I am, sadly, an amateur at woodworking but my day job is a technical author and I spend my time training engineering apprentices to procedures I have already produced. There is always a need to change them but it is a great memory jogger. The simpler your sheets the better but a picture paints a thousand words as they say (and don't forget the photo's)!!!
Even if you never share your work there is always a feeling of well being when you go back over your your own work
Keep it up
Log in or create an account to post a comment.
Sign up Log in