
After hearing news recently of the discovery of world’s oldest musical instrument – a 35,000 year old flute made from a wing bone – I wondered how it would be to create a “modern” recorder. Using example recorders at home, and with the help of the Internet, I began a creation in SketchUp. Here’s the procedure I used to make only one part of the recorder – the Head. The remaining parts include the Center and Foot pieces.
Step 1:
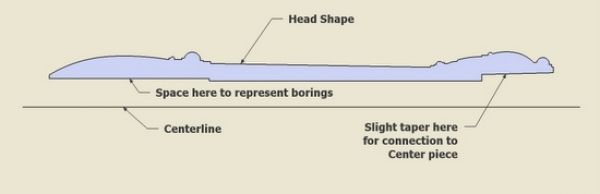
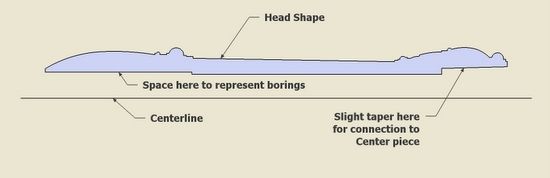
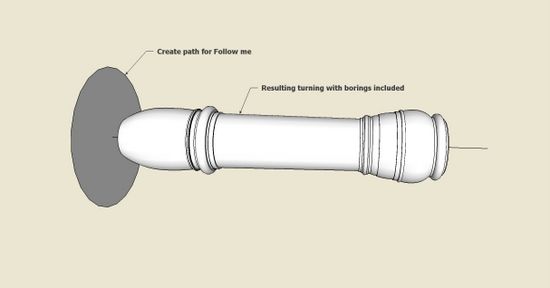
I first created the shape of the recorder Head. I included space for the borings and the taper end which connects to the mid portion of the recorder, the Center piece.
Step 2:
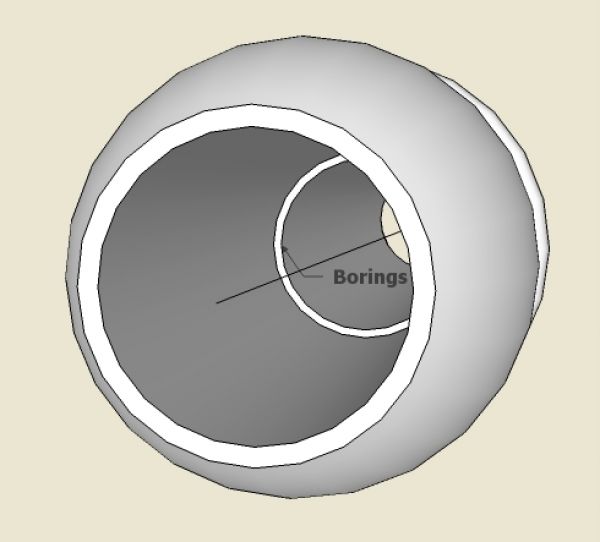
After placing the circular path, I executed the Follow Me command to complete the turning. The borings are included.

Here’s a look down the front end of the Head to show the borings.
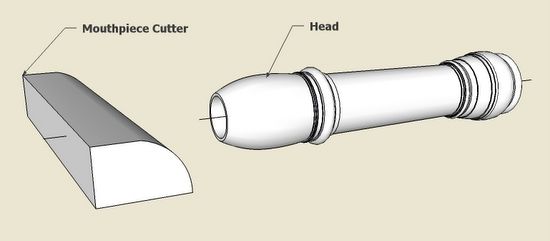
Step 3:
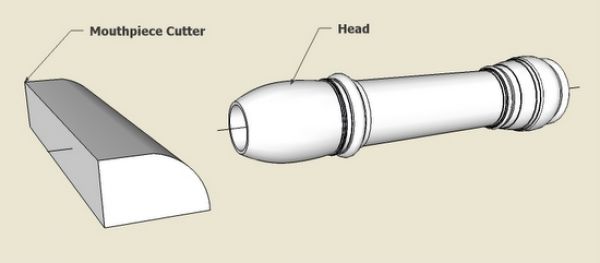
Next is the shaping of the lower section of the mouthpiece. I created a “cutter” with just the right shape.
Step 4:
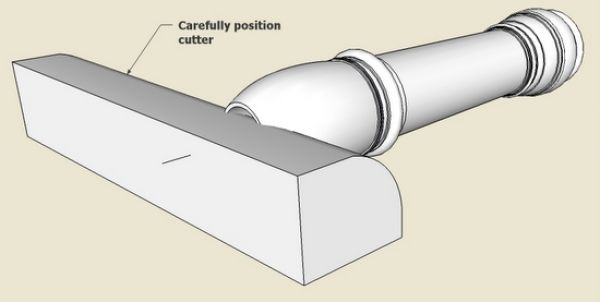
I positioned the cutter precisely in readiness for executing an Intersection.
Step 5:
After intersecting, clean-up the waste material with the Eraser Tool.

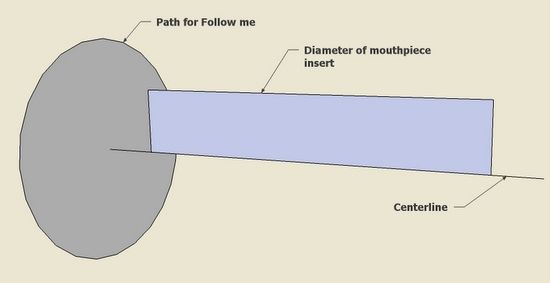
Step 6:
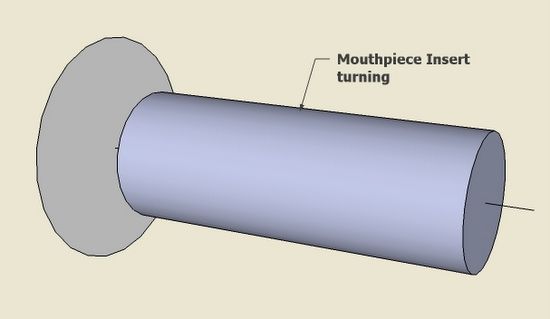
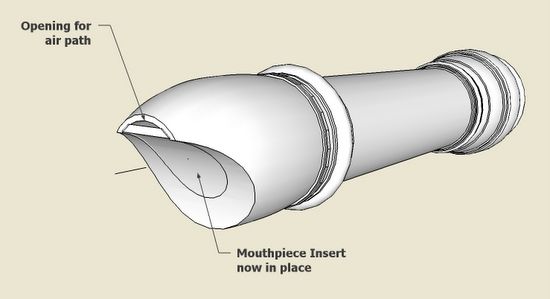
There is an insert into the front of the mouthpiece which provides a small air path into the Head.
The insert must have the same diameter as the boring, and also must be cut to the same profile as the mouthpiece.

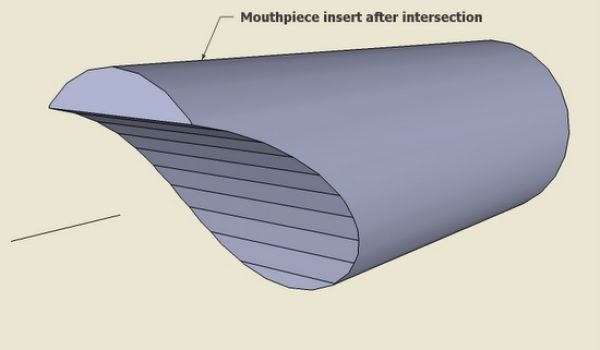
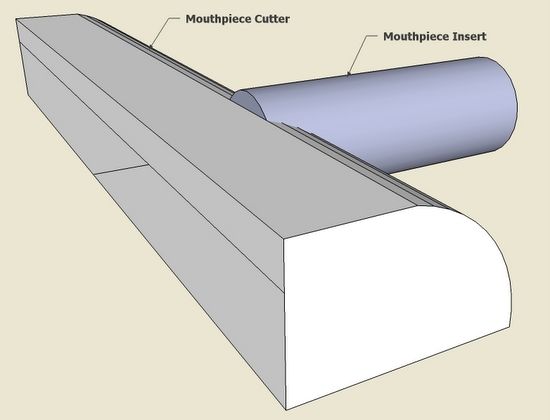
Step 7:
After executing Follow me, I place the mouthpiece cutter into position for an Intersection.

Step 8:
Clean-up the intersection with the Erasure Tool. Also, to remove unnecessary lines, use the Soften/Smooth Edges feature. This can be found in a pop-up menu after selecting the surfaces and edges and right clicking on the object.
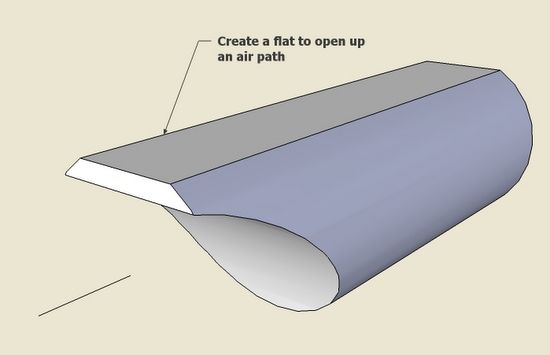
Step 9:
With the Push/Pull Tool, make a small flat on the top surface of the Mouthpiece Insert. This provides a small air path into the Head. Line up the mouthpiece insert (I use the centerlines as guides for this).
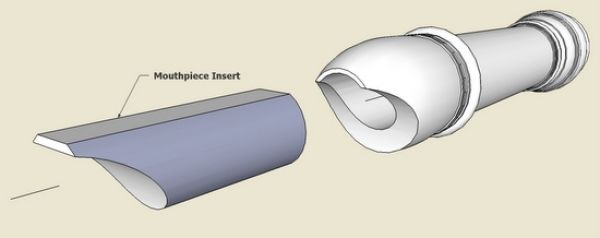
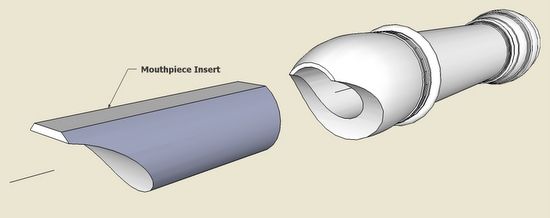
Here is the Head complete with the Mouthpiece Insert.

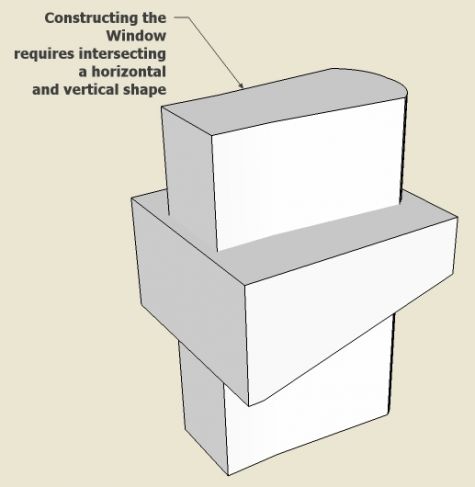
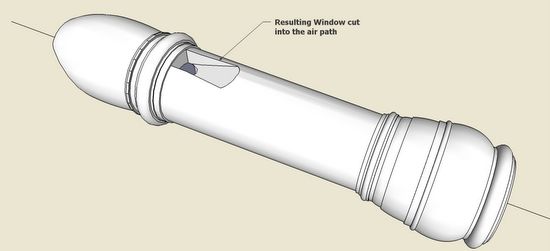
Step 10:
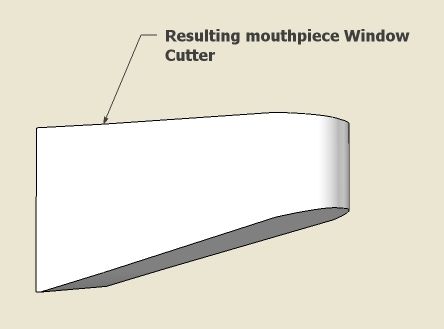
There is one more cut required – making the small slanted window opening in the top of the Head. I make a tool for cutting this window opening by determining and combining the horizontal and vertical shapes.
Step 11:
After cleaning-up the waste after Intersecting, here is the resulting Window Cutter.

Step 12:
Place the Window Cutter precisely and execute an Intersection. Before doing this, I find it useful to explode both the Head and Cutter components.

This was quite a project and only represents one-third of the total instrument. I can imagine how difficult this would be in the shop – someday.
More from FineWoodworking.com:
- Check out the complete Design. Click. Build. Blog
- A New SketchUp Forum
- Layers in SketchUp: The Basics


Comments
I would like to say how much I enjoy this forum . Apart from marveling at the time you people contribute for the benefit of others , I find the images in the postings to the site very clear , the recorder head above being a good example . There is a very clear visual relationship between the drawing process and the actual objects being drawn , which I find very appealing .
I am not a woodworker , but an architect learning SketchUp . I know that specialist contractors like to have 3d views on working drawings as it ads to their understanding of the usual , plans ,sections & elevations, particularly if there are complex pieces of construction . This site has inspired me to carry on with learning SketchUp and get to the position where I can include 3D views on my construction drawings .
Thanks
Jonas Mac
Great post Tim. Brings back fond elementary school memories... Ever made one of these out of wood?
Anyone else made one? We don't have anything like it in the musical instrument section of our gallery:
http://finewoodworking.taunton.com/gallery/tag/musical-instrument
Log in or create an account to post a comment.
Sign up Log in