I’m currently building a wainscot wall in my house that I plan on staining. I’ve heard it is a good idea to back seal/ end seal all the wood before installing it on the wall. (The wainscott is a craftsman style with a white oak plywood substructure and solid quarter sawn white oak detailing.) Since I will be using both plywood and solid wood I was planning on finishing it using the method described in Jeff Jewitt’s book. Essentially applying dye stain, sealing it and applying a glazing stain.
Now to my question. What should I use to back seal/end seal my wood. Furthermore will the backsealing/ end sealing affect the finish I intend to put on the front of my boards. Is it critical I don’t get any of the sealer on the front surface of my boards and if so how do I accomplish that.
Oh one final detail. I’m planning on finishing the wood once it is applied to the wall.
Thanks for any help anyone can give me.
Fine Woodworking Recommended Products
Festool Model KS 120 REB Miter Saw
Sliding compound miter saws have become a woodshop staple. Their ability to squarely crosscut wide boards and to cut difficult miter and bevel angles is huge. Festool’s Kapex KS 120 REB fulfills these duties with aplomb. The design keeps the saw close to the wall, allowing for a small footprint. The cut is rigid and precise provided you use good technique. It accepts 20mm blades, about 10 1⁄4 in. Its maximum width of cut is 12 in..
French Curves
An essential for drawing and designing with curves.
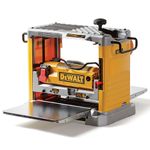
DeWalt 734 Planer
One of only two machines with a cutterhead perfectly parallel to its beds, the DeWalt 734 is a very good planer. Knife changes overall were straightforward, but access is difficult because you must remove a Phillips-head screw from under the dust shroud—not an easy task. The dust port on the back of the machine has a 2-1/2-in.-dia. opening but can be hooked up to a 4-in.-dia. hose. Connected to a dust collector, it did an excellent job gathering chips. And because the port exits to the left of the machine, the hose is never in the way of exiting boards. The top of the machine is flat, making it a good place to stack boards between passes.
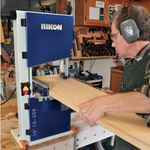
Rikon 10-3061 10-in. Deluxe Bandsaw
The 1⁄2-hp motor has all the power needed to resaw at its maximum capacity of 5 in.
The saw has two speeds: 3,280 sfpm (surface feet per minute) for wood and 1,515 sfpm for soft metals and some plastics.
Bosch ROS10 5-in. Random Orbit Sander
- Good stock removal and dust collection without a vacuum - Average for both with a vacuum - Handling was very good, but a little less so with a vacuum attached - Easy to grip around the waist


Replies
It IS a good idea to treat all of the surfaces of your wood to ensure is absorbs moisture more-or-less evenly. It's hard to go wrong with shellac as a sealer coat: it's easy to apply, dries quickly, and is compatible with almost all other finishes.
However, you didn't mention enough of the specifics of your proposed finishing schedule for us to provide a response specific to your situation. For example, are you planning on using waterbased or oilbased stain? What are you planning to use as your final finish (shellac, lacquer, varnish, polyurethane...)? Do you plan on spraying, brushing, wiping?
You might want to reconsider staining and finishing in place - unless you plan to spray. I find it easier (on the knees, back, etc) to finish several small pieces lying at a convenient height on a work table (it's also much easier to control ambient lighting and ventilation).
Good luck with your project,
-Jazzdogg-
Whether you think you can, or you think you can't, you're right.
Thanks Jazzdogg for your input. I'll tell you what I am planning to do but keep in mind I am a novice wood finisher so feel free to correct me if my ideas sound crazy.
First I'm planning on applying a water soluble dye stain, followed by a seal coat of wipe on oil based polyurethane. Next I plan on applying a pigmented glaze to even out any differences between the plywood veneer and the solid wood. Finally I plan on finishing up with a couple of coats of wipe on polyurethane. If this makes no sense please feel free to tell me!!
So the question is can I seal the back of my solid wood, apply it to the wall and then undertake my finishing sequence as detailed above or will the backsealing migrate to the sides of my wood and inhibit my finishing process. Furthermore what should I back seal my wood with.
Sealing the whole piece is a good idea. I've heard it called encapsulating. Ambient moisture is no respecter of up, down, inside, outside. So it can get into a piece from any surface.
It is also a good idea to finish the panels before the are installed in the frame. That way when they shrink they won't have that nasty looking unfinished stripe around the panel where it slides under the frame
You bring up a good point. I've never seen any of the carpenters do that but for a high end house it makes sense. Certainly more work and the cost would go up but with no call backs it would be worth it. It wouuld be interesting to put this post on Fine Home Building as it sounds more pertinent to that forum. I've seen wainscotting articles in FHB and not in FWW. You might also post on http://www.homesteadfinishing.com as that's all they do.
Edited 3/7/2004 6:17:18 PM ET by rick3ddd
Thanks Rick for your input. The reason I am planning on going to all the trouble of backsealing all my wood is I have a very demanding customer.....my wife. Actually I am probably more demanding than she is so I want to get it right. The reason I asked this question here and not at "Breaktime" is it really is a question about wood finishing. I figured a woodworker would have a better idea about this than a finish carpenter. No offense to any finish carpenters who might be reading.
From your name, I assume you live in Pittsburgh. Nice place. I lived in the North Hills for a few years when I got out of college.
I am planning on a similar project, so I am watching your thread carefully. The design I am considering is ply panels, solid 4/4 quatersawn stock for stiles / rails (biscuited together), and picture molding to frame around the panels inside of the stiles / rails.
My plan is to:1) build and finish the picture frames prior to installing them inside the stiles and rails. Finish the ply panels prior to install. This includes gel stain and sprayed on pre-cat lacquer.
I will finish the stiles / rails after installation (but before inserting the picture frame molding. My reasoning is that the stiles / rails will need to take nails and filler on the face frame side. Although I've done this with pre-finished chair rails, I have been able to get less noticeable nailhead marks that way.
This forum post is now archived. Commenting has been disabled