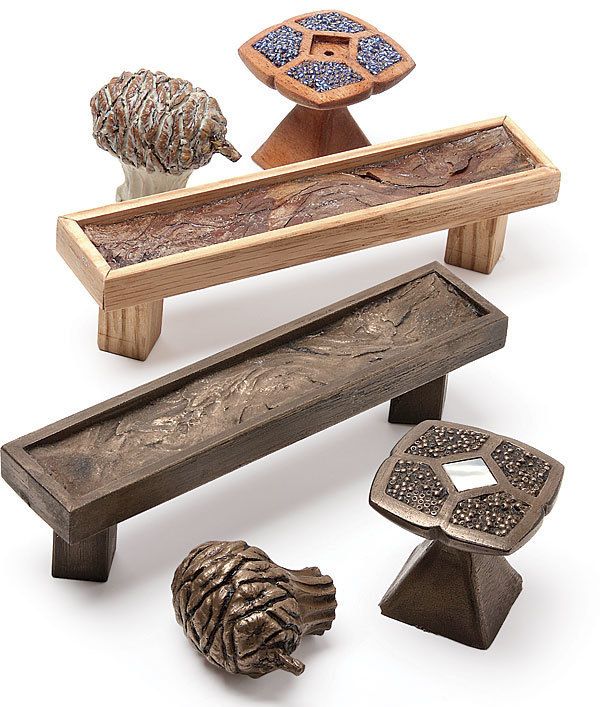
Synopsis: Scott Grove uses metal-resin casting to create cabinet pulls, finials, inlay, and small boxes. It’s a technique that gives him an endless source of unique pulls, because you can use items such as pinecones, sculpted wood, and other shapes to form the shape of your pulls. Here, he explains what you need, how to make a master and use it to make a mold, how to cast your pull, and how to add finishing touches using metal powders.
When I got tired of the stock items available in stores and catalogs, I discovered cold metal-resin casting. Today, I use it to create distinctive cabinet pulls, finials, inlay, and even small boxes.
Casting is as easy as baking a cake, and the beauty of this technique is that you can make a master pattern from almost anything, from a hand-sculpted piece of wood to a found object like a pinecone. With the addition of clay, the possibilities are truly endless. And you can do it all for less than $5 apiece.
The casting material is a mix of metal powder and resin that has the feel and durability of real metal, with the look of bronze, steel, copper, etc.
I’ll cover the basic concepts as I cast a pinecone pull. But this is just a small sample of what you can do. Once you have the process down, let your imagination run wild.
What you can cast, and what you can’t
The master is the original object or model that a mold is taken from. This is what your casting will look like—exactly—including pores, wrinkles, and even wood grain.
The master doesn’t have to be a durable object; it only has to be strong enough for a mold to be taken. So you can use hot-melt glue, clay, or whatever works to create a temporary assemblage. Everyday oil-based clays contain sulfur, which inhibits the curing process of some mold compounds. So I use sulfur-free clay, available from art-supply stores and casting suppliers. And I use vinyl gloves, as latex also can inhibit curing.
Thin areas and minimal contact points are a potential area of failure. For example, if you place a marble on a flat surface with the goal of combining the two, there will be a very small point of contact between them, and the little sphere will break off. But it is easy to use clay to beef up the weak point.
As you plan, you must also think about how the object will be mounted. The easiest approach is to incorporate areas or elements that will be drilled and tapped for screws and bolts. For this, you need enough meat at the attachment point, for example, at least 3⁄8 in. of material to support a No. 8-32 bolt.
For the full article, download the PDF below:
Fine Woodworking Recommended Products

Sketchup Class

Stanley Powerlock 16-ft. tape measure

Dividers


Log in or create an account to post a comment.
Sign up Log in