

Exploded views are a common way to show details in a drawing of a project. They are an excellent way to show how the parts relate to each other. One of the many advantages of creating a SketchUp model of a project is that you can easily create an exploded view to show whatever details you need to show.
Before you can make an exploded view, you’ll want to make sure of a couple of things. First, that every part in your model is drawn as a component. Second, you’ll want to make layer associations for the components so you can control the visibility of the various component.
There are a couple of plugins available that can help you make exploded views. One of them is called ExplodeImplode from Smustard.com and the other is called Eclate-Deplace, a French-made plugin. I have both of them but this is something I prefer to do manually. It isn’t difficult and I want finer control over where the components end up. Note: There is an “Explode” command in the Context menu. This does not create an exploded view. It destroys groups and components.

Here is the process I use. I draw the entire model with all of the required details. then I make the layers I want and make the layer associations with the components. This gives me the ability to easily control which components are visible.

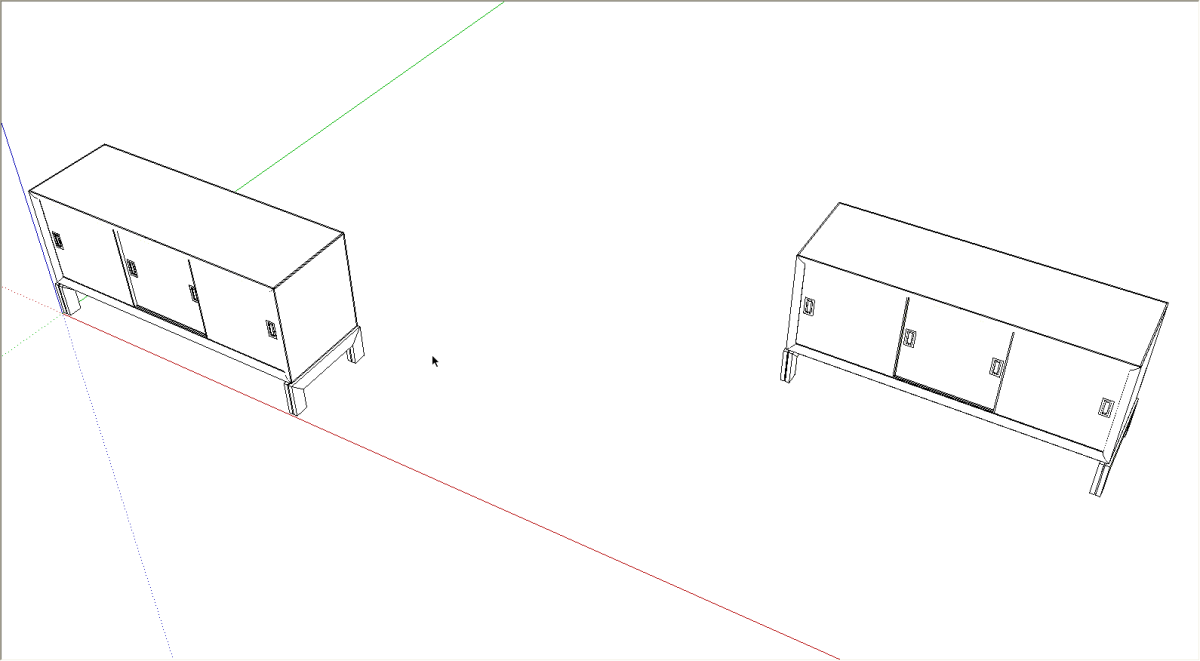
Next I make a copy of the entire model and move it to one side and behind the original. The copy is the one I’ll use to make the exploded view. It is placed as it is so that I can make both 2D front and right end views of the original model without having anything in the way.

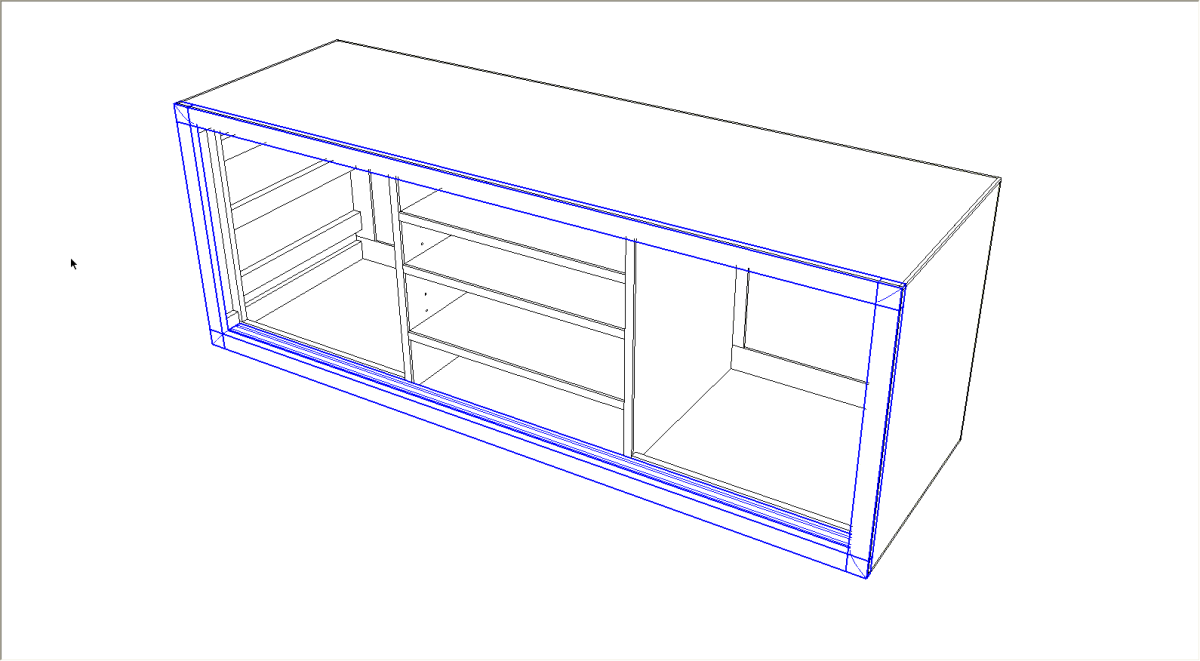
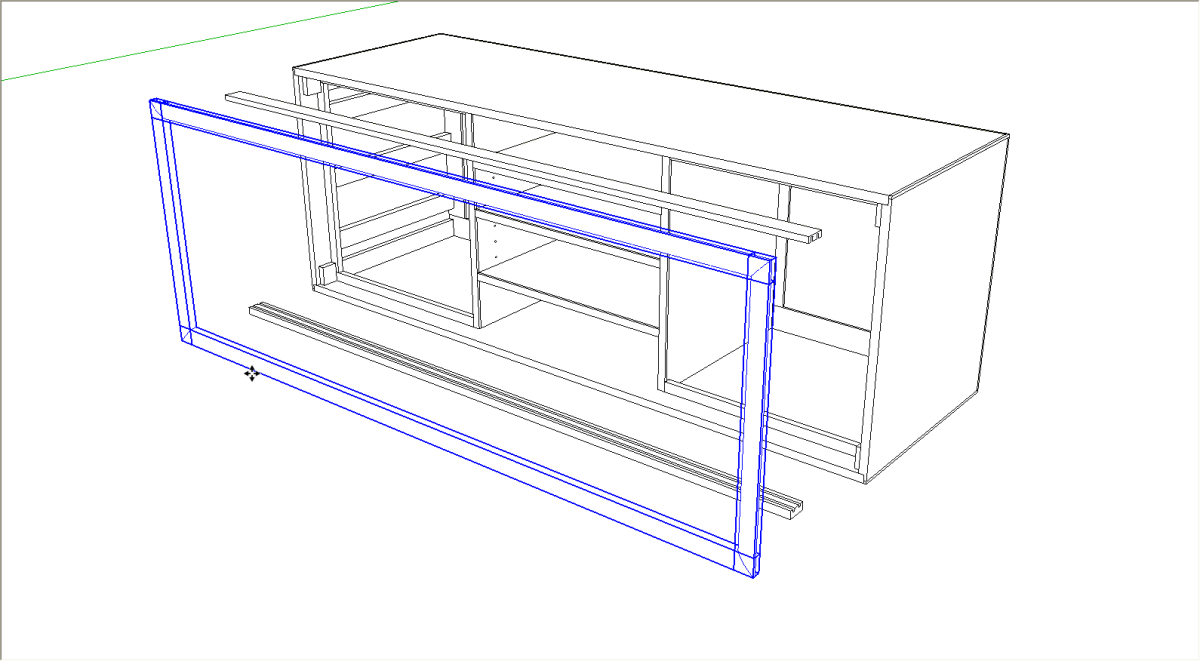
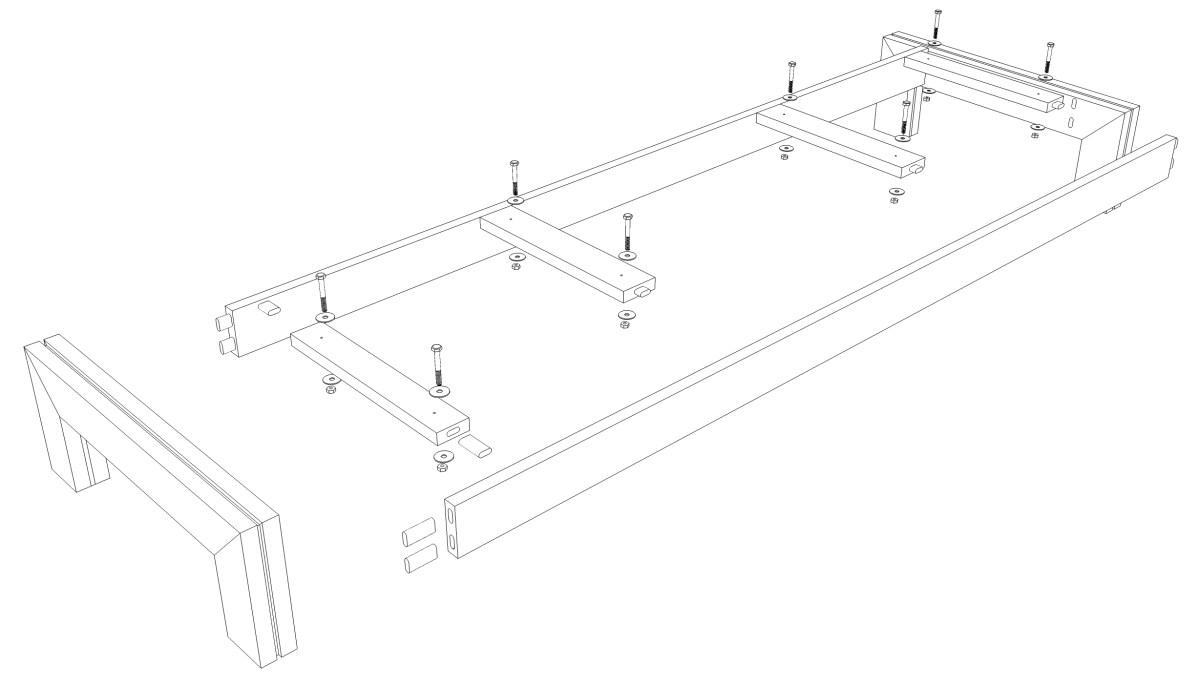
I’ll turn off layers for things I don’t want to show in the exploded view. In this example I’ve turned off the base, the drawers and the doors. Those will be shown in separate views. Then I start making the exploded view by slecting some components and moving them. In the illustration, above, I have selected the face frame and the door runners.

I move the selected components out a bit from the rest of the model. Then I switch to the Select tool (the Space Bar is the default keyboard shortcut for Select) andhold Shift while clicking on the door runners to remove them from the selection set. Then I move the remaining selection out further.

I repeat the process of selecting portions of the model and moving them. Then I “drop” some of the components and continue move the rest. When I am mostly satisfied with the exploding I make a scene making sure to save the camera view. Then I may find I need to tweak the positions of some of the components so they can be seen clearly.
Only explode enough to show the details. Leave some parts assembled because that will help to show how the model goes together.

I then turn off the layers for the sub-assembly and turn on those for another sub-assembly and repeat the process of exploding the model. After making another scene, I move on to another sub-assembly.

I use LayOut to do the dimensioning but if you choose to add dimensions in SketchUp, you can add them in the exploded views. You’ll probably want to create layers for the dimensions so you can show only those dimensions you need.
Near the beginning of this post I mentioned that all of the parts should be components. Here’s the reason for that. If you find, after you’ve made your exploded views that you need to edit the model to add details or change sizes, you only need to edit them in one place and the changes will carry all the way though. If you use groups, you’ll need to go through the file and find all the copies and edit them, too.
Some folks like to make their exploded view in a file separate from the assembled model. I find this just makes more work when the model inevitably needs editing because the changes won’t carry over from one SketchUp file to the other. By creating all the views including the exploded ones in the same file, I don’t need to go chasing down different files to make sure they all get corrected.


Comments
Hello Dave;
Your comments or suggestions would be appreciated...
I have created a SU model that I want to 'explode' per your column above.
This particular model (like others I have completed) is comprised of a hierarchy of components within components. In this case, it includes a 'unisaw assembly' made up of 'unisaw' + 'cabinet' + 'extension table' and each of those components is also made up of components (door, side, etc).
My problem is that, when I 'explode' a copy of the assembly and of its constituent parts in the way that you outline above, other instances of those assemblies and other instances of those component parts throughout my model also explode.
Must I make the to-be-exploded copy of the assembly and of all of its lower components and sub-components unique in order to prevent this? If I do, then I will loose the benefit of updating components in the same way that if I create an entirely new model as you mention above.
Am I missing something? Maybe some tactical use of groups is the answer?
Please and thank you...
To JAJH.....
This is Tim....
When you explode a component, the definition of that component still exists, and any copies are unchanged. so you must be doing something other than "exploding".
Just to be sure, are you right clicking on a component and selecting "Explode" from the pop up list? When you do this, you are not changing the component definition. The only way to affect the component definition is to "Edit the component", then all the other copies are changed accordingly.
The fact that you have nested components does not affect the above rules on changing components.
I'm sure Dave will also comment when he can.
Tim
Hello Tim & Dave;
Sorry to confuse. I am not 'exploding' my components and sub-components in the SU sense (hence the quotation marks!), rather, I am 'spreading them out' to create an exploded view per Dave's suggestions above. The dual use of the term explode is noted by Dave in his post.
By the way, Happy Thanksgiving from one Canadian reader who, along with the many others of us, celebrated our bounty last month. And thank you for taking the time to respond on your holiday weekend.
To JAJH:
You put your finger on the problem. Make sure to use the "Explode" feature in the SketchUp sense.
Make a copy of your overall assembly component. Move it to the side, then "Explode" from the pop-up menu. Now you can pull the parts away from the assembly without messing with your component definition of the assembly.
Tim
JAJH,
What is the definition of "Explode?" :)
Sorry for the late response. I was away eating turkey and cranberries (and a lot of both).
SO I think Tim has it covered but let me reword it a bit.
If you gave nested components, you will indeed affect all instances (copies) of them when you open one and drag the components away from each other. It's the same thing as editing any component in that what you do to one instance gets done to all instance. One solution, as you have suggested is to make the nested component unique so that you can drag it's component parts away from each other without doing the same to the rest. Of course the components inside can remain related to the other similar components so if you edit one, that carries through.
An option that Tim mentioned is to explode the upper level component leaving just the component parts as components. That basically dissolves the upper level component.
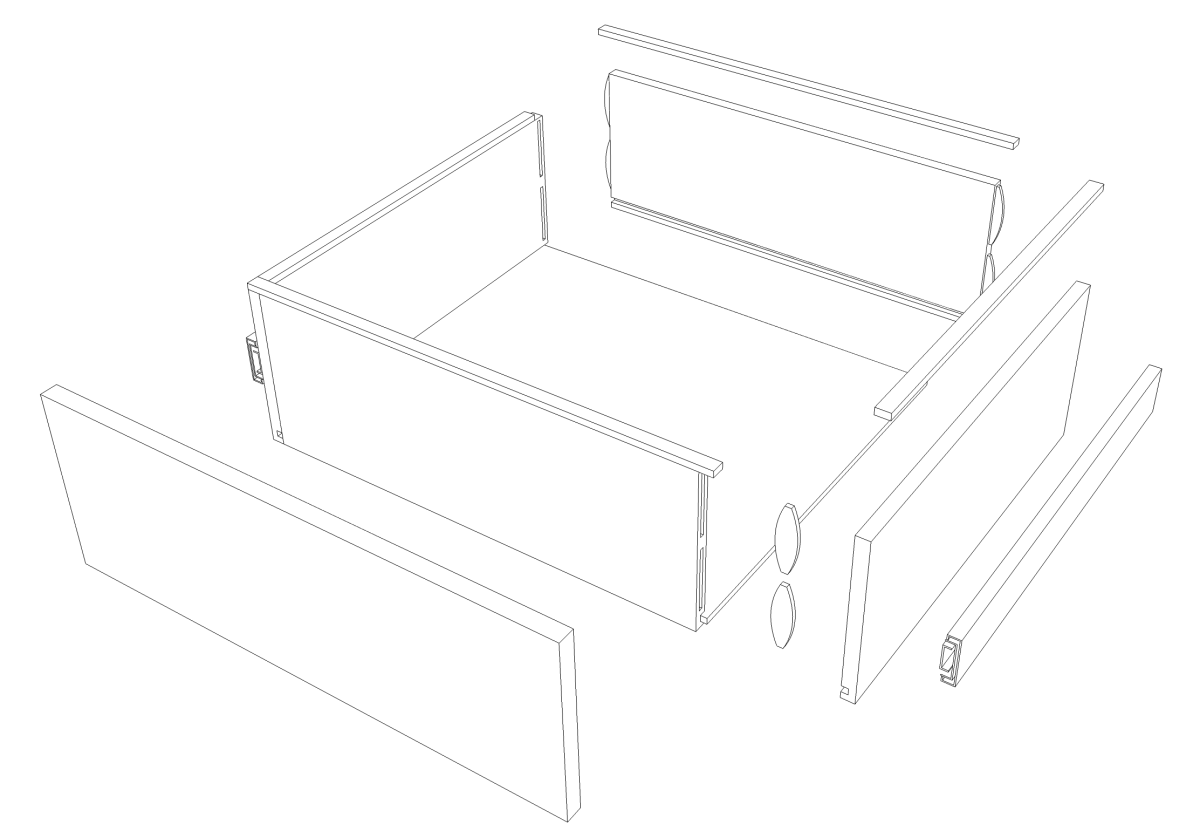
Nesting components together can be useful for some assemblies such as doors and drawers. It makes it much easier to select an entire drawer, for example, and pull it out. But once you have a copy of the drawer moved off to one side to make the exploded view, there's probably not a great deal of value in leaving that drawer component intact. You could just explode that drawer component before you pull it apart. Just be sure to leave the individual parts as components so if you have to make an adjustment to something, it still carries through the model.
You could make groups as you asked but I don't see that being of much value either.
-Dave
To me, this makes more sense.
[url=http://rosesfamilyrest.com/images/live.php?p=142]Sac Longchamp Pliage Taille M Noir[/url]
[url=http://rosesfamilyrest.com/images/live.php?p=261]Longchamp Sac 1948[/url]
[url=http://rosesfamilyrest.com/images/live.php?p=77]Compagnon Longchamp[/url]
Dave,
I realize this comment is about 9 years late but here goes. I went back and found this article which was very helpful in my understanding of making exploded views with nested components. Thanks so much.
I am wondering about the construction of the credenza shown. The sides appear to join the top and bottom with a rabbet. What are the items with the holes, shown with question marks in the attached screenshot ?
Hi there.
Those a "glue blocks" which are added to the inside faces of the side panels. The holes are halves of mortise cut for Dominos which are used to joint the sides, top, and bottom together.
Thanks for solving the mystery for me Dave. I've never seen that construction before. I have seen the dominos mortised into the ends of the top/bottom and into the face of the sides before. As shown, with the rabbet in the sides pieces, that would be difficult.
You're quite welcome.
You're right, in this piece there wouldn't be enough "meat" for the dominoes and the rabbet for the trim piece.
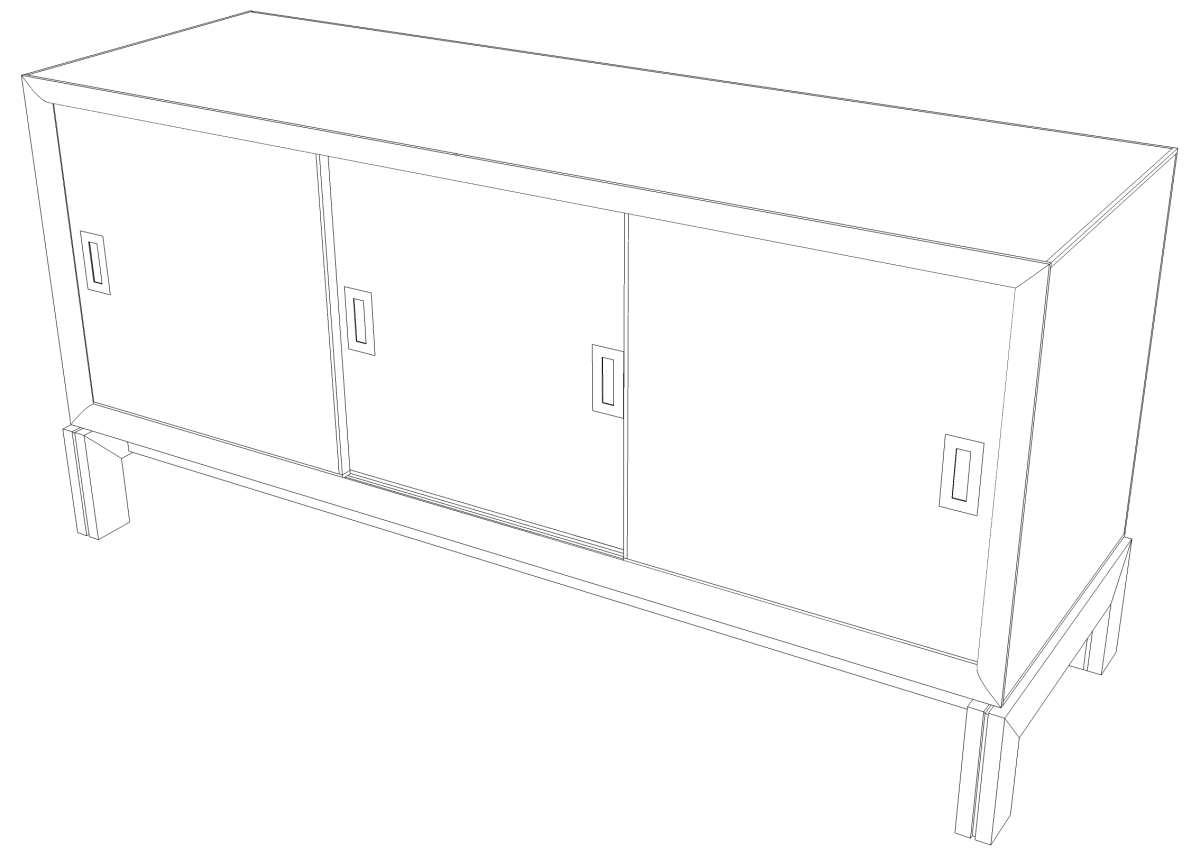
This is a a entertainment center by Anatole Burkin. See: https://www.finewoodworking.com/videoworkshop/2012/08/build-an-entertainment-center
Log in or create an account to post a comment.
Sign up Log in