Develop a Game Plan
Make a step-by-step plan for each project to maximize efficiency and minimize mistakes
Synopsis: Go beyond the cutlist and drawings to get truly prepared for your next project. Author Stewart Crick suggests laying out a complete game plan before you begin that includes all the steps you’ll follow to mill, shape, assemble, and finish your project. Some tips include finding ways to combine milling tasks, fashioning parts in the correct sequence, deciding on the assembly order before you begin, planning for the finish, and gluing up in stages.
Many woodworkers use drawings and cutlists for each project to help them avoid waste and errors and to keep their work organized. I like to go one step further and develop a complete game plan. This plan is basically a series of steps I follow to mill, shape, assemble, and finish the individual parts and components of a project. It’s a disciplined and careful way of thinking in advance about the best way to build a project, using the tools in my shop.
I think about these questions in a specific order, starting with the largest task and working down to the smaller details. If a piece is complex enough, I’ll write down the plan on paper. For simpler projects, I keep the sequence in my head. In the process, I almost always find ways to save time by combining steps. I also spare myself some aggravation by making sure that I don’t work myself into any corners. As a result, my shop sessions are much more efficient and enjoyable. Here are some tips:
1. Find ways to combine milling tasks
When milling, try to avoid the confusion and wasted time that come from repeated machine setups.
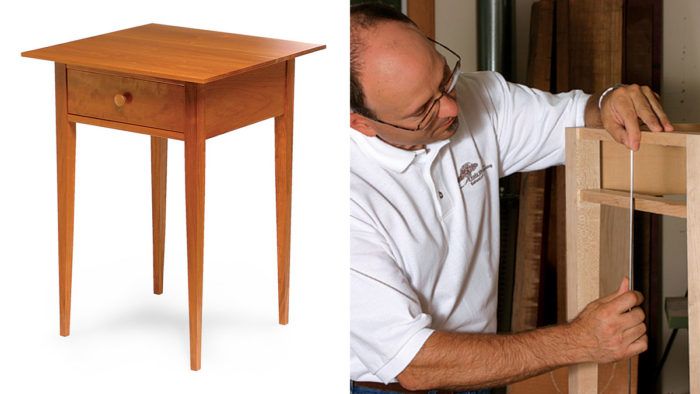
A small end table that I built recently, for example, requires 3⁄4-in.-thick stock in each of three major subassemblies. It makes sense to mill all of that stock in one operation—the milling will be more consistent and you will spend less time breaking down and setting up machines.
But don’t let the quest for efficiency lead you into other problems. If your stock is not fully acclimated to the shop, or if you know you’ll be out of the shop for a couple of weeks between building assemblies, plan to mill up only enough stock to build one assembly at a time.
2. Find the right sequence for fashioning parts
Think about all the steps needed to produce each individual piece, and decide on the best tools and most streamlined sequence for carrying out those steps.
A set of tapered table legs, for example, will require both tapering and mortising. In many cases, you’ll want to cut the mortises before tapering the legs because it is difficult to hold a tapered leg secure and level in a router jig, on a drill-press table, or on a workbench. on curved parts, too, it’s often easier to cut the joinery before the curves.
Some tasks that take place late in a project can be simplified if you take preparatory steps early on.
From Fine Woodworking #187
For the full article, download the PDF below:
Fine Woodworking Recommended Products

Stanley Powerlock 16-ft. tape measure

Blackwing Pencils

Drafting Tools


Log in or create an account to post a comment.
Sign up Log in