How To Build Frame-and-Panel Doors
Five steps to building a door that will last for generations
Synopsis: Detailed directions in this article guide furniture makers through the sometimes tricky process of building frame-and-panel doors. The author shows how to set up stock for fast and accurate cuts and describes the time-saving methods he uses. The article goes through the whole process, from cutting tenons to routing the panel grooves to milling the panels and dry-fitting and gluing up. Artistic elements are noted to ensure an eye-catching result.
Lonnie Bird is an author and woodworking instructor. Visit him online at www.lonniebird.com.
From Fine Woodworking #168
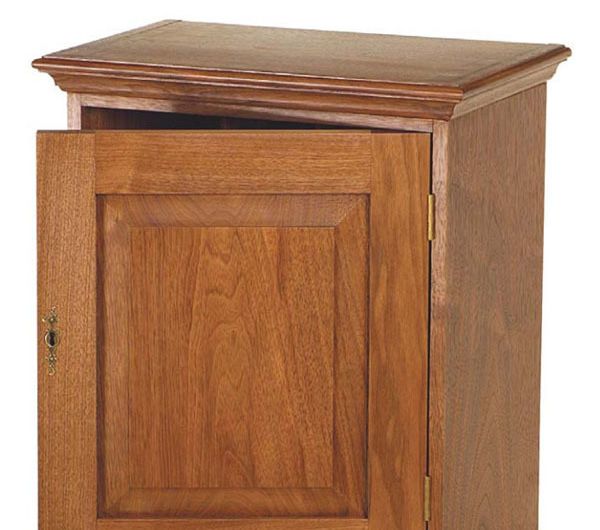
There’s probably no design element with broader appeal than the frame-and-panel. It’s a traditional favorite for doors, such as on this heirloom spice box (above), and for wall paneling and case work. And for good reason—the frame-and-panel covers a broad expanse with only a negligible amount of seasonal wood movement. As the panel expands and contracts, it floats within the confines of the rail-and-stile frame, which helps keep the panel flat.
Frame-and-panel doors are relatively easy to construct, but it can be tricky to get the proportions right. A door with the wrong proportions can ruin a piece of furniture. The door must be proportionate to the entire piece; the frame-and-panel parts must be proportionate to each other; and the stiles and rails must be proportionate to the door as well as to each other. Sometimes, though, I make the bottom rail slightly wider to give it more visual weight. To determine the correct proportions quickly, I begin with a drawing that relies on the golden rectangle, in which the ratio of length to width is 1 to 1.618.
But I make the final judgment with my eyes. Although flat panels work well, I prefer a raised-panel door, which has beveled edges and a raised appearance in the center. This design catches light and creates an interesting shadowline.
I start with the rails and stiles. Straight-grain stock provides strength and resists warping. The rails are dimensioned to size; the stiles are milled to the correct thickness and width but are left long for cleaner assembly. Leaving ears (extra length) on the stiles makes it easier to dry-fit the piece because you can use a mallet to put it together and tap it apart without denting the finished frame. After glue-up, the ears can be trimmed off on the tablesaw.
At this stage, mark all of the faces of the parts and the height of the door, then work your way inward to locate the mortises. Next, use a marking gauge to mark the mortise widths and then mark the tenon shoulders on the rails. A mortise-and-tenon joint will hold when dry-assembled. Once glued up and secured with a wood pin, the joint will last for years. When cutting mortise-and-tenons, I find it easier to cut the mortise first, then fit the tenon to its mate. Simply drill a row of holes and square the sides with a chisel. It’s most important that the walls of your mortise be square to the adjacent sides and parallel to the opposing walls.
For the full article, download the PDF below.
Fine Woodworking Recommended Products

Jorgensen 6 inch Bar Clamp Set, 4 Pack

Bessey EKH Trigger Clamps


Log in or create an account to post a comment.
Sign up Log in