Adjustable Lathe Jaws
These easily made jaws attach to standard four-jaw chucks
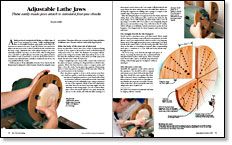
Synopsis: A finely produced turning should display no telltale signs of how it was mounted on a lathe, writes Jim Leslie. He decided to build his own adjustable jaws and they took just about three hours. He made the body of the jaws out of plywood and used straight dowels for the bumpers, which he then encased in shrink-wrap electrical tubing to help grip the workpiece. Screws hold the jaws to a lathe’s chuck. A drawing illustrates the piece.
Afinely produced turning should display no telltale signs of how it was mounted on a lathe. Unlike marking-gauge lines on dovetailed furniture, grip marks on the base of a bowl are not meant to be seen. To get rid of them, you need to be able to mount your work so that it is held by its rim, and then turn the base. Large, adjustable jaws with rubber bumpers are commercially available, but they cost about $100. After looking them over, I decided I could build my own with scrap plywood and a few dollars worth of materials. It took me about three hours to construct my adjustable jaws, and after countless hours of use, I’m very satisfied with the results.
I built my jaws to fit an adjustable, four-jaw Nova chuck, but the fixture may be adapted to other four-jaw chucks by using the same procedures. These jaws allow me to mount bowls, rings and plates of different sizes. The jaws will also hold oddly shaped pieces.
Make the body of the jaws out of plywood
Every woodworker I know has a few scraps of plywood lying around. A 12-in. square is about all you need. It should be free of voids and at least 1⁄2 in. thick. The diameter of your jaws will depend on the swing of your lathe. Make them about 11⁄2 in. to 2 in. less than the maximum swing so that when you fully open your chuck, the jaws don’t strike the lathe bed.
Using a straightedge and a sharp knife, connect the corners of the plywood square, marking two diagonal lines to divide it into quarters. Where the lines intersect, place a compass point, and draw a 12-in.-dia. circle. Cut the piece into quarters. (If necessary, plane or resaw any pieces to get them all the same size.) Then cut the curved sections on the bandsaw.
Place the pieces together to form a circle, and use your fourjaw chuck as a guide to mark the mounting holes. It’s important that each quadrant attaches to your chuck with at least two fasteners. Drill and countersink each hole. Next mark the locations for the adjustable stops. Using a protractor on one of the segments, divide it into four equal parts, and draw lines for the three bisecting angles (see the drawing on the facing page). On one of those lines, place seven tick marks spaced 1⁄2-in. apart. Mount the pieces on the chuck, and with the lathe turning at as low speed, touch a skew to the 1⁄2-in. marks.
From Fine Woodworking #126
For the full article, download the PDF below:
Fine Woodworking Recommended Products

Compass

Rockler Deluxe Panel Clamp

Double Sided Tape


Log in or create an account to post a comment.
Sign up Log in