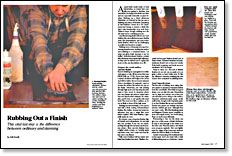
Rubbing Out a Finish
This vital last step is the difference between ordinary and stunning
Synopsis: Rubbing out a finish eliminates blemishes, so it should be the last step in finishing any piece of furniture. Taken in steps, it needn’t be frightening to abrade a finish film that’s only thousandths of an inch thick. Master finisher Jeff Jewitt explains how to prepare the work surface and the finish, how to sand various types of imperfections, and level with finer abrasive papers. He polishes with steel wool or powdered abrasives, and he talks about how to work with turnings, carvings, and moldings. Jewitt also addresses the science behind how sheen is measured.
A cured finish rarely looks or feels blemish-free, no matter how carefully you applied it. Bubbles, dust and debris can lodge in the finish as it dries and are especially noticeable on gloss finishes. Rubbing out a finish eliminates blemishes, so it should be the last step in finishing any piece of furniture. Surprisingly, few finishers I know do it. No doubt, some fear having to abrade a finish film that’s only thousandths of an inch thick. Taken in steps, though, rubbing out a finish need not be a terrifying process.
Any film-forming finish will rub out: hard finishes, like nitrocellulose lacquer, flexible ones, like polyurethane, and even waterborne finishes, which can be challenging to polish (see the photo at right).
Rubbing out is a three-step process of removing imperfections, leveling the surface and polishing to a consistent sheen. I always use gloss finish because it can be buffed. Satin-formulated finishes contain silica flatteners that impede light reflection, so they can’t be rubbed out to a gloss.
Prepare the work surface and the finish
If you’re finishing an open-grain wood like mahogany or oak, fill the pores first. If you don’t, light colored abrasives will lodge in the pores and will be visible. If your wood is textured (from a handplane, for example), sand or scrape the surface flat before you put on the finish. Otherwise, you risk rubbing through high spots and exposing the stain layer or bare wood. In situations where you can’t flatten the surface (inlaid furniture and hand-tooled antiques, for example), you’ll have to rub gently with steel wool. The wool acts like a cushion, so it’s not as likely to shear off the high areas.
Rubbing out removes finish, so be sure to start with a thick coating. Solvent-release finishes, like shellac, lacquer and some waterbornes, fuse into a single film once they’re applied. With these finishes, I generally apply six coats.
By contrast, coats of reactive finishes, like oil varnish and polyurethane, do not melt into one another. If you rub too much, you’ll go through the top layer. Most reactive finishes have a higher solids content, so I usually apply only three coats, and I make sure that the last coat is not thinned.
Fully cured finishes buff up better and faster than finishes that aren’t. Shellacs, lacquers and two-part finishes should cure at least a week. Oil-based varnishes and polyurethanes should cure at least two weeks. If the finish is gummy and loads up your sandpaper, let it dry longer.
From Fine Woodworking #119
For the full article, download the PDF below:
Fine Woodworking Recommended Products

Waterlox Original


Odie's Oil


Log in or create an account to post a comment.
Sign up Log in