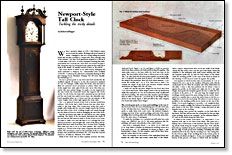
Synopsis: Robert Effinger has developed ways of making short work of the details in making a tall clock, and here he shares several. He isn’t a period purist, so he’s modified some elements of the Newport original, such as allowing for seasonal movement. Buy the movement and make the dial before you start cutting anything, he suggests, since the depth of the movement determines the depth of the case. He breaks the clock into three sections: the base, the waist, and the hood. He explains how to pin-rout the swan-neck moldings, how to turn a quarter column, and how to make ogee bracket feet. Fold-out drawings clarify the parts and assembly involved in the clock.
When I moved to Maine in 1970, I left behind a career as a tool-and-die maker. Working with wood instead of metal, I managed to eke out a living selling my turned bowls and wooden novelties to tourists who drove through town in the summer. One day a local gentleman stopped in to ask me if I could make a tall clock. I’d never attempted anything that ambitious before but I took the job. Since then, I’ve turned out quite a few. Along the way I’ve developed some methods that make short work of the details; I’ll explain several of these in this article.
The clock shown is based on an 18th-century mahogany tall clock attributed to Newport, R.I., cabinetmaker John Goddard (1745-85). I scaled up the plan from a measured drawing in Wallace Nutting’s book, Furniture Treasury: Vol. III (1933, MacMillan Publishing Co.).
I’m not a period purist so my clock isn’t built exactly like the Goddard original. I’ll improve on the old construction methods if I can. For example, unlike many old clocks, mine are built to allow for seasonal wood movement in places where the old clocks might have nails, glue blocks and, more often than not, cracks. The most radical change I’ve made is in the supports for the seat board—the horizontal board that supports the clockworks. On old clocks, the waist sides extended up into the hood and the seat board was nailed across them. My adjustable seatboard assembly slides up or down until the movement’s at the correct height, then screws tight against the waist sides.
The 1/4-in. plywood bottom of my clock is another break from tradition. Old clocks had a thick bottom that was often dovetailed to the base sides. This construction works fine until a weight cable breaks and the cast-iron weight wrecks the bottom, feet and sides of the clock. A falling weight will smash through my thin plywood bottom, without damaging the rest of the clock.
Buy the movement and make the dial before you start cutting anything. The depth of the movement determines the depth of the case and the dial must be made to fit the hood or vice versa. It’s easier to make your own dial than it is to redesign the Goddard hood around a store-bought dial. Some of the fancy old engraved dials were made from brass, but I cut mine from 16-gauge sheet steel and sent it out to be hand painted. The sources of supply on p. 78 lists a few of the many companies that sell movements. The movement I used in this particular clock is a cablewound, nine nested-bell movement (No. 213) from the Concord Clock Co., 96 Main St., Plaistow, N.H. 03865.
From Fine Woodworking #55
For the full article, download the PDF below:









Log in or create an account to post a comment.
Sign up Log in