Synopsis: Frank Klausz explains the way he learned to cut mortise-and-tenon joints in Hungary, using a kitchen table to show the steps involved. He won’t say his way is better than Ian Kirby’s, but he does spell out the points on which he disagrees: the shape of the mortising chisel, the method of sawing the tenon cheeks, and how to mark out and cut the tenon shoulders. He details these points and then makes the table, showing each step and explaining the processes.
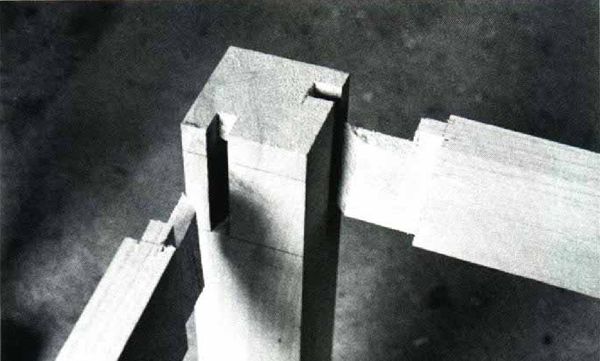
There are hundreds of variations on the mortise-and-tenon joint and many different ways to make them. The method and the tools I learned to use as an apprentice in Hungary are different from the English way described by Ian Kirby in the March ’79 issue of this magazine. Without saying my way is better I will tell you how I make a kitchen table with mortise-and-tenon joints, out of 3×3 poplar legs with 5 /4 pine for the 4-in. apron and for the top.
I disagree with Kirby on the following points: 1) the shape of the mortising chisel; 2) the method of sawing the tenon cheeks; and 3) how to mark out and cut the tenon shoulders.
1) Kirby corrects his chisels so the sides are parallel and square with the back. For me a chisel with parallel sides is a car without a steering wheel. The sides of my chisels are tapered 1° toward the front face as shown in fig. 2. This is better because you can twist it against wild grain to keep the mortise straight. The chisel back has to be straight, the edge sharp and the handle large and square with rounded corners and rounded top, so it can take a beating. The partially square handle is easier to steer and sight up—you can get a good solid grip. To make such a handle I turn it oversize, mount the chisel, then plane the flats.
I have three or four different makes of chisels, old ones, including a German 1/2-in. stamped D-FLIR Franc Wertheim, a French 3/8-in. stamped Peugeot Freres Agier Pondu, and a Hungarian blacksmith’s made from an old file. These chisels were made with tapered sides purposely to do mortising. Besides being able to steer them, the sides rub less, and the clearance helps in levering out the chips.
2) Kirby uses a backsaw for sawing the cheeks of the tenon and he changes the position of the wood several times. I use a bowsaw 30 in. long with 5 teeth to the inch, a common ripsaw. I don’t move the wood; I keep it straight upright in the vise at a comfortable height so I can occasionally check the mortise-gauge line on both sides. Start cutting the corner farther away from you, then come straight back across the end grain and down.
From Fine Woodworking #18
For the full article, download the PDF below:
Fine Woodworking Recommended Products

Starrett 4" Double Square

Suizan Japanese Pull Saw

Stanley Powerlock 16-ft. tape measure


Log in or create an account to post a comment.
Sign up Log in