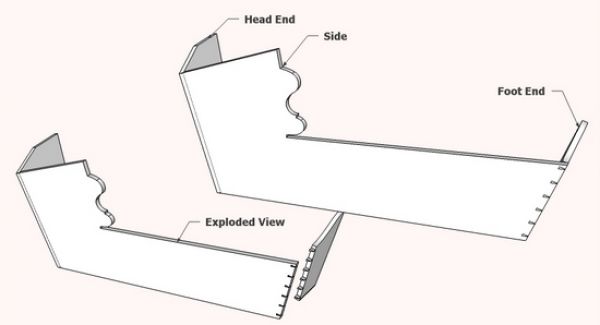
-
How to Make a Simple Jig for Offset Knife Hinges -
How to Apply an Aerosol Finish -
How to Drill Windsor Chair Mortises -
How to Cut Sliding Dovetail Joints -
Fixing Woodworking Mistakes -
T-Track is a Smart Workbench Accessory -
Upgrade Your Jointer with a Segmented Cutterhead -
Dedicated Sled Delivers Perfect Finger Joints -
3 Steps to Great Glue-Ups: Sliding Dovetail Joints -
Tablesaw Tapering Jig is Safer and Faster -
How to Sharpen a Card Scraper -
Box Making Tips and Tricks -
Best Tabletop Finish -
Buying and Using Trim Routers -
Five Minute Guide: Glue-Ups -
Five Minute Guide: How to Use a Tablesaw -
Router Jig for Perfectly Aligned Dadoes
"Align View" - a Little Known, but Handy Function
comments (0) January 22nd, 2009 in blogs
I don't use it that often, but when I do the "Align View" function is very helpful. It comes in handy when I'm making a full-size template of a component's details. In the case of the 18th C Child's Cradle shown in last week's blog post, I am interested in making full-size templates of the scroll shapes and dovetails for marking out lumber in the shop. However, these shapes and dovetails are on components that are splayed at various angles. The ordinary process of producing a template is setting the Camera to a standard front, side, or top view. However, this will not be appropriate in the case of angled or splayed components. You could rotate a copy of the component to remove the splay, but this is extra work that the Align View command avoids.
Here is the model as I left it in last week's post. The following illustrations will show steps to create the templates for the scroll shape in the Side and the dovetail layout.

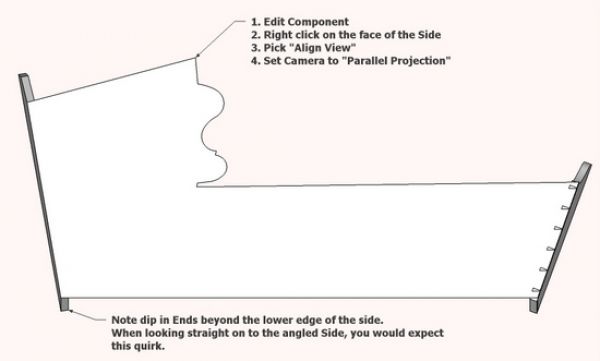
Step 1: The Align View function is only available when editing a component. In this case, edit the Side component, then right click on the face of the Side. In the menu, select Align View. The model will instantly rotate such that the camera view in now normal to the plane of the Side.
To produce a full-size template the Camera setting must be in "Parallel Projection".

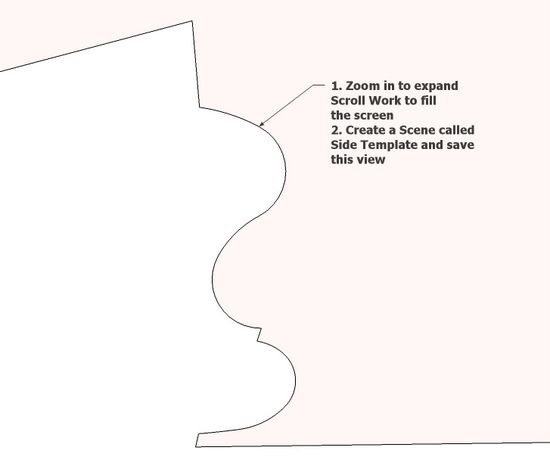
Step 2: Zoom into the scroll area of the Side so that it fills the screen. Save this view in a Scene, then you are able to return to this view for printing and viewing.

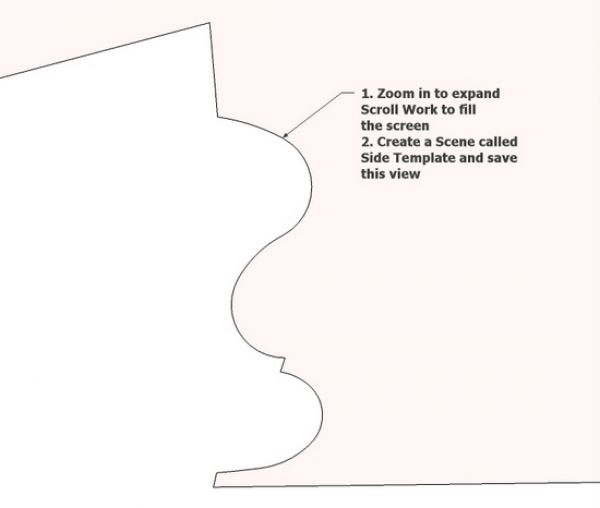
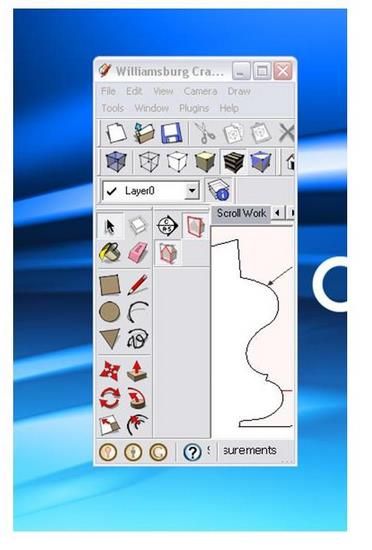
Step 3: To print the full-size template, I re-shape my Windows screen so that the scroll shape fills the SketchUp view area. In that way, the white space is reduced to a minimum and the number of pages printed is optimized. Remember when printing full-size templates, you must set the scale to 1:1 on the print dialog box.

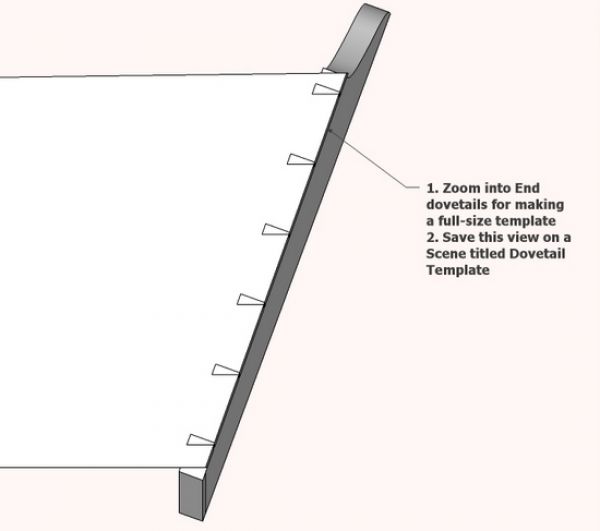
Step 4: Repeat the viewing, setting a Scene, and printing process for the dovetail template.

Template production is one of the most effective by-products of the SketchUp model, and Align View helps me make them accurately and quickly.
posted in: blogs, period interpretation, dovetails, mahogany, cradle
Become a Better Woodworker
About Design. Click. Build.
Learn the art and science of designing furniture in SketchUp with Fine Woodworking's official blog. Moderated by a devoted community of woodworkers, we feature step-by-step SketchUp tutorials on designing components, downloads of pre-built 3D models of furniture parts, and news and information about the evolving world of digital furniture design.
Buy the Video
Don't miss Dave Richard's brand-new DVD/video download, The Basics.
Buy the Book
Get Tim Killen's popular eBook, the Google SketchUp Guide for Woodworkers.
Basic SketchUp Tutorials
Learn the basics of building furniture in SketchUp with these classic posts from the Design. Click. Build. blog.
Creating a Project Plan in SketchUp
How I Draw in SketchUp
Axes in SketchUp
The SketchUp Move Tool
The SketchUp Rotate Tool
The SketchUp Scale Tool
Materials, Colors, and Textures
Applying Wood Grain Skins in SketchUp
Easy Dovetail Joints in SketchUp
Digital Project Plans
Download and modify SketchUp files for select projects from Fine Woodworking. View all. Top Sellers: Matt's Monster Workbench New England Pine Cupboard Garden BenchMeet the Authors
|
|
DaveRichardsI am a Biomedical Equipment Technician. I maintain anesthesia and respiratory equipment for the largest medical facility in southeast Minnesota. I...view profile |
|
|
Tim KillenI am retired from Bechtel Corporation after 36 years in Engineering and IT management. I grew up among woodworking machinery in...view profile |
|
|
FineWoodworkingEditors...view profile |


Comments (0)
You must be logged in to post comments. Log in.