
Watch the recorded video from our live online event where two experts faced off to find the best way to cut a tenon: hand tools or the tablesaw/dado-set method. This was recorded live on Jan. 21.
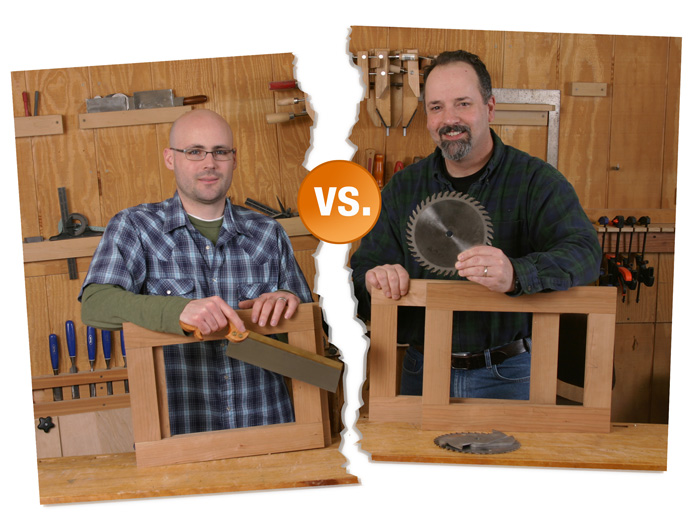
Hand tools? Associate editor Matt Kenney advocates the hand-tool-only technique. He says that cutting tenons doesn’t take much longer by hand than it does to stack a dado cutter at the tablesaw.
Power tools? Art director Michael Pekovich, however, disagrees, saying that cutting tenons at the tablesaw with a dado blade is the best way.
So Pekovich challenged Kenney to a showdown.
The pair battled it out for an article for our January/February issue (FWW #210) and then they did a live rematch in front of our cameras and a studio audience Jan. 21. See photos of the event taken by a studio audience member here.
This showdown was our second live event. We broadcast a surface-prep battle in November where Pekovich faced off against magazine editor Asa Christiana and clobbered him in a different hand-versus-power-tool battle. Watch the recap of that show here.
Credits: Producer: Gina Eide; Technical director: Dariusz Kanarek; Cameras: Ed Pirnik, John Ross; Marketing: Missy Robinson, Online chat moderator: Matt Berger; Production assistant: Steve Scott; Advertising: Linda Abbett, Megan Kolakowski; Shop manager: Robert Nash; Video editors: Gary Junken, Mike Dobsevage; Graphics: Michael Amaditz.
Watch our live tenon shootout Thursday, Jan. 21, at 1:30 p.m. EST and watch two experts duke it out over the fastest way to cut a tenon: Hand tools vs. power tools. Also, don't miss special giveaways and live chat where you can ask the contestants about their techniques.


Comments
Why not make it a three-way using a router table? Or, the method I am currently using, a dado set in a radial arm saw?
Whomever "wins"; the best method is the one we are most comfortable with. I have tried all, but found that I get the best results with table saw and tennoning jig.
Whatever method used...... they are all winners.
I have never used a dado set for tenons. I have tried a tennoning jig but I always come back to my table saw. It is much faster, more versatile and more accurate. I make the mortises on a router table with a long fence for creating stops, before starting the tenon.
First, I define the length of the tenon by cutting a kerf slightly deeper than the intended dimension of the tenon on both faces and both edges using the fence as a stop and a miter gage to keep the piece square. If the tenon is to be off-center, adjust the depth of this cut accordingly.
Always using the outside face against the fence as a reference, I define the position of the outside of the tenon. Use a zero clearance throat plate when you make these cuts. If the piece is long and/or heavy, a vertical plywood fence extension will keep it vertical. If it is enormous, you can use a band saw following these same principles.
With the mortised mate-piece handy, and still using the outside face of the piece as the reference, cut the inside of the tenon until it fits to your satisfaction. This works well even if your tennoned pieces are not the same thickness.
Lastly I cut the length of the tenon to fit the mortise in the same way. Sometimes I use the band saw or a hand saw for this.
You now have the option of rounding the ends of the tenons to fit the mortise or squaring the ends of the mortise to fit the tenon if you want a "locked-in" fit. I usually just cut the tenons short and let the cheeks of the tenon carry the strength of the joint.
Hi folks, Thanks for the feedback on how you cut your tenons. The shootout is definitely not comprehensive--just two favorite staff techniques. But, you be the judge. Watch the live event and let us know how you think the techniques stack up. In the meantime, I started a poll.
Vote now to help us find the most popular way to cut a tenon: https://www.finewoodworking.com/item/23290/poll-the-most-popular-way-to-cut-a-tenon
More of a question than a comment--I thought it was a safety "no no" to use a rip fence as a stop guide together with a miter gauge as Michael did on cutting the tenons. I thought the correct "safe" approach was to clamp a stop block to the rip fence that was positioned just in front of the blade so that when the work piece was being cut there was no impingement opposite the saw blade that might make the work piece twist and create a safety problem. Any comment, Michael?
I do have a comment, also--I have used a router quite successfully to cut tenons. All of the tenons that are to be the same size can be ganged up on the bench, clamped toether and cut with multiple router passes against a guide. This is another way of assuring that the tenons are all the same length and the shoulder depth is uniform.
It's true you should never use the rip fence as a stop when crosscutting where the off-cut can get trapped between the blade and fence.
In this case there's no hazard because there is no off-cut to get trapped. The dado blade is only removing the stock from the underside of the work piece. No part of the work piece is actually trapped between the blade and fence. As an added precaution, I start cutting the tenon at the end and move the work piece toward the fence with successive cuts so there's never any stock to the right of the blade.
I hope this helps.
-Mike
No video?
I agree that the best way to make tenons is the way you are comfortable with. I personally do woodworking for the enjoyment of it, and to relax. I like the "old time" way with hand tools. I am not in a hurry. I am retired!
RoomeAL,
The dust up hasn't occurred yet, so there's no video yet. The live feed is this afternoon. The video will be up some time after that.
Matt
If the project is for me or the family, I always cut the tenons by hand because there is no schedule pressure. Cutting tenons (and the mortises) by hand provides great satisfaction when everything fits together nicely.
Else, I have used the table saw with a tenoning jig or a router with a tenoning jig. The table saw method produces less noise and dust. However, in this mode I always use the router to cut the mortises and therefore the router method for the tenons seems to provide the best fit.
I cut them both ways, but I enjoy cutting by hand when I have time. I cant wait to see the shootout.
I can hear fine, sure wish I could see it
Refresh your browser and you'll be able to see the action!
The video feed was not coming in initially, but when I refreshed it showed up, however it has been a little choppy.
Video appears to go in and out when I submit comments.
Can you hold the mic closer?
Tell the "Dandy" he doing great with all eyes upon him. It's not easy. At home there is coffee or what ever at your elbow. Plus no questions or stop watch.
comment
Great show, I learned a lot. Thanks for putting this together.
Cut those bad boys with a router!
Great show so far and thanks for doing this.
I'm rooting for the hand tools!
HEY MATT
What do you use for blades when you make your marking guages
Danny in Toronto
What happened to the video?
I'll be watching closely. I have a few projects planned, and haven't decided how to go.
I think it is awesome that you all are having someone do tenons by hand. It is so hard to find videos that focus on hand work sometimes. Thanks!
When fitting the tennon with the hand plane shouldnt you take equal amounts off of both sides.
Those are great prizes....
I do have a question:
I assume you have to worry about wood movement on wide tenons. How wide is too wide? And by that I mean, how wide before you have to start thinking of using double tenons or limiting the glue area and using pins?
It is reashering to see a pro make a mistake. I liked the tip on sawing the cheek cut. I will have to try that.
Another great shootout! However, the audio/video is very choppy today-don't know if that is on my end or at FWW.
As a new woodworker, I'm curious why making tenons with a bandsaw doesn't get much attention. You see folks use the dado stack/TS or hand tools, but why not the bandsaw? Is it just that folks are more likely to have a TS than a bandsaw? I'd have been interested to see a TS vs. BS competition on which was able to produce an accurate tenon most efficiently.
I’ve been a woodworker for many years using mostly power tools. After watching this I think I might give the hand process a try.
I like these live shows, keep them coming
Video stopped again, I am going to try posting a comment to force a refresh of the screen and see if that works
Nice prizes and giveaways! Great idea to watch live event..... my husband is there and I'm back at home!.....great way to check that he's really where he say's he's going to be!!!! hahahaha Although he really is usually in his woodshop, this was a nice escape for him!
Live video, chat works good, but signing into the blog forced me to lose the connection to the video due to different login requirements...
Using a router seems like an effective way as well. I think that what makes this comparison fun is that there are multiple ways to accomplish the goal. The power tools are faster but then you sacrifice the enjoyment that some may get from using hand tools etc.
I typically cut mine with power tools, but as my hand tool skills improve I lean more that way. I like the lack of dust clouds in my shop.
Another great shoot out. Don't forget to think about an East vs West handtool shoot out.
In chat one viewer said he used a bandsaw to do tenons. I have not had much success with that method.
Why is he not putting the plane down on it's side, so the blade does not contact the bench top? Does that dull the blade?
Show us the details of the cutting gauge.
great idea. I like the competition comparing hand to power. Seems the power tools does reduce the time, but you lose some control.
Yeah, most shows don't show the pain and time in just getting the tablesaw, dato setup correct to get started. They just show the finishing cuts.
how many teeth per inch is Matt's back saw?
If there's time, could either of you comment on pinned tenons with an offset hole on the inside piece to pull the joint even tighter. Does this increase cracking due to humidity and wood movement? Thanks!
i would like to see live videos weekley
Unfortunately I haven't gotten video but the audio has been enjoyable. I look forward to the replay tomorrow.
Matt is quick eh?
Are Canadians eligible to win prizes?
I must say I love all the good information these guys provide. I would love to know Mikes methods for his mortise cuts.
Keep doing these, and I will keep watching.
Great way to learn!
This is great. I lean toward the hand saw, but have a dado set and hope to try this technique soon!
first show i have seen so far and its great
Do you guys chamfer the ends of your tennons?
Excellent presentation. Just need to keep the mic in front of the one speaking or else you just can hear well. Thanks, and keep 'em coming.
I was more interested in seeing Mike's technique and my video keeps dropping out for his demonstration - Argh!
You guys at fine woodworking are doing great job at educating people who work with wood. This live tenon competition is a great idea. Keep up the good work.
Very good event... Better than the last one...
I left more comments on the survey.
Thank you for sending email Just In Time to see this! Worked out great!
Thank you,
Joe
jay I Don't have A Table Saw but i Have A Hand Saw But it takes more skill.
Does these guys perfer to mortice or tennon first?
Good idea, too many drop outs.
With some luck I caught part of the show. I sure did enjoy what I caught. I am a beginner, I'll be back for more.
I see there are a lot of questions for me. I'll do my best to work through them all. Here's a few answers.
1. The big rip saw has 11 tpi.
2. I use a jigsaw blade to make the cutters for my marking gauges. Look for issue 211 (out soon). There will an entire article about how I make them.
3. Always cut the mortises first. It is quite easy to make the tenon fit the mortise, but the opposite isn't easy at all.
4. You absolutely should take an equal amount off each side of the tenon when trimming them with a handplane. I try to keep track in my head. However, it helps that I have layout lines on the tenon, so I can simply trim to the line. After that I am more careful about how much I'm taking off each side.
Nice job with the demonstration. Too bad I missed the live version.
I found this video very informative, as I like to use both methods. Great job
Most of the time I make these joints using power tools. This is an encouragement to use hand tools. Thanks for an interesting shoot-out.
Excellent. Lots of useful tips for a novice like me
What is the best dado set to use for tennons? Manufacturer?
This is a great demonstration of making tenons. I would love to see a demonstration on cutting mortises by hand.
Does a rabbeting block plane have a "nicker" to keep it tight to the shoulder? I typically use a shoulder plane but the plane creeps away from the shoulder with successive passes on the tenon cheeks. I then have to go back and clean up and undercut with a paring chisel.
I am a begining woodworker and the hand techniques is great...gives one a feeling of accomplshment, but as Mike stated, "sometimes one needs to work faster (if one has the tools)".
Also, if one doesn't have the tools the hand technique should work: you train the eyes to work better and later use the tool technique. Either way it's great to be a woodworker...there's so much to learn!
Angelo Feliciano
JLYoung,
LN does now sell a version of the Rabbet Block plane with a nicker. I've always used the version without a nicker. The nicker is actually meant to sever the fibers so that the blade doesn't cause any tearout on cross grain cuts. So, it doesn't help to keep the blade close to the shoulder. My first suggestion to solve your problem is to make sure that the blade is flush with the side of the plane that is against the shoulder. It sounds to me as if it is not, so the plane is not cutting tight into the corner, which leaves a tiny little lip. Well, with the next stroke the plane will be guided by that lip, which means a second lip, even further away from the shoulder, will be formed. That becomes worse with every swipe. Getting the blade flush to the side of the plane will solve that problem.
Best of luck.
I have an adjustable (wobble) dado blade. Unless I am cutting a 3/4" dado, the bottom of the cut is not square becaause of the blade wobble. I think a dado set would do a better job.
Great event guys, keep these up. I don't think they all have to be shoot outs either, but perhaps just a demo of a technique or something. As a podcaster and blogger I am really excited to see this kind of supplemental content.
great stuff, keep up the good work, verry helpful.
Great Shootout guys. It is within my opinion that using a tablesaw to cut tenons and grooves for a cabinet door is faster than using hand tools. But the advantage of the hand tools is know how to use them and being very quiet in the basement working while neighbors are asleep. So for those beginning woodworkers prior to using a machine type for mortise anda tenons or tongue and groove learn how to use the hand tools first. It is great and inexpensive to own.
Regards,
Desi Bravo
Maybe this has been covered in one of the other 75 posts, but I feel that I get better results if I use the tenoning jig with 2 narrow kerf saw blades with a set of metal spacers and magnetic shims between the blades when paire up with my mortise machine will give consistant results. The shoulders will have to be cut with another setup on the table saw with additional tenon width cuts made on a bandsaw.
Wonderful instruction with many useful tips. Thanks.
How do you determine the amount of space
needed for glue in the joint? Excellent video. Thanks.
I love the production. Learning is fast and complete with lots of practical details not usually covered in an article or book. However, you really need to improve your video action. There is a large lack of zoom time and expertise. Take some time and show details. Thanks for the show. I hope you keep them up.
I like the live video, it always helps to see it in action and it helps with the "hands on" for all the beginners, and alike. Great Job, keep the the good work.
Thanks for the link to my photo page. I hope everyone enjoys them. I sure enjoyed the event.
OK, First of all I appreciate the live video,and great job on the subject coverage, however, I am hrd of hearing person and sure did have heck of hard time trying to hear what McKenny was saying Please improve the sound quality and also it won't hurt to hand the Mic. to the speaker. I also couldn't see some of the stuff they were doing ,because the camera was too far and couldn't zoom in. May be you can install a camera over head that can be zoomed in & out remotely. Also may be give the speaker mic. like what they use in the news rooms. I think that your magazine has enough revenue to accommodate for these improvements. Overall, I appreciate the knowledge you all are passing on to us the woodworkers. Keep up the good work.
Good Job! Keep going guys.
I also have had a hard time hearing this program. But I like it.
Hi To the guys and girls of Fine Woodworking.com,
Thanks for the opportunity to experience both sides of tenon making. It is a great idea. I really enjoy the videos about woodworking and as I am self taught and a hobbyist, it gives me a great insight to the ways of the craft carried out by the professionals.
Matt has given me a terrific tip on the marking gauge as I often steer clear of using them because I have found that mine (pin type) tends to follow the grain. My next purchase is a blade type marking gauge.
From a bloke "downunder" thanks for a great mag and numerous opportunities to improve my skills while in the comfort of my own home.
Ando
I realize this is being posted a bit after the fact, but here it goes. One of the live audience members asked if it mattered which style of dado blade you use; the stack dado or the dial in dado. I have used both and personally I prefer to use the stack dado. With the dial in dado I found that when it is set to the maximum width, it tends to cut a "tapered" dado. The bottom of the dado is not flat; it has a sort of ramp or taper to it. With the stack dado; no matter what width you have it set up for; it will always produce a flat bottom. So, I would recommend a good stack dado set.
I guess it is less noisy and less dangerous, you have a better relationship with wood, and demands more coordination what is a good mind exercise for someone 55 years old as I am :-), I whish to know what kind of wood he is cutting.
Thanks for showing us these comparison
Sergio
Man! Oh Man! What's up with the sound quality?
Nice job on the shootout. Keep trying to find someone doing the hand tools portion that knows how to work efficently. If you need inspiration simply watch Frank Klauszs' videos.
Keep up the good work and send me my prize!
What material is used for making the cutting gauge, and how is it anchored into the body? Excellent video.
I use a crosscut sled made exclusively for a dado set for cutting tenons.
Wow! this was great! Are you guys planning more of these types of technique demos? I've tried some of these power tool applications with some success, but I now see HOW to strenghthen the outcome. Thanks alot...plese do more!
Haven't been able to run your new videos on my Mac for the past few issues. I can view the videos, however, on the regular video page. How come? I'd love to see them!
Oops! Now that I'm logged in, it works! Thanks!
I am a big proponent of the modern use of power machinery however when it comes to the period type of furniture we make the tender love and care of good hand tools just to get that joint feel a little bet more authentic is a great feeling. Our shop as most of yours commands both measures of electrical power as well as muscle power tools.
what r good quality dado blades? the price range of some of the
dado blades are very expensive. what price range would
a good quality dado blade fall in.
This commentary is more on FWW's video(s) in general than this specific tenon shoutout, which was good.
1) The video playback is very frustrating. Why does it not "preload" when I pause the video, such as with any YouTube video. I have a fast connection, but this is ridiculous ..... and then when I login to make this comment, the video resets and I have to wait another 10 minutes to get back where I was watching!!!! .... NOT GOOD!!!!!!
2) The "tags" for who is talking, or the advertising (such as Lie Nielsen) pop up and cover close to half the video ..... POOR judgement. These should only be less than 1/4 of what they are now. I'm watching the video and don't want those to block out things just when some detail is being shown.
If anything, this makes me mad at Lie Nielsen (not that they can do anything wrong!), or whatever advertiser is doing this. I can see who is supporting this by a MUCH, MUCH smaller tag/banner.
Please change this. I have avoided FWW videos consistently for these reasons and have said nothing before. If YouTube can do the first item, so can you. The second item is up to FWW and their advertisers.
Thanks.
Don
using dados do you always use the arbor washer on the outside the the dado blades, if I put all my dado shims on I can not get the arbor washer on with the nut
This was really good to highlight that hand tools can still produce great results. Also that good hand tools being made today, while expensive, are as good or better today than ever in the past. [However, I do love & have a small collection of old tools.]
While I have a tenon jig, I think I will use a dado as demonstrated to make tenons in future - for reasons mentioned in program.
Great video I've always had trouble cutting these. Thanks
The small 'rabbiting planes.' Do the sponsors of this program sell them? What size do you use for tenioning purposes?
HI, would like to watch your show but, the pop-up ads
block out half the screen !!! This takes away the pleasure
of watching. I won't make the mistake again to watch.
Also, the screen resolution is poor.
Do or have you ever limited (re-defined) your hand saw "teeth setting" to limit the kerf and allow you to get a finer cut?
Rdennison
Which workbench does Matt prefer to use for this project? The bench with a tailvise he presently using or the monster bench he demonstrated construction of recently.
with all the trimming on the tenon, is there ever a risk of ending up off centre? great video!!
I see a few more questions have popped up for me.
1. I prefer to use my bench (the so-called monster bench), but it wasn't practical to bring it in for this video. The bench I was using is in our shop here at FWW and is a fine bench. However, benches are tools and you get used to working on the one you always work on. So I did miss mine. That being said, my techniques were not any different.
2. I have not attempted to reset the teeth on my saws so that I would get a smaller kerf. As for the cleanness of the cut, the crosscut saw I use leaves a clean cut on the shoulders, but even if it didn't the shoulder plane would take care of that. I'm not worried about the cleanness of the cheek cuts, as the rabbet block plane will definitely take of any messiness. It's the planes that give you smooth surfaces, not the saws.
3. The are at least two contemporary makers of shoulder planes (Lie-Nielsen and Veritas). I like a medium shoulder plane. Mike likes his large one. As far as I know, only LN makes a rabbet block plane at present. Sargent, which no longer makes planes, made one but you'd have to search eBay, flea markets, etc. to find one.
4. When trimming tenons, there is a risk of ending up with a tenon that is off center. There are two ways to avoid that. Work up to layout lines, but do not go past them. Take an equal number of passes on both sides of the tenon with the rabbet block plane.
I think that gets all of the questions. If I missed one, let me know.
Have the camera man/woman focus the camera on the set up of the dado head to the fence. stan
this stuff is great keep it up
This is a great video! I normally use power tools to cut mortise and tenons but I will definitely try hand tools the next time around. I don't have a great selection of hand tools at the moment but I will be saving to buy the rabbit block plane and the cross cut Lie-Nielsen tools! A great job and fun to watch! Great personalities!
This is a great video and I plan on trying both techniques.
If noise and space are issues, is there a way to prepare some of your parts so that you can use only a router and handtools in preparation of the tenons?
I enjoy these informative competitions, and would like to see more of them in the future. I would strongly urge FW, however, to consider using master craftsmen in these tutorials. No disrespect intended to Matt, who does a fine job at his skill level, but so long as you're going to the effort of making these videos, why not use one of your many contributors who have been woodworking for 20 years? There are certainly some helpful techniques that can be related to the audience by anyone. But there are many more subtle and advanced techniques that can only be learned by watching a master at work. By providing a more experienced woodworker in these videos, I think you'll make them appealing and useful to a broader cross-section of your audience.
When you used Japanese had saws did you have problems as far as pain & cramping from holding the saw handle?
I noticed you are using a homemade blade insert on the SawStop which is the same saw I have, do you have a good process or a set of online instruction on how to make the insert for this saw which is more complex than most?
dcgrafix:I never had any problems from holding Japanese pull saws. Are you having trouble with them?
dyweller: Could you give me some examples of the kind of subtle and advanced techniques you have in mind?
I thaught it was an very good show showing ways of the past and the future showing the capabilities of booth. The speed and the tools used to make it possible.
Hi Matt,
The information you give in the video is first-rate, but it's also widely available in a number of articles from FW and elsewhere. The advantage to video tutorials, to my mind, is that they allow the viewer the opportunity to pick up on the qualities that distinguish a master craftsman from a good woodworker. The viewer has the opportunity not just to read a list of techniques, but to see them performed by a master. When the basic skills being performed are already familiar, the way in which these skills are performed becomes more significant. And that's where having a master performing the task becomes critical.
These differences in technique may have to do with a slight variation in the way a tool is held, or attention to body positioning when making a cut. It's somewhat difficult to be too specific in describing what I'm looking for since, by definition, I'm asking for techniques that I'm not already aware of. So perhaps the best way to answer your question is to turn it back at you. What kind of video tutorial would you like to see, that would improve upon the fundamental hand-tool skills you already have? And who would you like to see in front of the camera?
Dylan
I have enjoyed Fine Woodworking's videos a lot and want to echo dyweller's comments on what video brings to the subject. That said, I'm not sure that a "live" audience and webcast adds a lot of value. It's nice to have questions--so that's value added--but I found it really annoying that the advertisers block took up over 1/3 of the screen and often blocked the shot of the work being done. I also found that the camera work on FW's other videos was much better, zooming in on the critical part of the work. Finally the tone of the video was much more Televisionesque and less documentary. Thanks to the slider, I was able to pass over the drawing and the description of the goody bag, but the recent move on formerly great TV channels like Discovery from documentary to reality TV has me worried that FW is moving in that direction. If you are going to continue these live feeds, I would suggest that you look carefully at your objective for them and the audience. I think we (your audience) are particularly interested in the "documentary" approach and the addition of a live audience was a distraction to us.
I am about to build a frame and panel for my current cabinet project. I have never made one and decided to check your website and found this wonderful video shoot out. It answers all the issues I had been trying to resolve. These videos are jems and I would urge you to continue to make them.
I would like to see a good video on hand cutting dovetail joints in hard woods like maple or cherry. The ones I have seen were usually made with soft woods which are very forgiving. Also most of the ones I have seen had sloppy results. Hardwoods like maple are not so forgiving and require a lot more skill. I would like to see an in depth video with closeups and have the result being a tight fit.
Any chance of someone putting the video back on? The movie window is there but nothing loads when I push play.
Thanks
Fixed
Log in or create an account to post a comment.
Sign up Log in