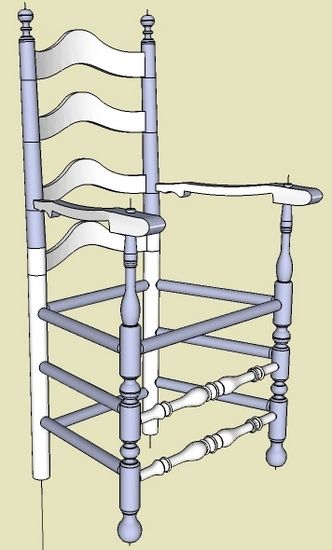
Following my last post, I felt somewhat uncomfortable about taking a short-cut with the Back Post. Rather than executing a bowed bend for the upper section of the Back Post, I simply rotated the upper section about the knee fulcrum. That is, there was no arc involved only straight sections. So I was not accurately representing the original museum piece which was steam bent.
Here is another view of that 18th C Ladder Back with my short cut bend of the Back Post.

I elected the short cut method since I could not figure out how to make a tapered turning. I contacted Dave Richards who provided the solution for making tapered bends. It involves using a free Plug-in called Taper Maker (you can find the download site by doing a Google search on “Taper Maker for SketchUp”). I found this plug-in to be very easy to use, with some surprising impacts however.
Here is my solution to making the bent tapered Back Post.
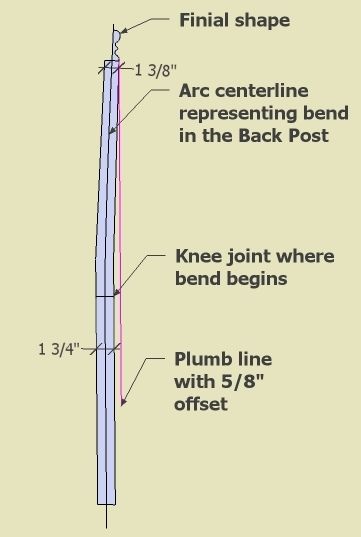
Step 1: I’ve created the shape of the Back Post by tracing over the scanned drawing by Lester Margon. Only the upper portion (above the knee) is bent in a slight arc shape with a 5/8″ offset from the plumb line.

Step 2: I found that it was necessary to do the tapered bent section first. Then use the ends of the tapered section as “tools” to complete the finial and lower straight section.

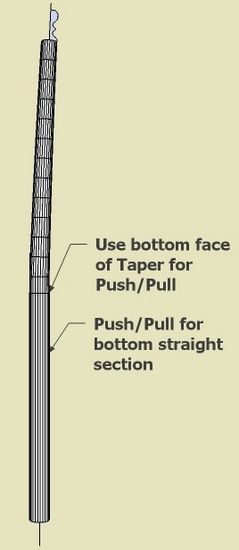
Step 3: Use the bottom face of the tapered section for the Push/Pull of the straight lower section. In this way, there is a perfect seamless match of the two adjoining sections.

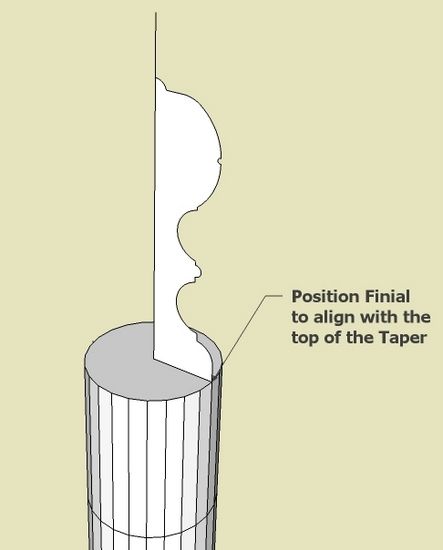
Step 4: I also found that you have to “align” the Finial shape with the vertices of the top of the Taper. I also used the top of the Taper as the path for the Finial Follow me. Again, this makes a seamless transition between the Tapered section and Finial.
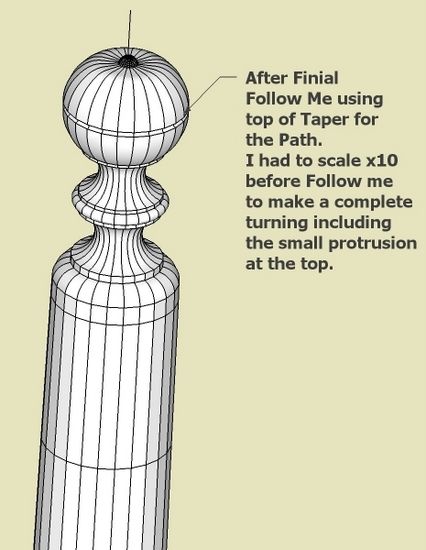
I also found that you have to scale the finial shape and the path times 10 to accurately make a finial complete with the small protrusion on top.

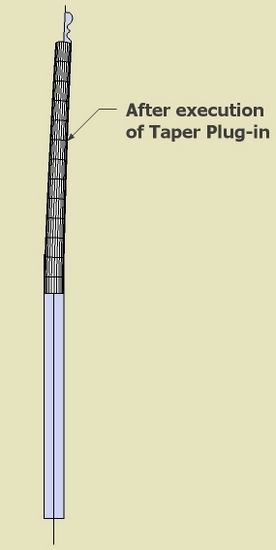
Step 5: Here’s the Finial after Follow me

Step 6: The final step is to do some “smoothing”. I’ve shown my first short cut way on the left. The “tapered” version is on the right. To me the difference is insignificant.

Even with Dave Richards’ help, I spent several hours on this tapered bend. My conclusion is that it was not worth it – that my short cut version was good enough.
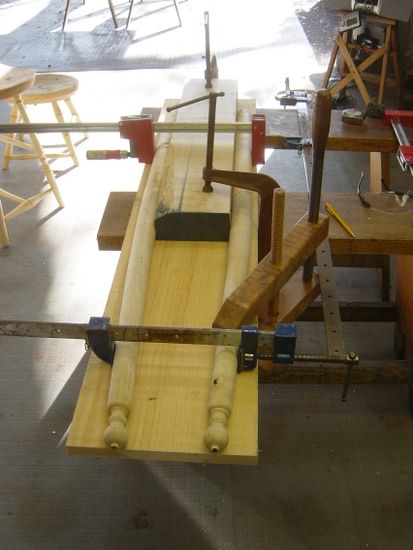
I’ve finished most of the turning and below is a picture showing my method of performing this bend after steaming the ash for about 1 1/2 hours. After removing from the clamps the following day, there was very little spring back and I achieved the 5/8″ offset.


Comments
Tim,
A big thank you for this post. I was searching for an efficient way to draw a round, curved, tapered leg. I didn't really expect to find one. But here it is, exactly what I need.
Since I'm not a metalworker I wonder if I ever would have found the Taper and Curve plugins on my own.
Also, thanks to Dave for his help with other problems and to the editors of FWW.com for hosting this blog.
Doug Hepler
The only way I've been able to create a taper like this is to create a uniform bent tube first by using follow me along an arc, turning on hidden geometry, then successively scaling each horizonal "ring".
Log in or create an account to post a comment.
Sign up Log in