
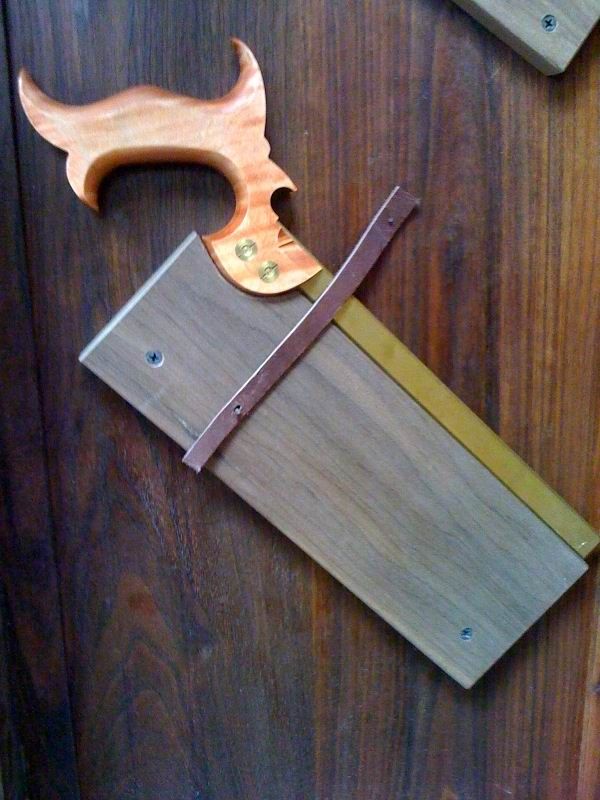
Perfect fit. I wanted to protect as much of the saw as possible, so I cut out a little notch to match the saw handle. That way, the entire blade is covered up, and the handle helps to hold the saw in place.
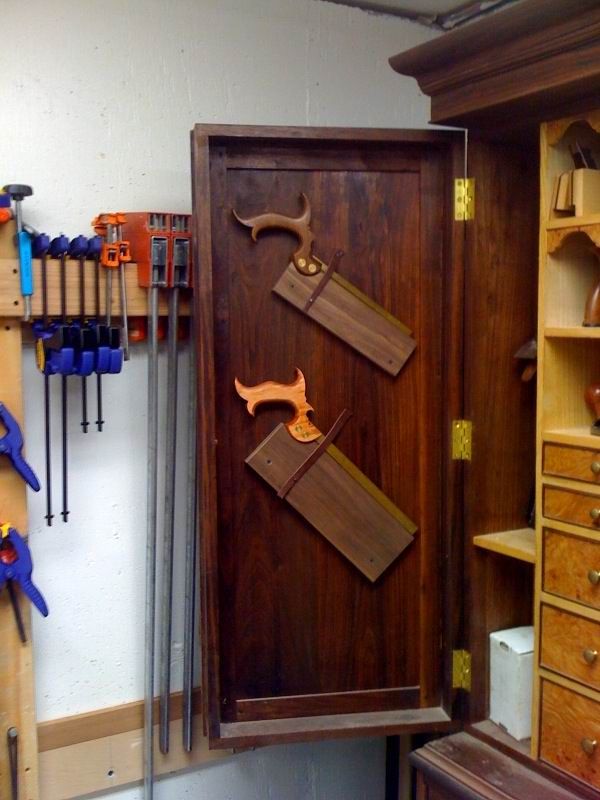
My first serious woodworking project was a tool cabinet. I made it under the direction of my friend Joe Mazurek, president of the Ugly Men’s Club. I designed the doors so that I could one day hang my handsaws (which I didn’t have when I made the cabinet) on them for quick and easy access. I finished the cabinet about 3 years ago, and have purchased several good backsaws in the last 3 years, but I never hung any of them. I kept them in their boxes in the bottom drawer inside the cabinet. Two weekends ago, I was taking a break from building my wife’s jewelry cabinet (Well, I was actually frustrated with the cabinet. Why did I design a bow front cabinet with tons of little bow front drawers?) and decided it was high time to do something about those saws. I was tired of having to go into the drawer and pull out a box when I needed a saw. It was so annoying that I would end up leaving my saws on the bench top, which I never liked. I was always worried that one would fall off and go splat on the floor. I needed some way to hang them that would be quick and easy to make and that would protect the blade. The pictures above show what I came up with. I’m happy with the cases. By the way, the leather straps are just insurance, not necessary.
A few notes on how I made them. I took a piece of walnut and cut a slot in it with my tablesaw. I then traced the shape of the handle onto the walnut and shaped with the rasps and file. I cut the slot last. The only tricky part is knowing where to locate the slot side to side on the thickness of the blank. I held my saws against the door, placed the blank under the saw teeth to get an idea of how far the blade was from the door, and the cut the slot just a bit further to the outside of the blank. I cut the slot at the tablesaw.
-
Perfect fit. I wanted to protect as much of the saw as possible, so I cut out a little notch to match the saw handle. That way, the entire blade is covered up, and the handle helps to hold the saw in place.
-
Rip saws on one side. Some of my saws look exactly alike, but are filed differently. To keep track of them, I put all the rips on one door and the crosscuts on the other. These are my rip saws.


Comments
Matt,
I don't understand. You say you cut the slot with your tablesaw, then cut the handle shape and then "I cut the slot last". How many slots are there? It seems like you'd just have the one slot for the blade.
Grant,
Sorry about the confusion. I honestly don't remember what I did! I'll take a look at them when I get home and post back. However, I can say with complete confidence that there is only 1 slot per holder. Most likely, I cut the slot at the TS, shaped the holder to fit the handle, and then did something else that involved cutting.
Log in or create an account to post a comment.
Sign up Log in