Tips for Turning Holiday Ornaments
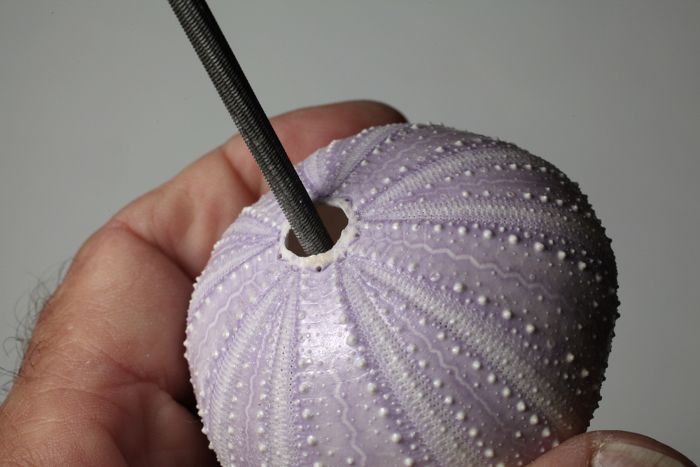
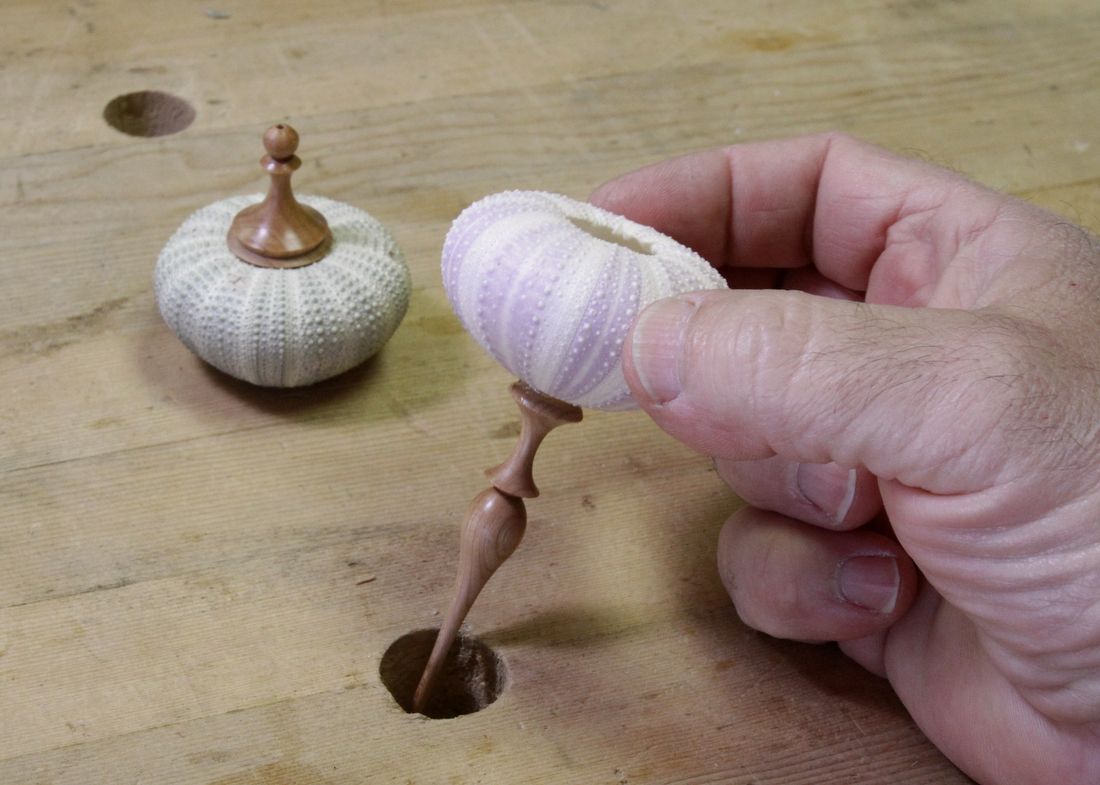
Use a fine round file to prepare the openings in the sea urchin.
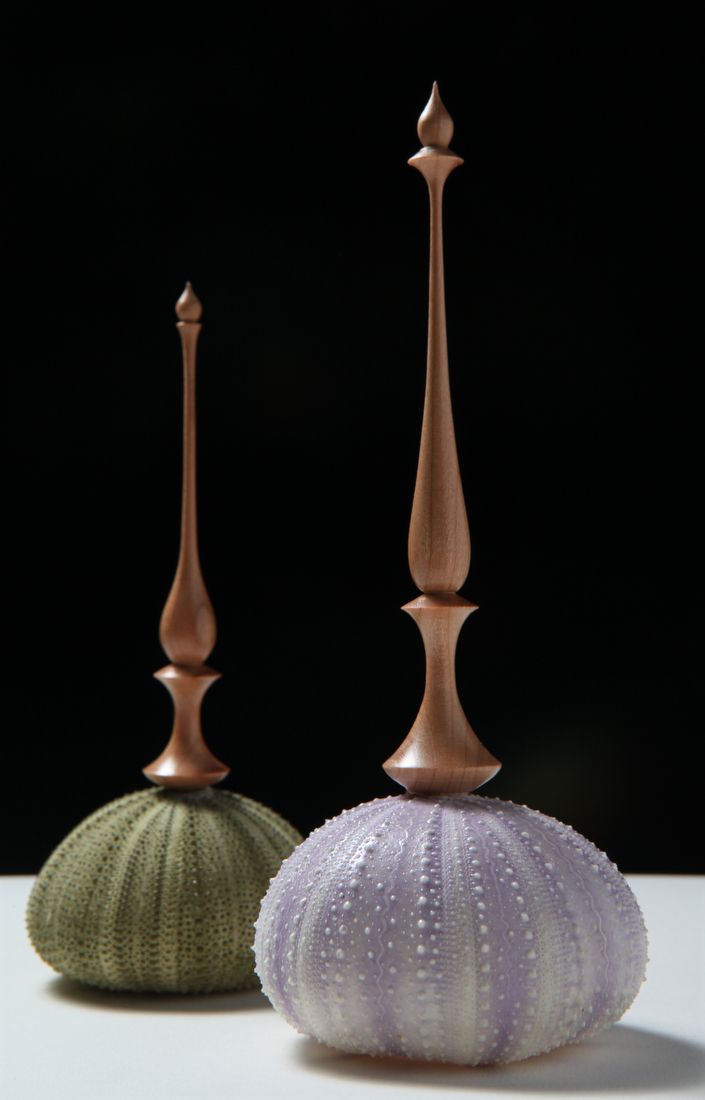
Turned holiday ornaments are popular and I’m always looking for ways to speed and simplify the process of making them. Using sea urchin shells for the hollow portion of the ornament is a no-brainer. They’re readily available, cheap, and beautiful. Colors include purple, pink, red and green and the sizes range from about 3 inches (the largest are named “sputnik” because the pronounced texture is reminiscent of the Soviet satellite) down to less than an inch.
I’ve made dozens of these ornaments and the first few hung crooked and had visible glue joints. To help you avoid these and other common problems, check out these tips:
Preparing the shell– I carefully use a round file to prepare both openings so the finials fit well. Many of the shells are heart shaped and I like to position the larger opening at the top. The sputnik shell’s profile is more symmetrical and has large protrusions. The protrusions around the openings may need to be ground away so the finials seat properly. I use a pneumatic die grinder with a cone shaped grinding point to smooth them, but be sure to use a full-face shield and a dust mask when using the die grinder and run it at a low r.p.m.
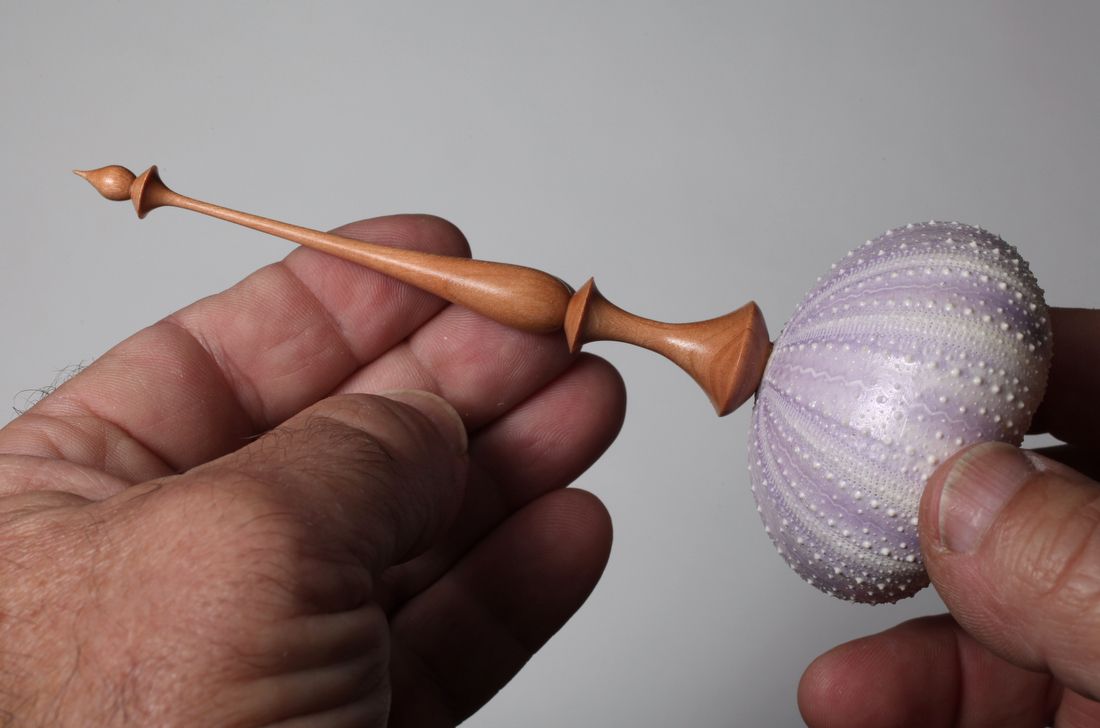
Finials– Finials can be made from any close-grained hardwood, and I make most of mine from cherry. It takes fine detail and finishes beautifully, and the heartwood matures to a rich red color. My early finials were heavy and clunky, but as my turning skills improved, they became thinner and more elegant. I use a 1/2 inch skew and a 3/8 inch spindle gouge for most of the turning, sand to 600 grit, use an abrasive wax product, then give a quick shellac finish on the lathe. I like to place the longer “icicle” shaped finial at the smaller opening (I think of it as the point of a heart), which will become the bottom of the ornament. Turn a taper to the sized tenon so when the tenon is inserted it forms a “V” intersection with the shell. The top finial is shorter and a small hole is drilled to allow an eyelet to be attached. I size the tenon, and make a slightly larger shoulder that acts as a flange and helps contain any glue squeeze-out.
Assembly– I prefer a two-part 5-minute epoxy instead of instant CA glue, because it gives you time to align the finials. Insert the tenon of the lower finial into the bottom hole and use a small dowel or coffee stirrer to place the epoxy. The larger top opening gives you good access. When the epoxy starts to thicken place the shell bottom up and align the finial. Eye it up from a couple of angles to make sure it’s “plumb” before the epoxy sets up. My workbench has round holes for bench dogs, and they’re the perfect recess to hold the ornament for the final glue up. Epoxy the top finial and attach the eyelet to complete the ornament.
-
Use a fine round file to prepare the openings in the sea urchin.
-
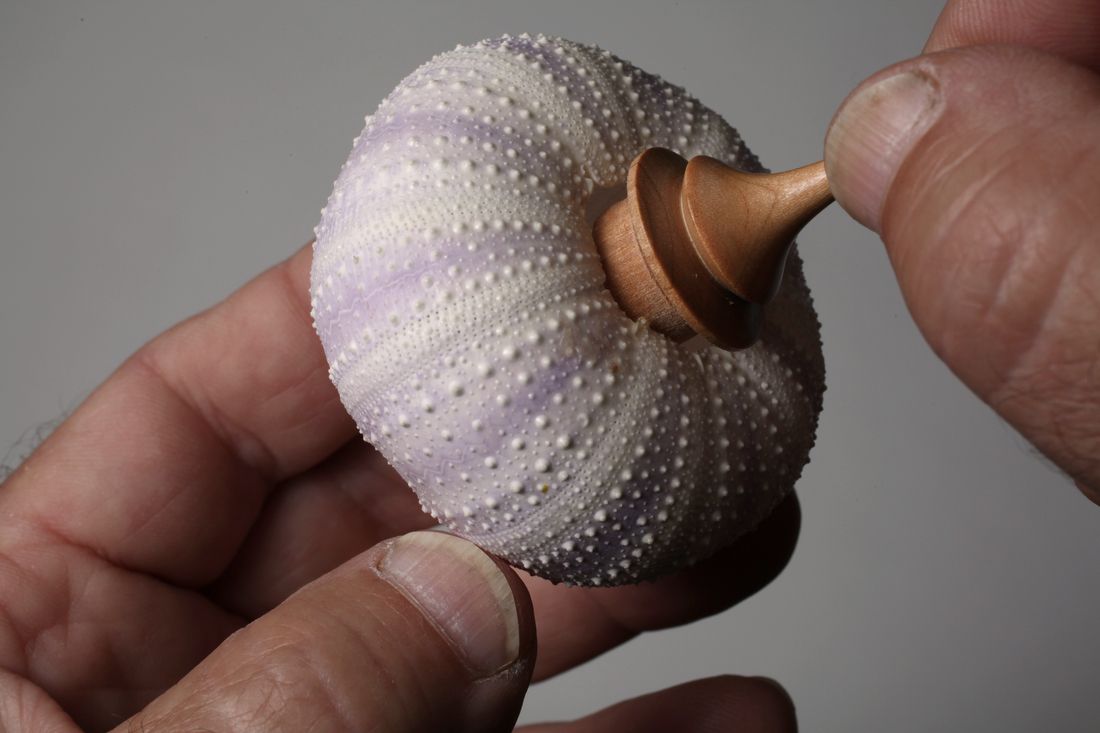
Turn a shoulder on the top finial so it covers the sea urchin opening and helps prevent glue squeeze out.
-
Turn a taper on the bottom finial so it makes a good looking intersection where it meets the sea urchin.
-
Be sure the bottom finial is "plumb." I use slow setting epoxy and align the finial, eyeing it's position from different angles.
-
I place the partially asembled ornament in my bench dog hole and then attach the top finial.


Comments
Joe,
That's a great article. May I post it on our woodturners website, http://www.tristatewoodturners.com? I feel the Chattanooga TN. area woodturners would love to make some of these. Again, well done!
Josh
Excellent project idea! Any suggested sources for the urchin shells?
Thanks Zombeerose, I have purchased sea urchin shells from Craft Supplies USA and the NaplesSeashell Company, and I was satisfied with both. Good Luck, Joe
Log in or create an account to post a comment.
Sign up Log in