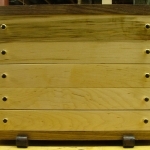
I am completing a chest of drawers, four rows of 2 drawers each which will have false drawer fronts. I would like the edges of the drawer fronts to be very “soft”. Routing the edges with a round over bit will I believe give a very mass produced look. I would like to have a softer look – which I believe is referred to as a “pillow”. I have seen pictures of box tops with the type of treatment I am referring to but haven’t seen drawer fronts. I would appreciate any references to material/sources that describes how to achieve this kind of edge treatment with consistency. thanks LT
Discussion Forum
Get It All!
UNLIMITED Membership is like taking a master class in woodworking for less than $10 a month.
Start Your Free TrialCategories
Discussion Forum
Digital Plans Library
Member exclusive! – Plans for everyone – from beginners to experts – right at your fingertips.


Highlights
-
Shape Your Skills
when you sign up for our emails
This site is protected by reCAPTCHA and the Google Privacy Policy and Terms of Service apply. -
 Shop Talk Live Podcast
 -
 Our favorite articles and videos
 -
E-Learning Courses from Fine Woodworking
-
-


Replies
Hi LT
Instead of rounding over the top of the drawer, why not add a bead to the top and bottom of the drawer face?
Regards from Perth
Derek
Derek,
It truly is an honour to have a response from you. I read a lot of your postings both on this forum as well as the Australian woodwork forum. I also enjoy and have learned a lot from your website. I don't know where you find the time to do it all and still have a professional life.
To your point about adding a bead... I had thought about it but had come to the conclusion that it would be too formal. Your post has caused me to think about it again and I will try a couple of test pieces. Good excuse to use my new LN 66
Thanks for taking the time to help me out.
BTW .. I had the opportunity to visit Australian last year and fell in love with your country. I used the trip as an excuse to order some H&S chisels and am now hooked on Australian tool makers.
LT
Do you have a url that shows this pillow treatment?
Thx
LT,
A roundover bit is too consistant, what you want is a consistantly inconsistant look?
Try rounding off with a hand plane, and if that is still too consistant, a spokeshave- it sounds like what you are after is a sort of un-regulated handwork effect.
Ray
LT,
As Ray mentions, you need to decide what degree of inconsistent can be reconciled with your need for .... regularity?
A spkeshave is my first choice; but I have come to enjoy perhaps more inconsistancy than you want.
If you need more consistency but a "handmade" (meaning handtool) look then consider these for small roundovers:
http://www.leevalley.com/wood/page.aspx?c=3&p=32682&cat=1,41182
For a greater roundover maybe one of these:
http://www.leevalley.com/wood/page.aspx?c=3&p=64009&cat=1,41182
Here is a thang I did some time ago for a neighbour. It was intended to stand on an existing cabinet, hence the lack of a proper bottom-end with skirt & legs. Is this the look you want? Spokeshave, rasp, file and sandpaper were used in that order.
View Image
View Image
View Image
Lataxe
Good Looking piece - nice color - especially like the square holes - Hand made pulls as well ?
SA
SA,
The timber is Ypean beech, got free here and there hence the variation in shades.
I began by making smaller pulls shaped like those you see on the piece. Gawd, the bluddy things looked too small! So I ended up using the Lee Valley bought ones (in red oak) that I had been using as the model. In fact, the larger pulls look better than the tidgers, despite the small drawer size. Something to do with the pneumatic look I think.
I am addicted to square plugs to cover dowels. If I feel brave I make a square hole all the way through and put a square dowel in. As I make the square holes by hand-wacking a mortiser chisel, sans-bit, down the round hole I drilled beforehand with the bit, this is not so easy. It's easier to use a round dowel and just cap it with a few millimetres of square plug.
It was pleasant to form those rounded-over everythings with the handtools, despite it taking a while. It's surprising how regular one may get the curves to look, although a hand passed down any of the edges will feel the variations easily. And a closer look also reveals the slight changes in radius here and there.
Lataxe
Lataxe, old chum,
Sometime, you ort to try driving a square pin into one of those round holes. Counter-intuitively, it works. One must be scrupulous in sizing the pins, they must be the exact same size side to side as the drill is in diameter, not a cat-hair more. Whittle an octagonal section on the first 1/3 or so of the pin, to ease starting it into the hole, more if the pin is longish (as for a bedpost to rail joint), dip the tip into your glue pot, and drive away. 1/4" is the standard size I use for most furniture joinery. Drill and drive whilst the joint is still in the clamps, and you can remove the clamp and go on to the next assembly, handy if assembling a set of chairs or multiple doors.
Ray
Ray,
Do you have any tricks for driving the square pegs with octagonal ends into a round hole without them twisting?
Hi Chris,
No tricks, they usually go straight in, but occasionally one has a mind of its own. On period work, that is not an issue, but I can see where it might be an issue where a contrasting pin with pyramidal head is a design feature:-(
Ray
Can't remember, but perhaps
Can't remember, but perhaps it was Garrett Hack who suggested using a crescent wrench (spanner, Lataxe) on the square section to hold the pin from twisting while being smashed home.
Ray and other square peg lads,
Will this tekneek of pounding the square item into a round hole work with all timbers? I know it works with green timber, as this is a method for pinning the top slats of a ladderback chair to the arms. However, even green oak is relatively soft, the pin and pin 'ole small.
What about pounding that hard beech with an square oak peg (as in that piece)? Perhaps it might also depend on how big a hole (diameter of drill) we want to use? Would 10mm (3/8") be possible?
Lataxe, excited by the prospect of getting a square peg into a round 'ole.
Lataxe,
I have driven 1/4" (6mm) square pegs into 1/4" round holes with no problems, save for the occaisonal twisting. Let's see if the wrench (spanner) solves that problem.
Lataxe, y'ole
Lataxe, y'ole bodger,
Problems I've had in pounding square pins in round holes:
Oversized pins. If the pin is at all larger in section than the hole's diameter, a split is more than likely. Maybe get away with oversized pins in very soft (white pine, basswood or the like) stock, but in hardwoods, splitting the cheeks of the mortise is probable. Sizing the pins (check with calipers) so that the pin stock (I rip 18"- or so- long scrap stuff on tablesaw) is uniform before cutting it up into short lengths is easiest for me.
Very long pins/ very deep holes. Especially if the pin's wood is a brittle one (mahogany), it behooves one to whittle the corners off the pin back a good long ways, so that only the last 1/2" or so of the pin is left square. Situations like pinning a 4x4" bedpost to its rail, when the tenon is centered in the post, you are driving a 3"+ long pin, it's easy to snap one off short.
Softwood pins. The SOP is to match the species of pin wood to the wood that is being pinned, so as to have color compatibility. This can lead to problems with a small section pin in a soft wood, pine, cedar, or the like. Beter to use a similarly colored hardwood, maple or hickory for pine, cherry for red cedar, that will drive easily, and not deform or break off.
I've driven pins as small as 1/8" in chair work, but 1/4" is my "standard" furniture size, have used 3/8 and 1/2 pins on occasion for large scale work- exterior shutters, house doors or the like. Couple of caveats with large pins: they displace a lot more wood at their corners, so I chamfer them more aggressively, leaving just the topmost end square, to avoid the chance of splitting. Keep in mind too, a too large pin in a smallish mortise and tenon joint will remove a lot of the joint's glue surface, weakening rather than reinforcing the bond.
Happy pounding,
Ray
Thanks for the tip, Don. I'll try that next time.
I have no idea what Ypean beech is (European?)
Beech is widely cultivated in North America as well as its native Europe. However we stupid USA folks use it for firewood? Firewood size is very common around me but furniture grade is expensive in my area. I have only made two works with beech. One was a workbench for a friend (he payed for the wood) and a large bedroom dresser for one of my daughters. Beech is wonderful to work with.
I just love how crisp you made the angles of the formed frame members to the drawer front edges.. NICE WORK!
Lataxe
beautiful work. balanced design and excellently executed. I have a long way to go before coming anywhere near your level. right now I produce expensive sawdust.
I have used the LV corning tool on another project a few years ago and found it very prone to tear out. I think I will have more success with hand planes.
as I mentioned in my reply all post, I will experiment with some different edge treatments to see what works best for my project. its a question of design balance with the rest of the piece.
thanks for sharing the pictures
LT
lt,
that pillowed look is very pleasing to me, as well. i use it a great deal and achieve it with a combination of hand and power tools. for example, a panel is raised on the t-saw with a tilted blade and then hand sanded to get it pillowed. also when i cut cloud lifts i do so at the table saw and then hand work them to that soft look.
eef
OOps, I guess we do it the same way. I should have read your post first.
I've made a few boxes with
I've made a few boxes with burl tops with a free form pillow like top. I don't think machined edges look right on burls. I start by cutting a low angle bevel on all four sides with the table saw, similar to a raised panel angle but with no shadow lines. Then use whatever tools you want to soften all the edges, hand planes, spoke shave, rasps...I use a horizontal edge sander and just roll all the edges and surfaces through it by hand. A nice soft look.
I don't know how to do a
I don't know how to do a "reply all" so I will use this reply to thank each and everyone of you who took the time to respond to my request for information.
I now have the concept of how to approach my objective. Using the table saw to remove material (or a plane) and then a lot of hand work to refine the edges seems like the way to go. I will play around on some trial pieces to get both the fine form as well as figure out an efficient approach - I have 8 drawer fronts to do and my wife is after to me to finish the project.
Again thanks to each and everyone.
LT
This forum post is now archived. Commenting has been disabled