Classic window sash and breakfront glass doors with molded muntins are challenging woodworking projects. However, I find that working through the detail design in SketchUp clears up any uncertainty in the construction of these complex joints. Below I will show how I go about designing a window sash. The techniques are similar for doing 18th C breakfront doors, however there will be more angled muntins in this case.
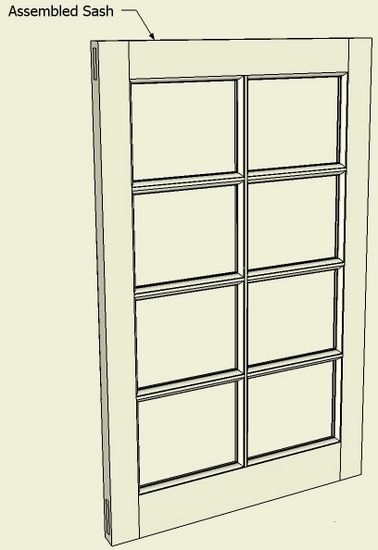
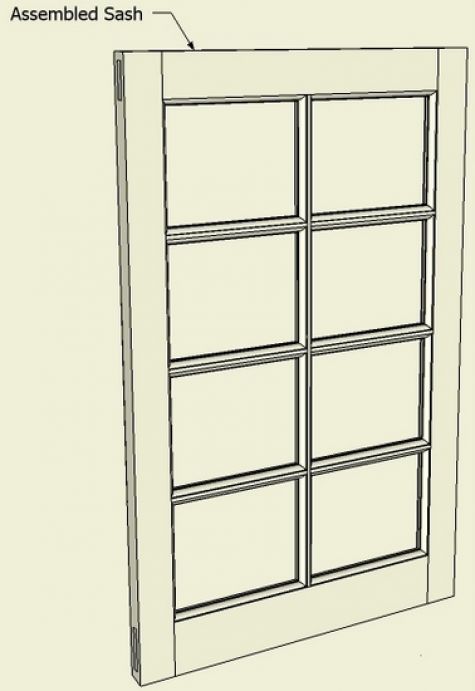
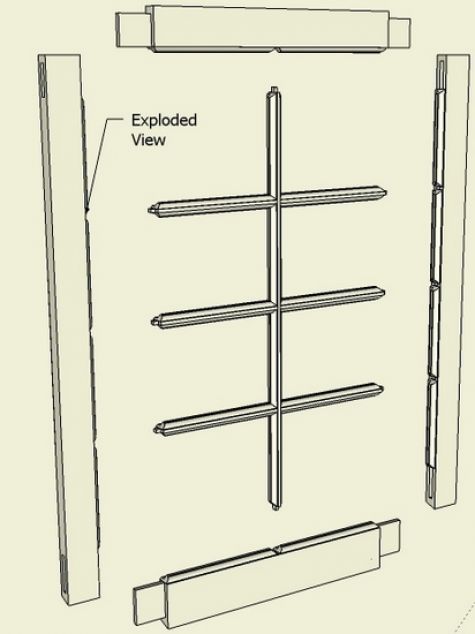
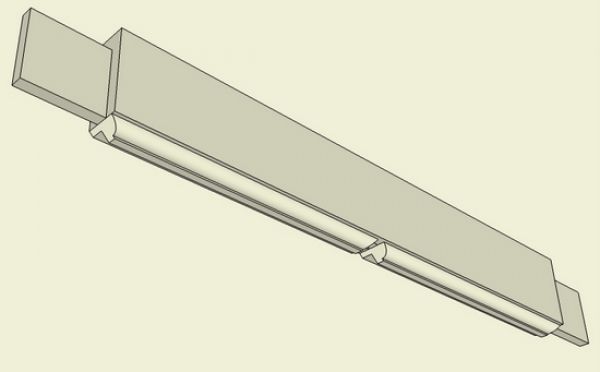
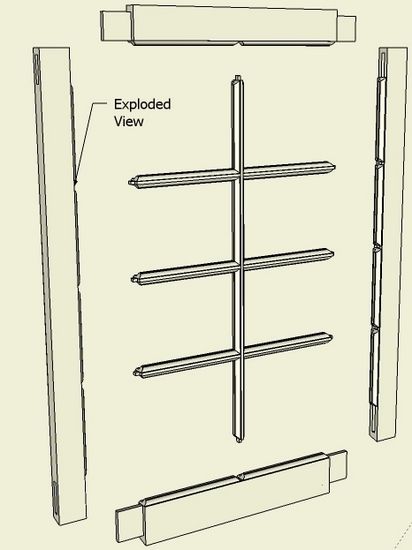
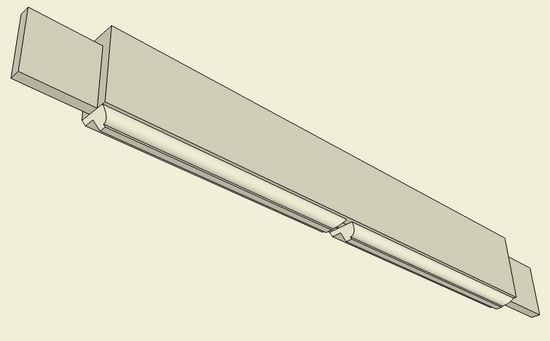
Here is the example sash in an assembled and exploded view.
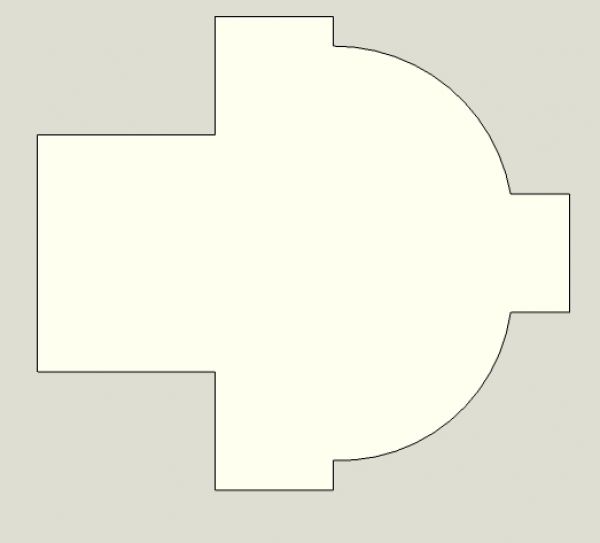
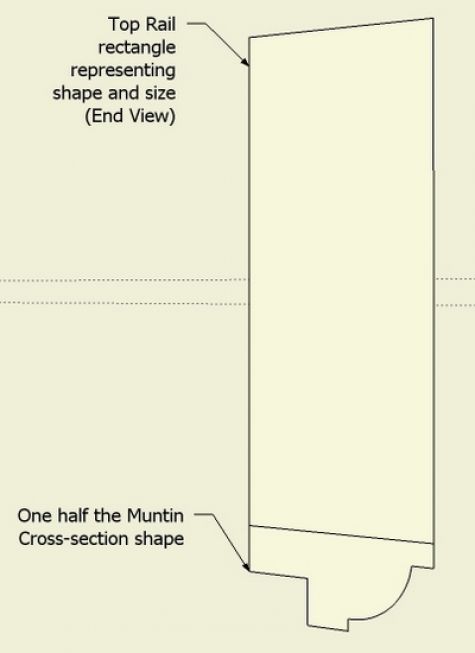
Step 1: I find that it is very important to start out on a sash or door with a detail of the muntin shape. By the way, muntin is an unusual word and refers to the thin connecting molding frames that hold the glass.
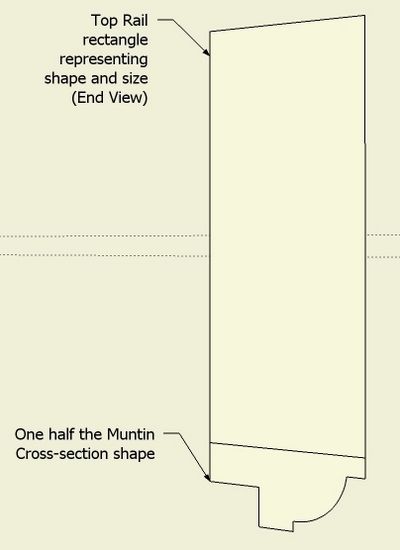
Step 2: Having designed the muntin molding we can now move on to designing the rails and stiles. I will use an example of the Top Rail in the next steps as shown in the following illustration.
Step 3: The first step in making the Top Rail is to create the cross-section shape which includes half of the muntin molding shape we created above.
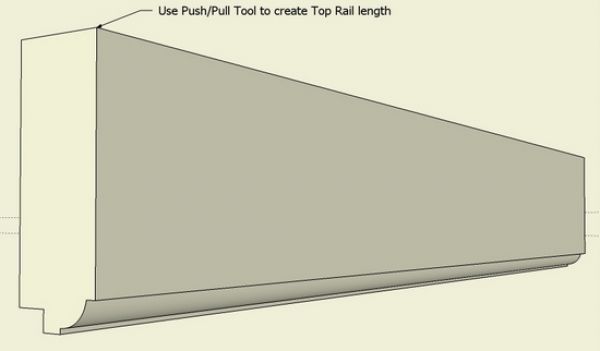
Step 4: Push/Pull the shape into the desired length not including tenons.
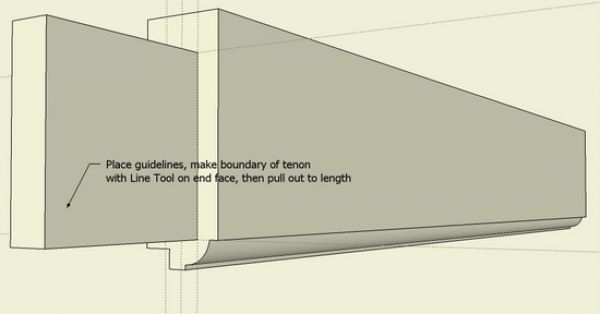
Step 5: Locate guidelines for the tenon and Push/Pull to length.
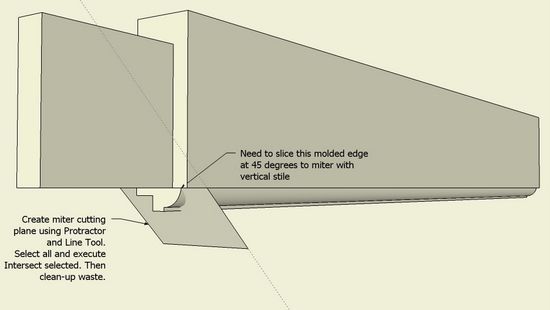
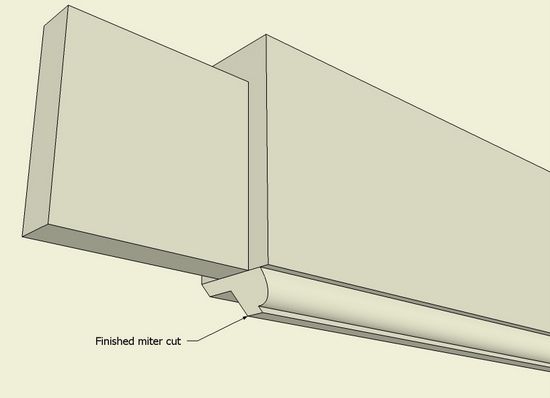
Step 6: The molded edge will require a miter cut to fit up with the corresponding molding edge on the stiles. So we need to make a 45 degree cut on the lower molding. I use a face or plane set at 45 degrees to use with Intersect to create the cut.
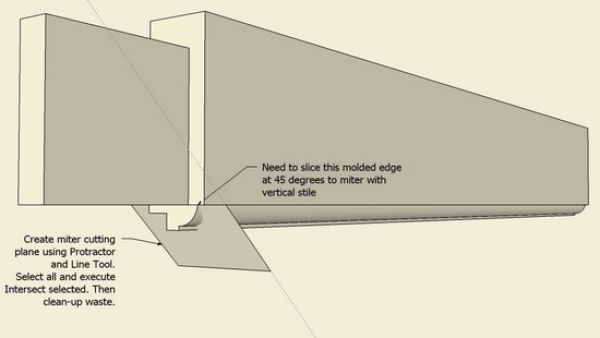
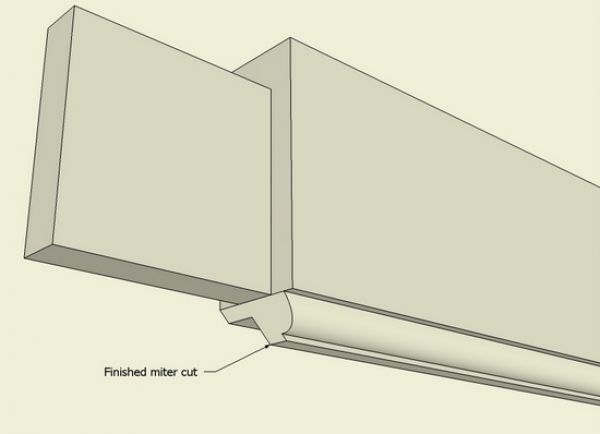
Step 7: After Intersection the miter joint will require clean-up of the waste with the Eraser.
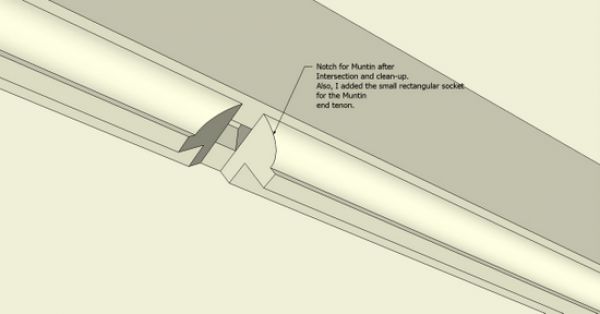
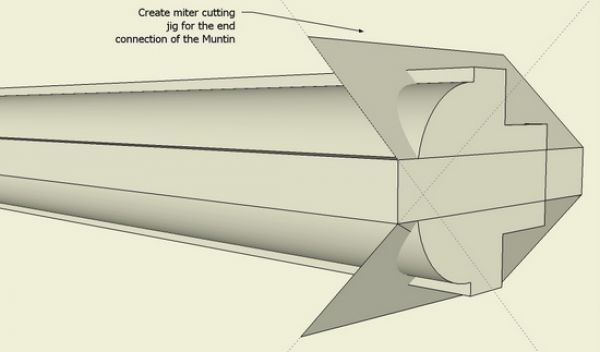
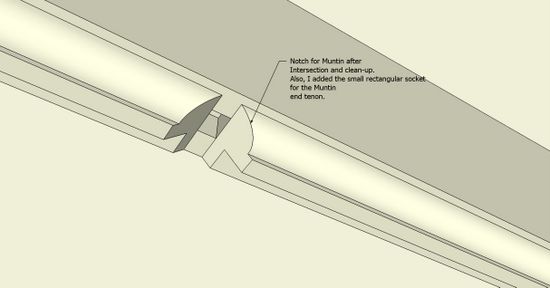
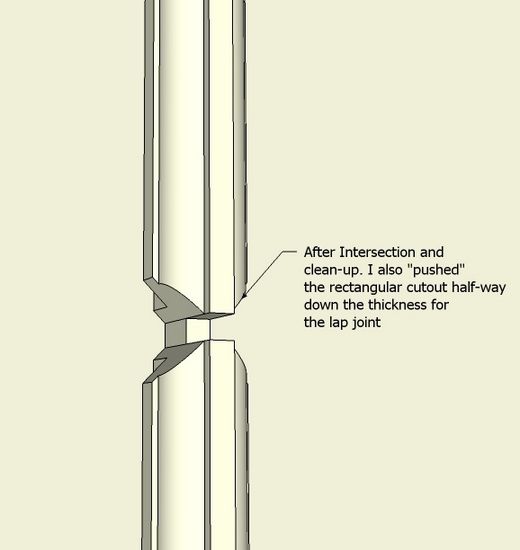
Step 8: We need a socket for the vertical Muntin that connects into the center of this Top Rail. Again I make 45 degree planes which are used to Intersect with the Rail.

Step 9: After Intersection, clean-up is required with the Eraser. The finished socket is shown below. I also create the small rectangular mortise for the Muntin tenon end.
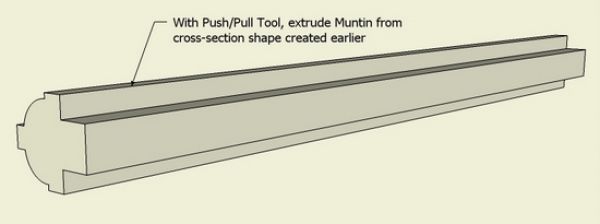
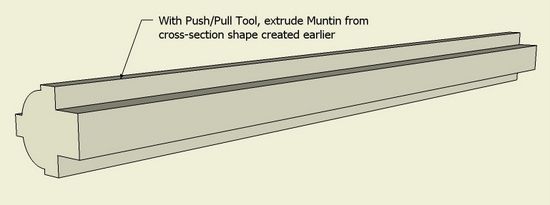
Step 10: To create the Muntin, Push/Pull the cross-section shape of the Muntin as shown in the first Step.
Step 11: We need to create the 45 degree cuts on the end of the Muntin. I make planes at 45 degrees to use with Intersect to create this joint.
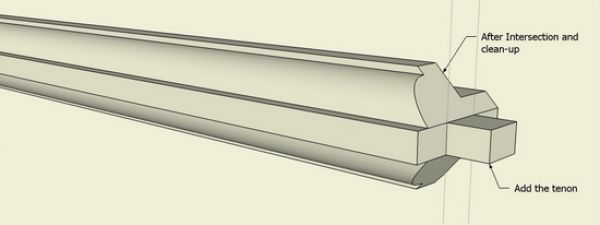
Step 12: I’ve shown the end joint below after Intersection and clean-up. Also I pulled out the small tenon which will socket into the Top Rail mortise.
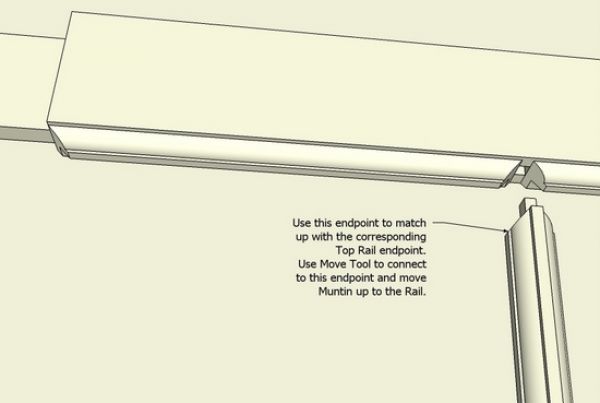
Step 13: With the Move Tool, latch onto a corner of the Muntin that corresponds to a matching corner in the Top Rail socket.
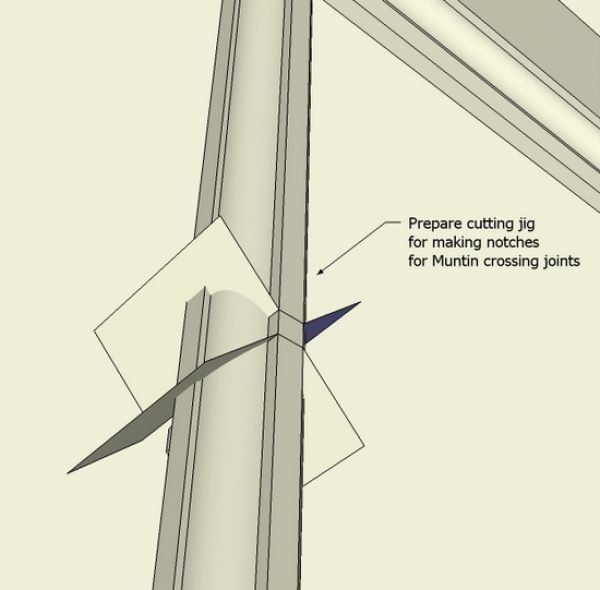
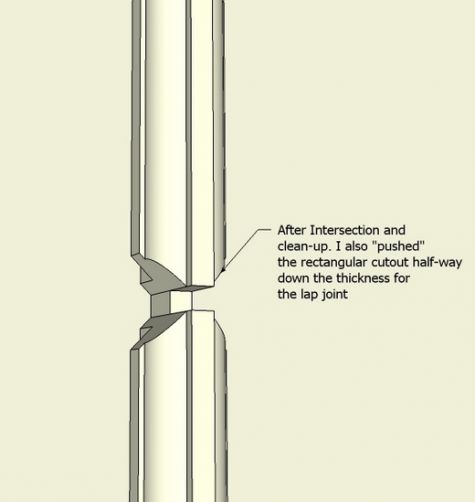
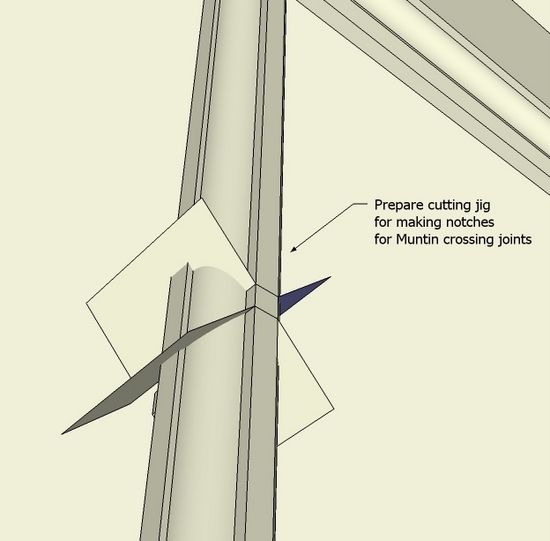
Step 14: The Muntins cross one another with lapped joints. The first step is to prepare cutting planes to create the “V” cut for the crossing muntins.
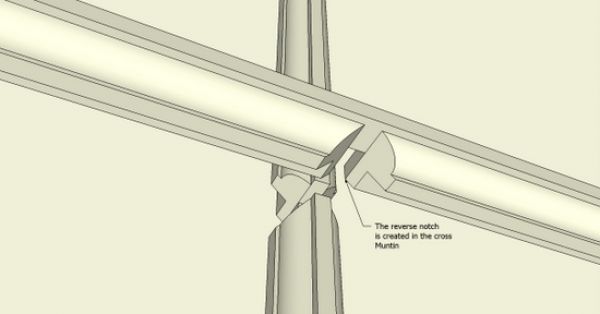
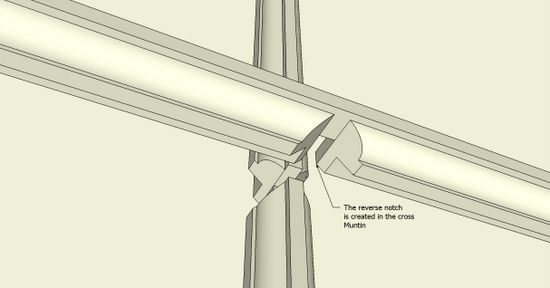
Step 15: After clean-up, I’ve shown below the resulting lapped joint for the vertical Muntin. Note the rectangular cutout that matches up wit an opposite rectangular cutout in the horizontal Muntin.
Step 16: After making the horizontal Muntin, the crossing joint is ready for fit up.
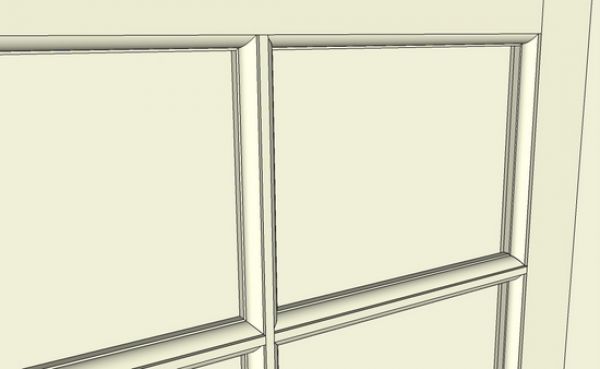
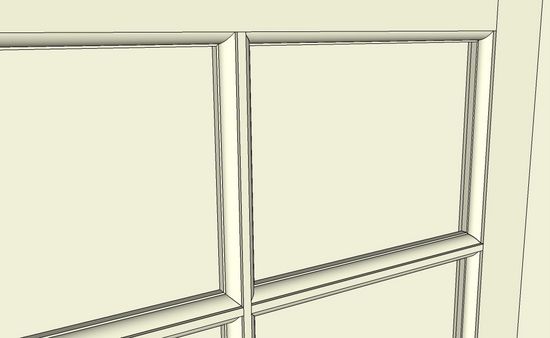
Step 17: Here is a close-up of the final assembly.
I’ve made several doors and sash using these classic techniques. I’m always amazed how strong the structure is even with delicate muntins and heavy glass.
Tim
http:/killenwood.com


Comments
Tim, very interesting article and very well explained. Do you intend making the window frame? That would be great too.
Cheerio
John
JohnMCM: Yes I built four of these sash in oldgrowth redwood. The windows are in a timber frame building I built, also in oldgrowth redwood. I used 18th C hardware iron strap hinges and iron catches.
Tim
Hi Tim, thanks for an excellent article which has helped me visualise how these seemingly simple windows are constructed. But in woodwork nothing is quite as simple as it first appears!!
I am currently trying to repair an existing sash window (dry rot in lower rail) and trying to make a replacement lower rail..... The construction of my window is different to what you show here as the window uses a coping joint between the rails, stiles and muntins- making repair a real challenge.
To succeed I need the router bit set with exactly the same profile as my 40 year old window.
While the the profile is a simple (half round approx 9mm) finding a suitable set is not easy - as most window bits I have seen here in Australia are a more decorative Ogee pattern. Do you have any suggestions for suppliers??
As a second thought, I could make a whole new window using your design above as I only need to find ONE profile bit and avoid the coping joints entirely Do you use a jig to hand cut the miters or some other method?
Dear WarmTone: I would not spend a minute looking for a router bit. I would use hand tools to shape the roundover, such as a shoulder plane, and/or scratch stock.
You could easily make a scratch stock shape out of an old scraper blade or bandsaw blade. The holder for the blade is a simple "L" shaped piece of lumber about 4-in. long and 1 1/2-in. wide (3/4 thick) with a kerf for the shaped blade.
Prior to using the scratch stock, I would use a shoulder plane to rough out the shape.
I also have a set of wooden hollows and rounds (old planes). These help me match shapes in reproduction furniture.
Tim
Hello, I've just read the "lesson" and am greatful for finding it, thanks, but I have a question, how are you cutting the 45o bevels from the muntins, you mention jig, no problem, what kind of saw? And how would you match the rail profile if you were not cutting the bevel from it, meaning how do you match the profile on the muntin that is to be inserted into the rail? I'm trying to match to an ogee profile. My guess is to us a shaper with the proper cutting heads, in reverse of the ogee, but I don't have that and will be doing it by hand.
I hope that not to confusing??!!
Thanks
Gisli Balzer
To Gisli Balzer: I do not use a jig for cutting the 45's. I use my bandsaw with a miter fence. The bandsaw is equipped with a 1-in. wide carbide-tipped blade. It makes a very clean cut which requires no clean-up. If the joint doesn't quite fit, I can remove a sliver with this carbide blade to slightly widen the 45 degree slot in the rails and stiles.
When cutting the 45s on the muntin ends with tenons, you have to stop the cut before cutting into the tenon.
Tim
nice work Mr thankyou very much
As I am about to embark on making a set of replacement sliding sash windows for an 18th century house, here in the UK, I have been researching info' on their construction. This is the clearest account that I have come across of muntin fabrication and assembly. Excellent - thanks!
Log in or create an account to post a comment.
Sign up Log in