Part 2: A Violin is Born at Fine Woodworking
 Mar 07, 2012
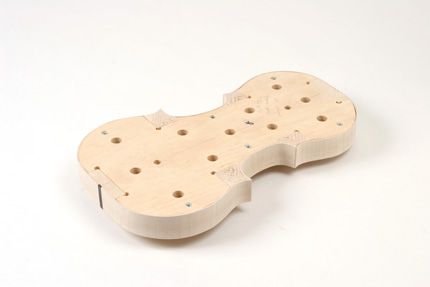
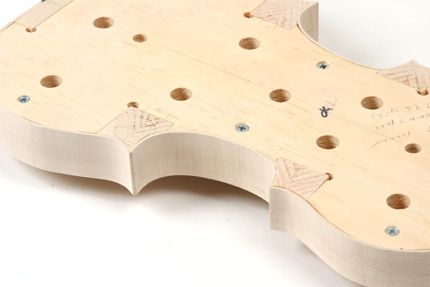
At this stage of violin construction, the ribs have been steam-bent and attached to glue block temporarily tacked onto the form.
In the first installment of my series on building a violin, I went over some of the basic techniques involved in constructing the bending forms. This week, let’s take a look at how all the rib pieces come together.
These are the final steps before shaping of the top and bottom plates can commence. At this point, it’s all about building a stable base for the spruce and maple plates that will be glued onto the ribs later.
Attaching Glue Blocks
With all my rib pieces steam-bent, I turned my attention to the glue blocks that will hold the six ribs in place. You may have noticed the six notches that were cut out of the violin form in my previous post. These notches are cut into the form in order to accept the glue blocks that hold everything into place. By just tacking them onto the form using a hot glue gun, I’ll be able to snap them off the form when the time comes to attach the violin’s top and bottom plates. Although it flies against conventional wisdom, these blocks are glued on with the end grain facing up in order to allow for better adhesion of the ribs to the blocks. It’s been done this way since the 17th century, so I’m not going to question it too much.
 Here you can see the six notches (two on the ends and two more on either side) that were cut out of the form. Seems counterintuitive, but they are indeed important. click to enlarge |
 Square glue blocks are tacked in with hot glue. Then I retrace the violin’s shape onto them and cut that “V” shape out with a coping saw. click to enlarge |
Ready for Glue-Up
 Text. click to enlarge |
With the glue blocks attached and shaped, I’m ready to glue up the rib assembly. This is where things can get real hairy, real fast. Clamping is achieved by sliding dowels through holes drilled straight through the form. Larger diameter dowels that reflect the radius of the curved areas where the ribs meet each glue block are than held into place on the outside of each rib while rubber bands, or in this case some heavy duty rubber gasket material, is wound from one dowel to the other. This causes the two dowels to be driven towards one another, thus holding the ribs to the glue blocks while the adhesive dries. The photo at right gives you an idea of just how precariuos this can be. I got a bit better at it as time went on.
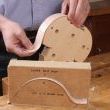
The rib piece seen at right is the “center bout” rib. It’s essentially an elongated “U.” I wedged a portion of my original bending form in between the two rib pieces thar are extending up and away from the form. This served to help drive the ribs outward (left and right in the photo), into the glue blocks on either side. It worked out quite well!
Joining the Ribs at the Top and Bottom
Mating the two opposing rib pieces on the area at the top of the violin (where the neck will eventually be attached) was easy. This joint doesn’t have to be super-tight, since I’ll be cutting a dovetail wedge out of the end of the top glue block in order to slide in the neck piece. Down at the bottom of the form however, it’s a different story.
 caption. click to enlarge |
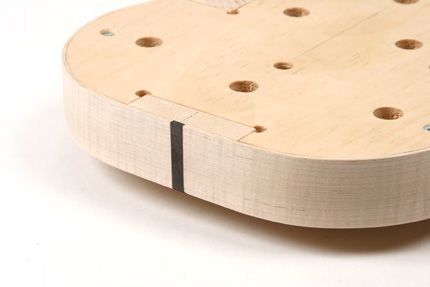
I wasn’t able to get a perfect, tight fit between those two mating rib pieces, so I opted to route out a dado (straight through where the two rib pieces joined. I glued in a nice ebony scrap and planed it flush. Perfect fix! With that problem addressed, all that was left was to plane the ribs down flush with the form on both sides.
Now it’s time to purchase some spruce tone wood for the top (belly) and some nice figured maple for the bottom plate. In the next installment of this series, I’ll bet to work carving those two plates. This is where the REAL work begins!
-
At this stage of violin construction, the ribs have been steam-bent and attached to glue block temporarily tacked onto the form.
-
In order to hide a poor end grain-to-end grain join, I routed a dado and glued in a small scrap of ebony. Perfect fix.
-
The "center bout" is what really gives a violin its signature shape.


Comments
Your blog inspired me to research building a violin of my own someday. What I have learned is there is so much more to it than I ever imagined - from the choice of wood, to the science of carving and hollowing the top and bottom plates, tuning the plates, inlay of the purfling, and so on. In some ways it's like a family doctor doing an open-heart surgery! I can understand why they can take months to build, and why the schools that teach violin making are three plus years long. Building a functional violin is not an undertaking for the faint of heart.!!
Found that reading this article was very interesting . I had a physics professor at the University of Minnesota who as a hobby made his own violins. As he showed me his shop and showed me how he did it I was very impressed. That was over 60 years ago. Now I see similar work published in your pages. Again, it is very interesting. Thank you
Sir, Where may I find the pattern for the bending form? Thank you.
Log in or create an account to post a comment.
Sign up Log in