Repairing a Checked Tabletop
 Jan 19, 2012
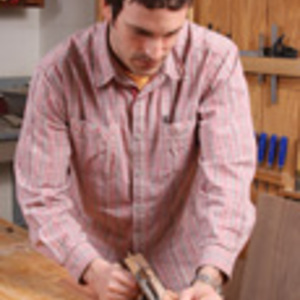
Unlikely tools for fixing a checked tabletop.Syringes are obviously hard to come by, so I had to rely on a relative who used them to adminster his own medication.
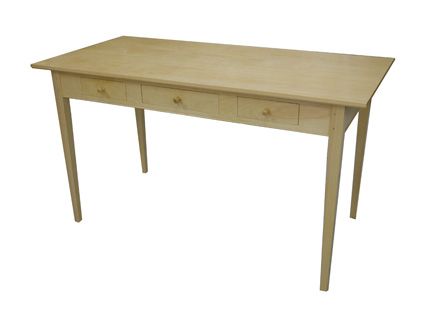
As a web producer here at Fine Woodworking, I find building furniture in the FW workshop to be an invaluable source of online topics. It’s as if I get to share the building process with thousands of folks I’ve never met. Case in point: a small check that opened up in the end of my soon-to-be-finished Shaker writing desk.

The crack emerged after I had applied the first coat of finish, so I didn’t have to worry about undoing a great deal of finishing work in order to fix it properly. Phew. I knew I had to address it however. The last thing I wanted to do was “let it go,” only to find the check spreading further down the top of the table over time. My solution was to reinforce the check with a spline glued into the end of the table. I followed up with a bit of cyanoacrylate (gel-style) squirted into the crack on the tabletop. This was done, not to reinforce the wood (that was achieved with the spline) but rather, to fill in the gap between the two halves of the check.
Unless you’re a doctor, syringes are pretty hard to come by. You can use a glue syringe but I’ve always found them difficult to use in really tine cracks like this. Luckily, I had a relative who was receiving shots at home. That said, I only had one to use-I had to make it count!
 |
Rout out a spline slot-Using a trim router outfitted with a 1/8-in. straght-cutting bit, I cut a 3/4-in.-deep spline slot that intersects the crack in the end of the tabletop. |
 |
Square the slot-Next, I squared up the ends of the slot using a 1/8-in. chisel. |
 |
Prep Your Spline-I was careful to use wood from the same boards used to construct my tabletop, for the spline. Hopefully, the expansion and contraction between the top and the spline will be equal. Also, the since spline is only about 1-in. wide, I don’t expect it to expand enough to force the check open again. |
 |
Glue and plane it flush-After gluing in the spline, I used a block plane to bring it flush with the table, and just kissed it with a bit of light sanding afterwards. That should serve to reinforce the joint. |
 |
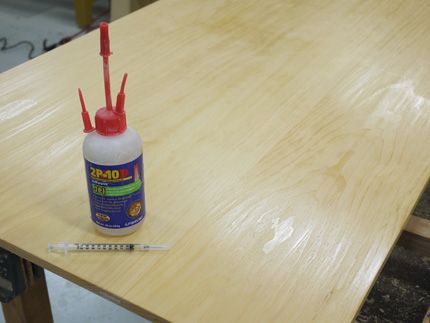
Address the tabletop surface-For the visible hairline crack in my top, I wanted to address the “feeling of the crack.” I wasn’t concerned with the fact that I could see a small line but I did want to ensure that a finger or hand running over the tabletop didn’t feel the valley between the two halves of the crack. In the end, I used a syringe to squirt just a bit of gel-style cyanoacrylate into the crack, smoothing it with a card scraper after it dried. |
-
Unlikely tools for fixing a checked tabletop.Syringes are obviously hard to come by, so I had to rely on a relative who used them to adminster his own medication.
-
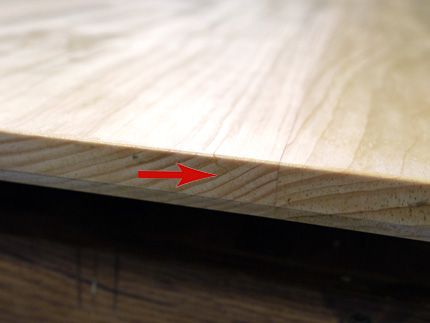
The check in the end of this tabletop is subtle, but it's there. I certainly didn't want it to continue cracking down the length of the tabletop as time went on.
-
Here on the writing surface, you can get an idea of the length of the split: about 5-in. I used the syringe to squirt a bit of cyanoacrylate glue into the occlusion.
-
Behold the nearly-finished desk. I still have to build up several more coats of finish.


Comments
Since it was early stages of completion, you could have kept integrity and added style simply by adding breadboard ends. Determine width of both ends, and cut all material from one end. still re-enforce check same. Saved. with style.
>"Unless you're a doctor, syringes are pretty hard to come by."
Not really. I buy 21 & 23 ga. syringes for 25 cents each at my local pharmacy. No Rx required. My SIL M.D. says the general theory is they'd rather let drug abusers have easy access to clean needles than have them share, reuse and risk blood-transferred diseases.
I also buy 16 and 18 ga. syringes in the veterinary section at my local farm supply store (Tractor Supply Co.) Syringes are in the back and needles at at the checkout.
If you're going to use the card scraper anyway, just make two or three applications with the thin CA glue, which should flow into the crack easily. Let dry after each, scrape, done. No need for syringe.
I'm guessing there wasn't enough meat for the bread-board ends.
Hope all of your fixes are for the wood failing not the woodworker.
JMeeley: Absolutely could have done a breadboard end but at the end of the day, I just didn't want BB's breaking up the expanse of the tabletop. So I opted for this method.
byhammerandhand: Interesting! I've never been able to get a hold of them here in Connecticut. That's good to know.
Best,
-Ed
You can by glue syringes. Just Google “glue syringes”. Here’s one example:
http://www.leevalley.com/en/wood/page.aspx?p=20003&cat=1,110,42967
This looks like a case of the wood losing moisture through the end grain. Any thoughts on why it happened now, e.g. you moved the piece into a dryer environment or weather patterns shifted to drier and colder?
Is the spline grain oriented the same as the table grain? If so, why would this small spline be likely to fair better than the original intact board?
Are you going to take any special steps to seal the end grain more thoroughly than long grain, e.g. coats of shellac on end grain only?
Thanks for sharing this, It would be educational for us to know how the fix holds up over time.
There was a tip years ago that would have let you use regular wood glue. Put glue into the spline hole and then use a shop vac nozzle over the crack to suck the glue through, thus coating the crack. If you have a "crevice tool" attachment it is pretty easy.
Whoops! I forgot to mention that he used the shop vac to suck glue into the crack without the need for the spline. He simply clamped the board once he got the glue into the crack. (Your spline does offer more strength, but at a cost of appearance).
It also seems like he used packing tape on the top side to limit the exposed length of crack if it was longer than his shop vac nozzle - but my memory isn't that clear :-)
What a cool fix! It would not have helped me with a large crack that open on a custom maple dining table over a year after it was delivered. I completely cut, rejointed and refinished that top a lot of work but my customer is happy. I'll keep this fix in my bag of tricks.
You could accomplish the same repair using a biscuit jointer. Cut the mortise using a biscuit jointer. Make a biscuit out of the same board, as you did the spline. Probably not much faster, but maybe a little.
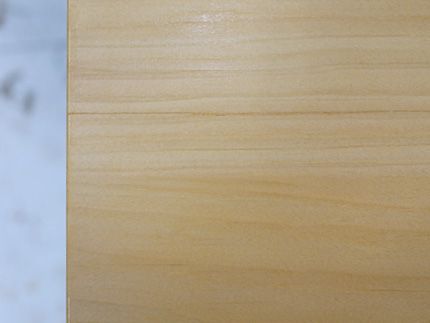
Fiveoaks: I should have perhaps added that if I'd wanted to make the crack invisible, I might have opted to tint the CA glue with some powdered dye. But again, I didn't really mind the visible hair line - I juste wanted it to be smooth to the touch. The tabletop is finally finished (put the last coats on today) and I'm quite pleased with the result. The spline can barely be seen - you really have to know it's there to find it.
Oh, and concerning the syringe - there is one caveat - I found that the small spring in the syringe blew out after squirting the gel into the crack. By the time I was finished, the spring and syringe tip gave up the ghost - to much pressure (remember, these syringes are designed for liquids, not gels) - so be careful. As for the vacuum trick - yes, I've known folks to use that method as well, to good effect.
Cheers,
-Ed
cirelloman:
My theory has to do with the finishing process.
On the day I began to apply finish, I applied the first coat on the underside and allowed to dry overnight. The crack emerged overnight so I'm left to surmise that in the interim time between application of finish on the other side of the table, the top experienced uneven moisture absorption from tha air, allowing from some movement. Just my guess. That's why I'm always in a rush when applying finish to a top - I like to get it on as quickly as possible, and secure the top to the table via buttons, also as quickly as possible.
Best,
Ed
@Ed,
While the finishing process may have been the straw that broke the camel's back, so to speak, I think it's safe to say that the internal tension that led to the crack has been there for a while, and if it hadn't opened up when it did, it could very easily have done so next week, or next year, or never.
-Steve
saschafer: I'm just glad I caught it when I did. better now than 6 months down the road when my computer is sitting atop it in the living room!
Cheers,
-Ed
Ed,
My first thought was as cirelloman mentioned, if you are installing the spline for strength, you have the spline grain running the wrong way. It is as weak as the original wood(which failed, I might add).
Using a biscuit would also have the same grain orientation as you installed your spline and would not fare any better IMO. Biscuits are oriented such that the grain runs from side to side, not tip to tip. This is done for a reason.
I would recommend on future problems such as this, you run the grain across the joint you are strengthening, not parallel to it. If you are concerned about looks, then you can cap the spline off with a very thin piece with the grain running parallel to the existing grain. Just a thought.
Rance
Hey just a thought, Why didn't anyone mention a butterfly on the backside? Along with fill and color. Might also be mindful of the weather when dealing with finishes. Hate it when things go wrong at the finish.
There was always the option to rip the top along the crack and re-glue. Seems like you might have had to redo the first finish coat anyway. No tricky routing the narrow end of the top, milling a spine to fit or fussing with the CA.
any pharmacy can and will sell you syringes in a wide range of gauges.
Log in or create an account to post a comment.
Sign up Log in