
I commented in my last blog entry that Scenes seem to be the most obscure feature of SketchUp. For when I show my computer screen (and this happened at AWFS), I can count on immediate questions such as: “What are those tabs at the top of your screen.”
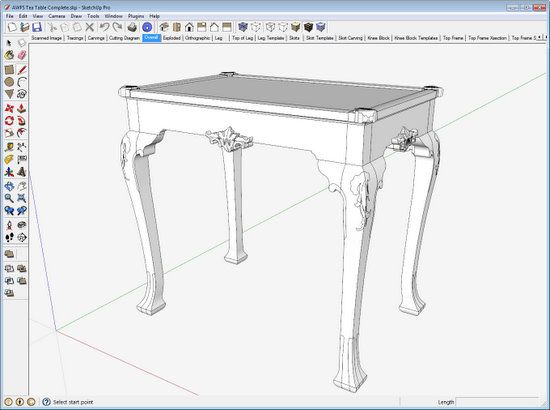
Here is the screen that I showed at AWFS:
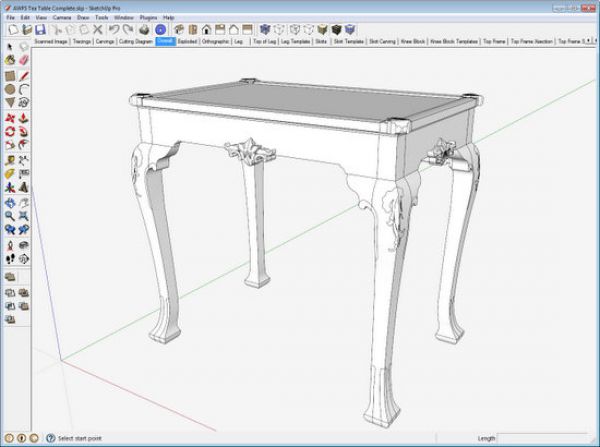
It doesn’t take long for hands to raise in the audience – How do you get those tabs just below the horizontal toolbar at the top of the screen? The tabs are labeled Overall, Exploded, Orthographic, Leg, Top of Leg, etc.
These tabs are Scenes – that is, captured and saved views of the SketchUp model. Scenes are a remarkable feature (included in the free version) and without them, creating shop drawings would be impracticable. Indeed, without Scenes, SketchUp wouldn’t be a feasible tool for woodworking. You don’t need Scenes to create a 3D model, but they’re required to deliver plans used in the shop.
I create many scenes for my furniture designs – sometimes exceeding 40 in number, depending on the complexity of the piece. My scenes always include ;
1. An Assembly view
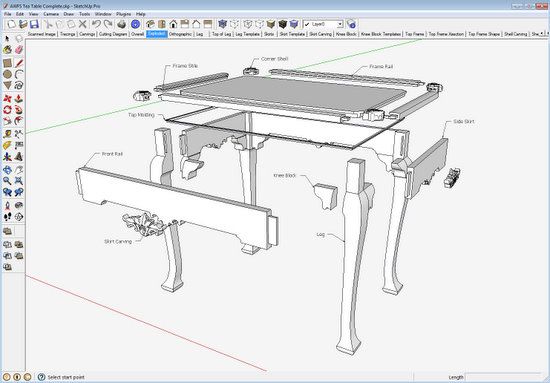
2. Exploded view
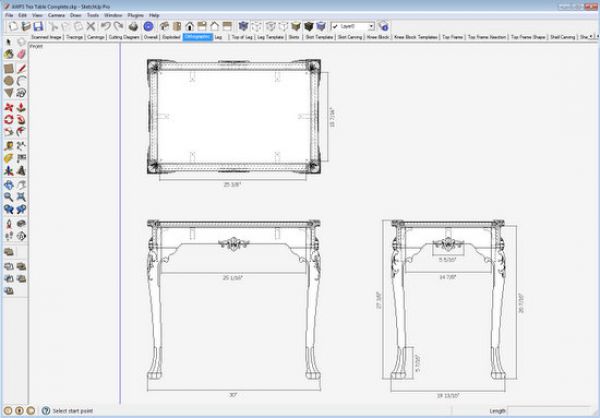
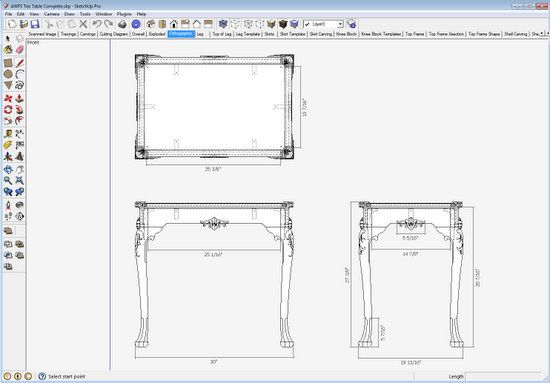
3. Orthographic views (top, front, and side) with overall dimensions
4. Perspective views of each component
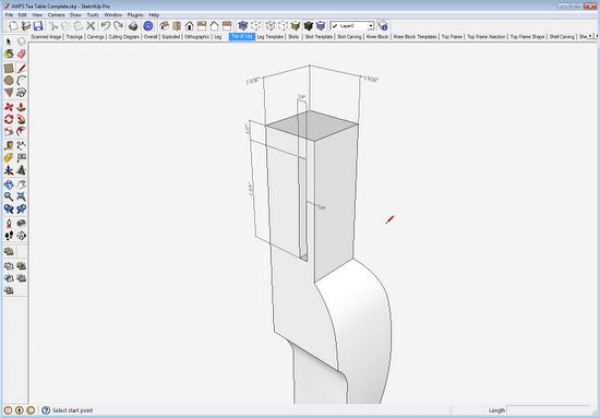
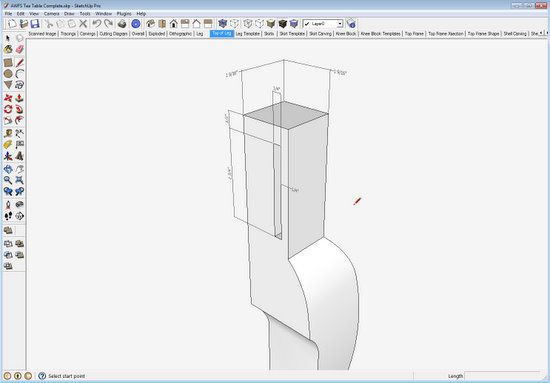
5. Detailed joinery views on components including dimensions
6. Orthographic views of shaped components for full-size templates
Here are a few examples: Exploded, Orthographic, Detailed Dimensioned Joinery

How to create and use scenes is covered in detail in Chapter 15 of my book. Here are some quick points.
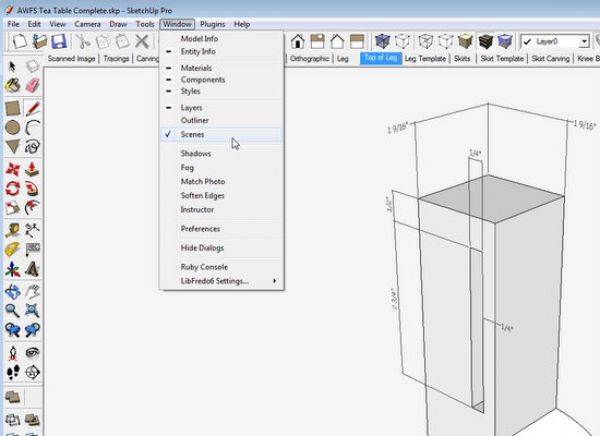
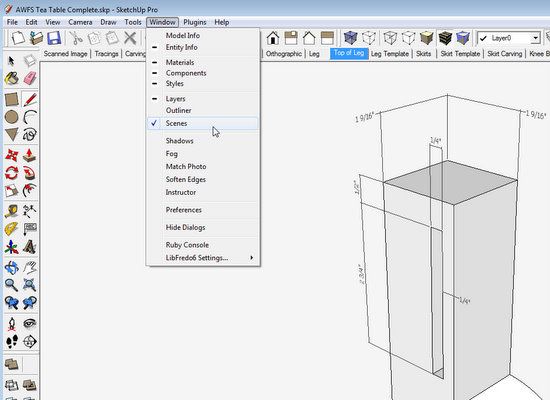
Click on the Window tab – a menu appears as shown below. Note the Scenes item in the list.
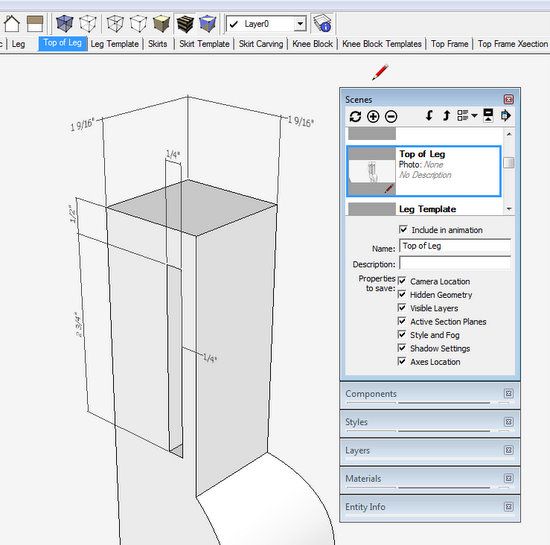
When you click on the Scenes label in the list above, a Scenes dialog box appears as shown below.

As you hover the mouse cursor over the icons in the Scenes dialog box, a label will appear announcing the function of that icon. The top two icons are the most used important ones – the chasing arrows is a scene update button. After making any changes to the scene on the screen, make sure to update the scene with this button. The next icon in the line is a circle with + sign. Clicking this button, makes a new scene and adds a tab at the top of your SketchUp screen. You can name the scene whatever you want.
Often I’m changing the Styles of my views in the saved scenes. For example, I like to see my orthographic and template views with Back Edges turned on. Sometimes I want a particular scene shown in X-ray. You can save these scenes applying these unique style differences. Likewise, I want scenes to show a specific set of layers. Again, I can make these differences that deliver an effective drawing package.
If you are interested in making shop drawings, then get to know Scenes. You’ll quickly find out how powerful they can be.


Comments
Cool. I've never used scenes, but will now.
When doing scenes and then need to change a componet I don't always to get the componet in all the scenes to change. What am I doing wrong?
Thanks for your help as always.
To Stevard: I would guess that you don't have the a common component in each of these scenes. If they are the identical defined component, then your change on one would occur in all scenes.
Right click on each of these components, select Entity Info from the list, then compare the names of the component.
Another explanation is that they are not really components, rather groups. Changing one instance of a group will not be reflected in copies of that group. If this is the case, my recommendation is to not use groups, only components.
Tim
First time that I write. Just wanted to thank you for your posts. They have been really useful. Also, I have really enjoyed your book. It would be great if you could publish another one specifically about all the windsor chair models. I would buy it. Once again, THANK YOU.
To Ocampo: thank you for your participation and the idea for another book.
Tim
Log in or create an account to post a comment.
Sign up Log in