
Often I find myself fairly complete with a model design, yet have second thoughts about the overall size or configuration. Or following a presentation to a customer, adjustments and tweaks will be required. Even with detail joints in place, these adjustments to the design can be made without too much effort.
I’ve been designing and building a Loft Bed, and continuing to make late changes in design involving the overall size of the bed. Some of these changes are due to incorporation of safety requirements required by the CPSC. The following are steps I use to facilitate these types of changes.
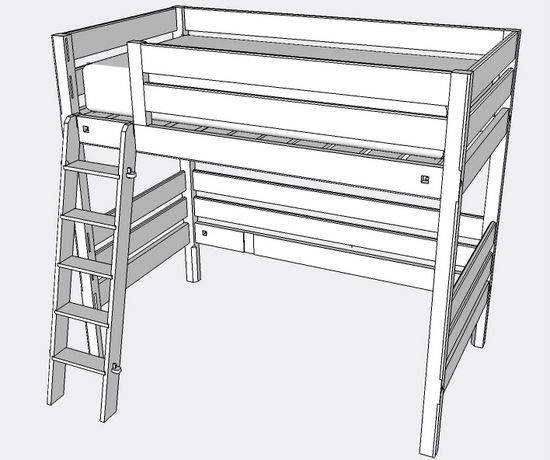
Here is the Loft Bed example:
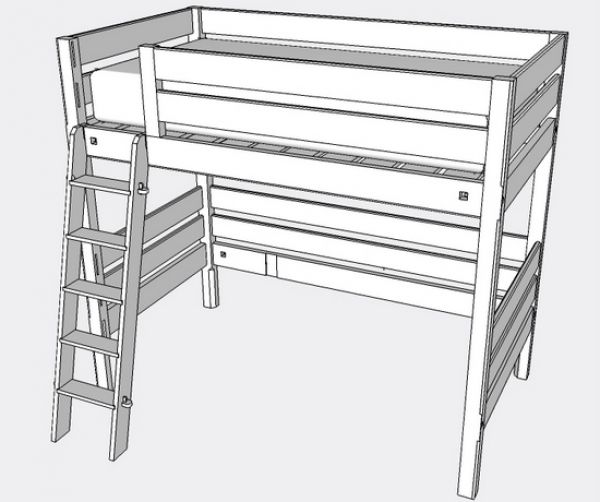
Let’s say I need to adjust the overall length and width of the completed design.
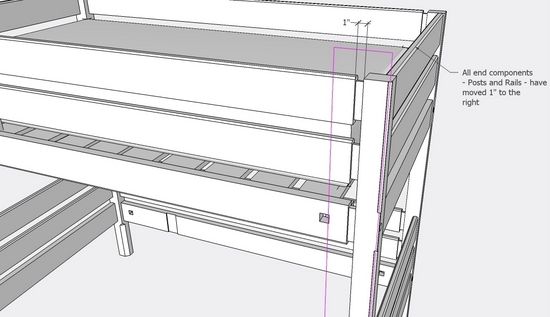
Set the Camera to a Standard Front View, and also to Parallel Projection. To increase the length by 1″, first draw a Select Box (Left to Right) around the Right Post. Because we are in parallel projection we can be very precise about the selected components with this Select Box. In fact, we will select all the end components including all Posts and Rails that make up the end framework. Now choose the Move Tool and move the selected components 1″ down the red axis. When I make a move like this, to ensure staying on the Red Axis, I tap the Right Arrow Key, and type 1 in the Measurements Box.
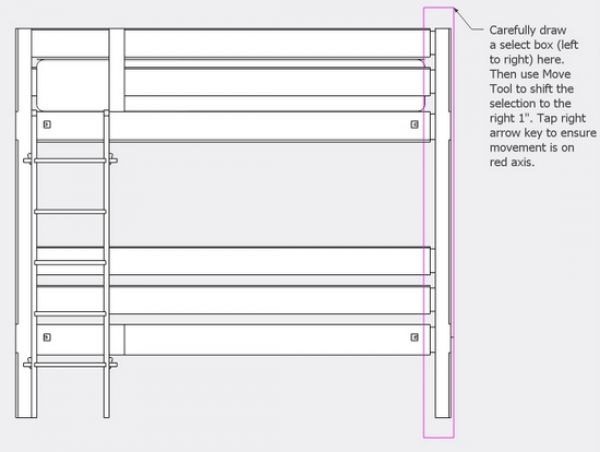
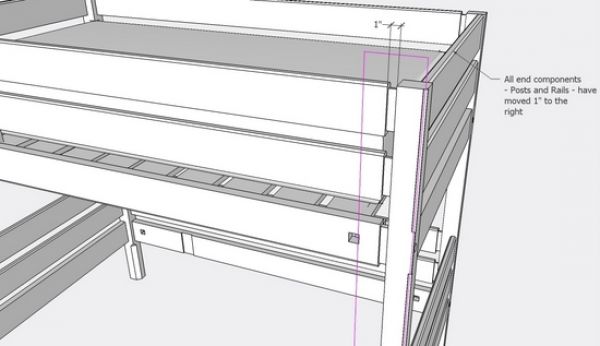
Here you can see the result of the 1″ move. Note that all Posts and Rails were included in the 1″ shift.
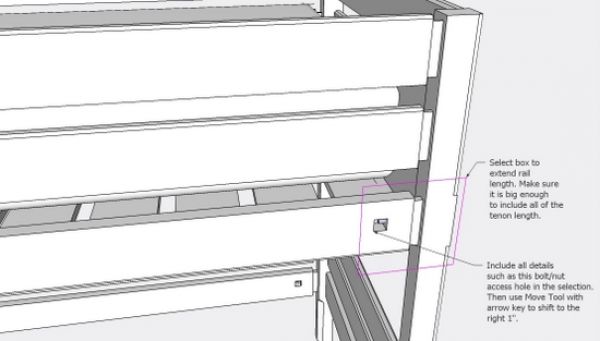
Now we need to adjust Rail length to fit the new configuration. In this case I’ve jumped out of a Camera Standard view and into Perspective. I draw a Select Box around the end joinery of one of the Rail components. Part of the joint is the bed bolt/nut access hole, so this is included in the selection. Also make sure to include all of the tenon length in the selection.
Now with Move Tool, extend the length of the Rail 1″. Again I tap the Right Arrow Key to stay on axis. Do this once for each unique Rail component (in this case two unique rail types).
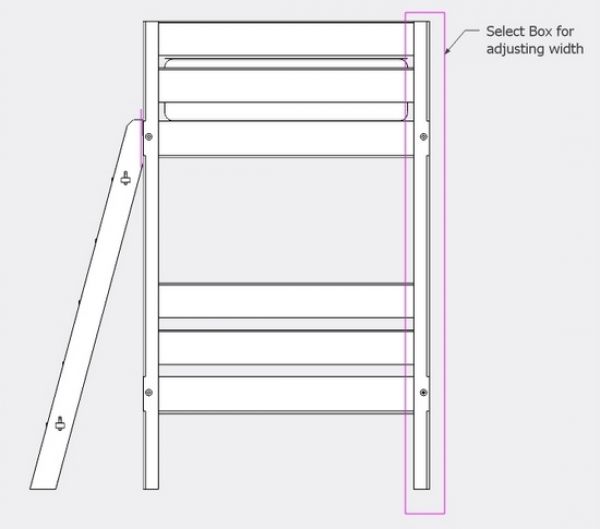
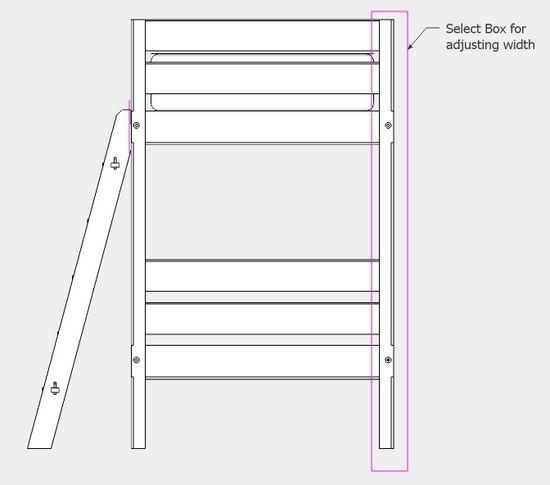
To change the overall width shift the camera to a Right or Left Standard View and Parallel Projection. Use a similar process to select all the Posts and Rails and move en masse the specified distance. In this case I tap the Left Arrow Key to keep the move on the Green Axis.
Often when making these kinds of adjustments, I save the file as another name (perhaps adding a version number), so I can go back to the previous configuration if the new modification is not accepted. However, I can’t remember a case when I actually had to go back to the older version.


Log in or create an account to post a comment.
Sign up Log in