

As Tim mentioned in his last post, one of the new additions to SketchUp 8 Pro is the Solid Tools set. This is a powerful group of tools for performing Boolean operations. In this post I’m going to demonstrate three of these tools. An important thing to keep in mind with these tools is if a component gets modified, it is converted to a group. Only the component instance actually involved in the operation is modified. All other instances of the component remain unaffected. This may affect your workflow. It would affect mine in many cases.
Another very important detail to remember is that these tools will not work with sloppy components/groups. There must be no holes in surfaces nor any loose or extending line segments. With a component or group selected, look at how it is described in the Entity Info box. If it doesn’t indicate you’ve select a Solid Component or Group, the Solid tools will not work with it. There is a Solid Inspector plugin that can be used to help track down problems if you have them.
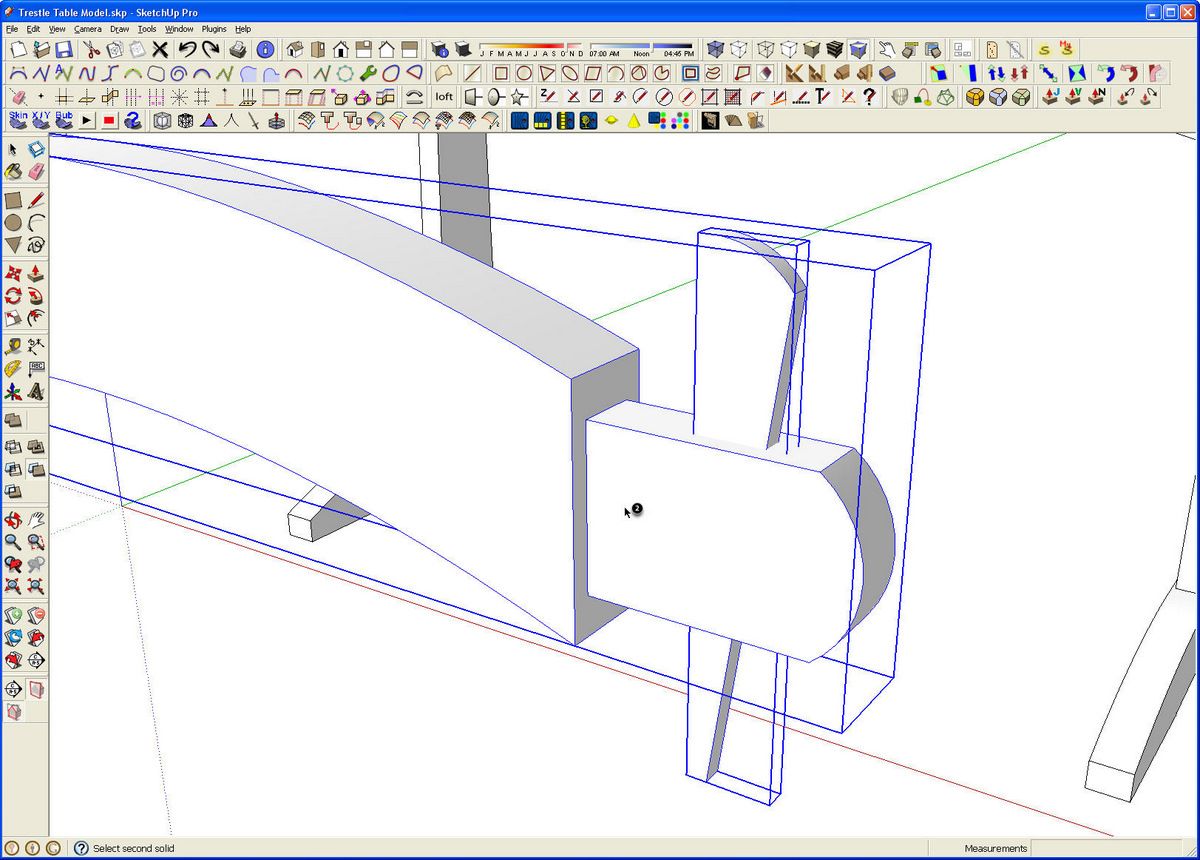
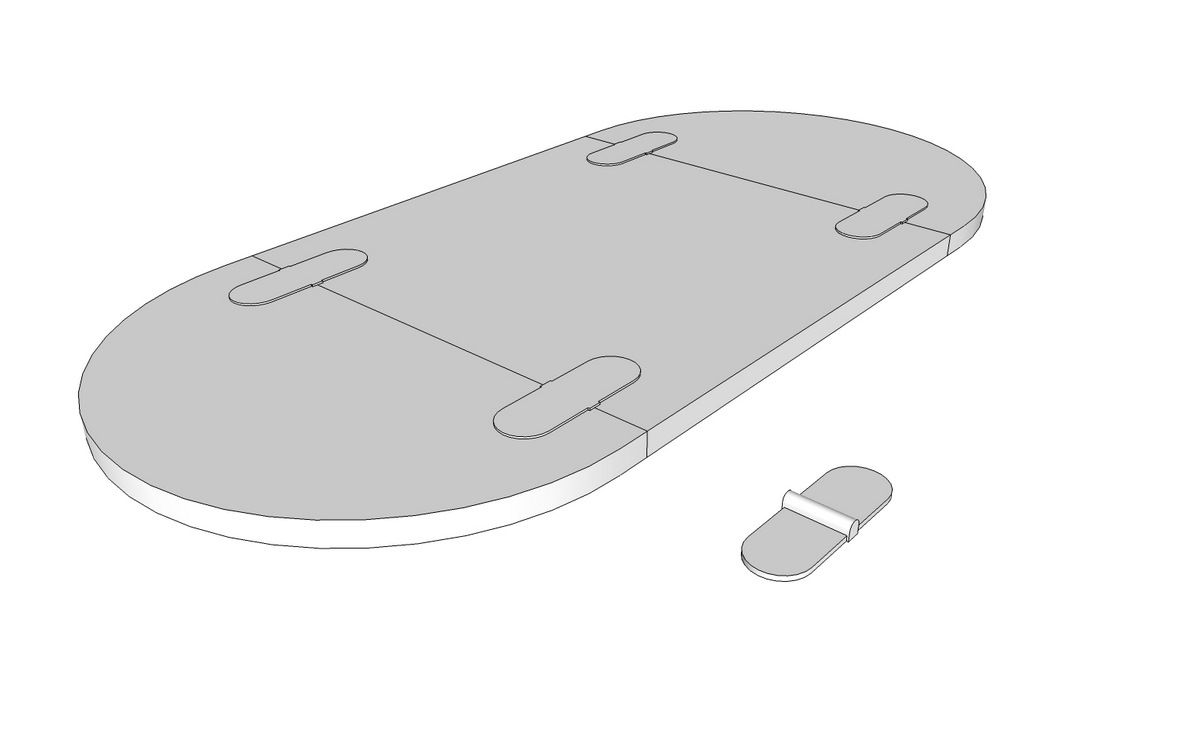
The first tool we’ll look at is Trim ![]() . In this example I am using it to cut the tapered mortise in the stretcher for the wedge on Gary Rogowski’s Trestle Table in Issue 214.
. In this example I am using it to cut the tapered mortise in the stretcher for the wedge on Gary Rogowski’s Trestle Table in Issue 214.

I’ve copied the stretcher and wedges out for this demonstration but I would normally do this with the components in place.
Select the Trim tool.
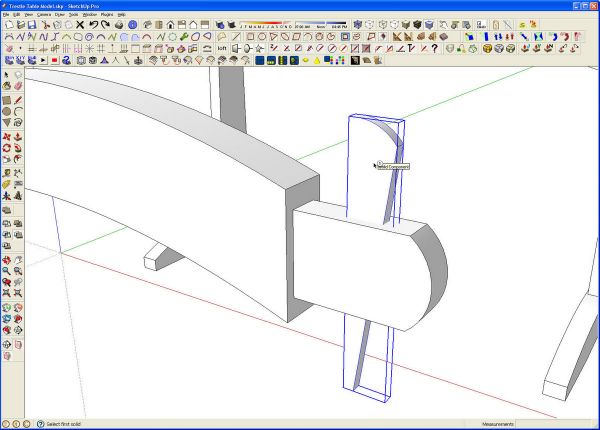
Click on the wedge.
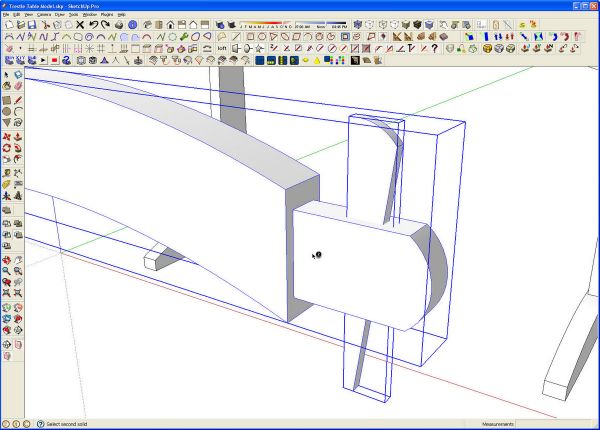
Then click on the stretcher.
That makes quick work of the tapered hole. The order on which you click on the components/groups is important. I think about it like this: Trim the wedge from the stretcher. Unlike some of the Solid tools, trim doesn’t destroy either component so the wedge remains as a component. The stretcher gets converted to a group so, if you work as I do with only components, you have to convert it back into a component. Also note that in my example here, the stretcher still in the table does not get edited with the copy I worked on. The solution is to make the edited stretcher into a component and then use it to replace the other instances in the model.
The Trim tool could be used to cut mortises if you have tenons on the joining components. As I’ve been working with Solid tools, though, I’ve come to the conclusion that in most cases, it is faster for me to cut the mortises the way I’ve been doing it because when I cut one in one component, all other instances get edited, too.

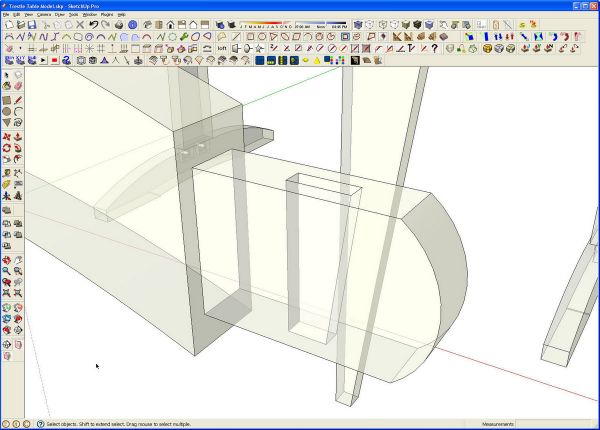
Here’s another example using Trim. In this case I am cutting hinge mortises for butler hinges. I created a proxy component that is shaped as the reverse of the required mortise. I flipped a copy of the proxy over so you can see the other side.
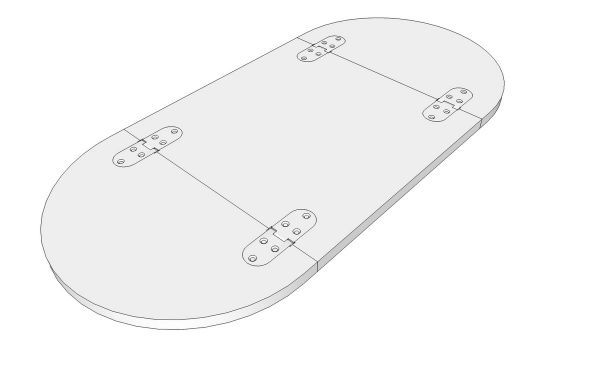
I used got the Trim tool and clicked on a hinge proxy and then on the leaf. For this sort of thing you have to restart the Trim tool to do the next mortise. The table leaves started out as instances of the same component but get converted to groups although the hinge proxies remain as components. After cutting the mortises for all the hinges, it is a simple matter of selecting the proxies, then right clicking on the hinge component in the Components browser and choosing Replace Selected.
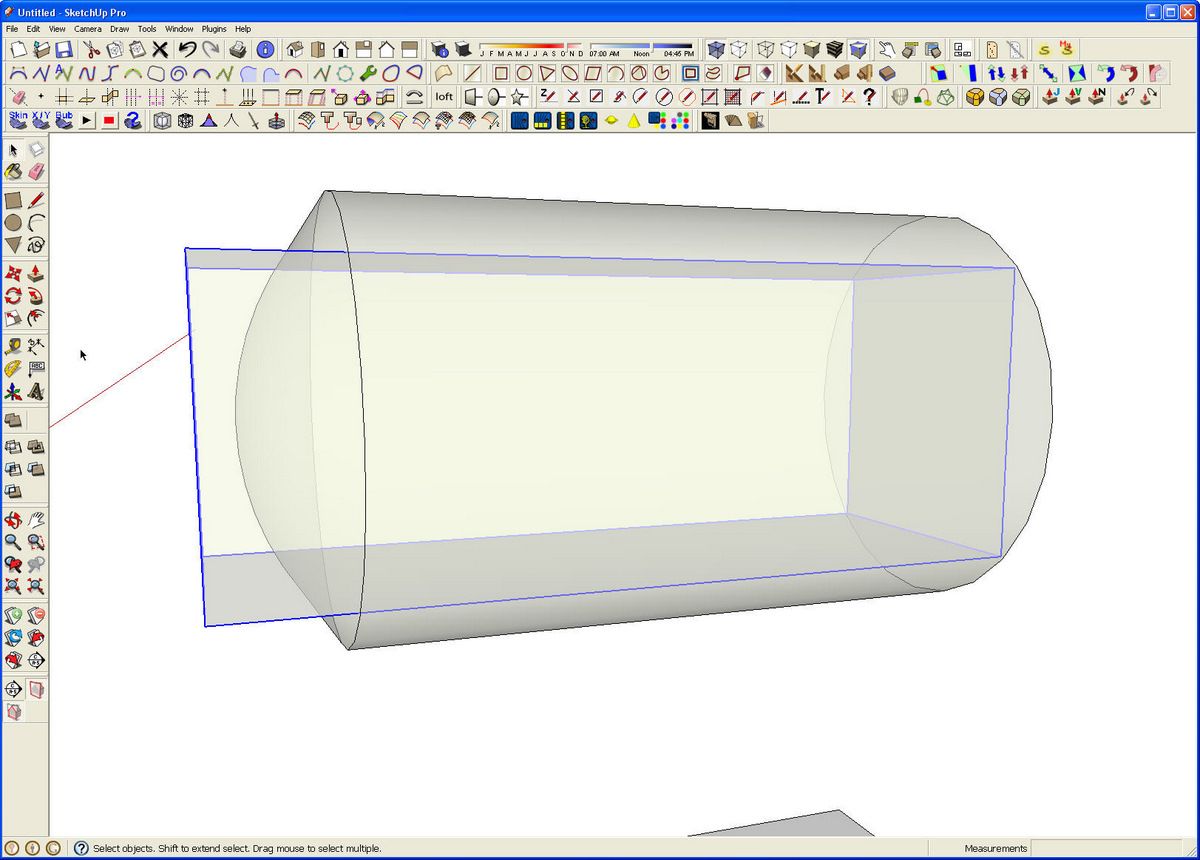
The next tool I’ll cover is Intersect ![]() . This one makes quick work of intersecting two shapes and leaving the part they have in common. I’m using it to create the pommel areas on a turned leg.
. This one makes quick work of intersecting two shapes and leaving the part they have in common. I’m using it to create the pommel areas on a turned leg.
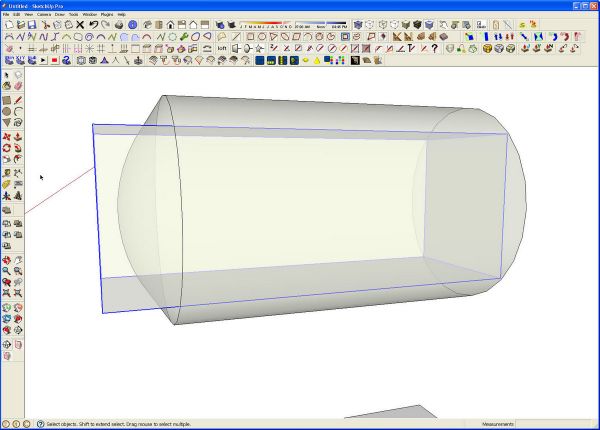
In this X-ray view you can see the cylinder with the rounded end which I created using Follow Me. I drew a square and extruded it to length The square is the section dimension of the leg. Each of these must be a component or group

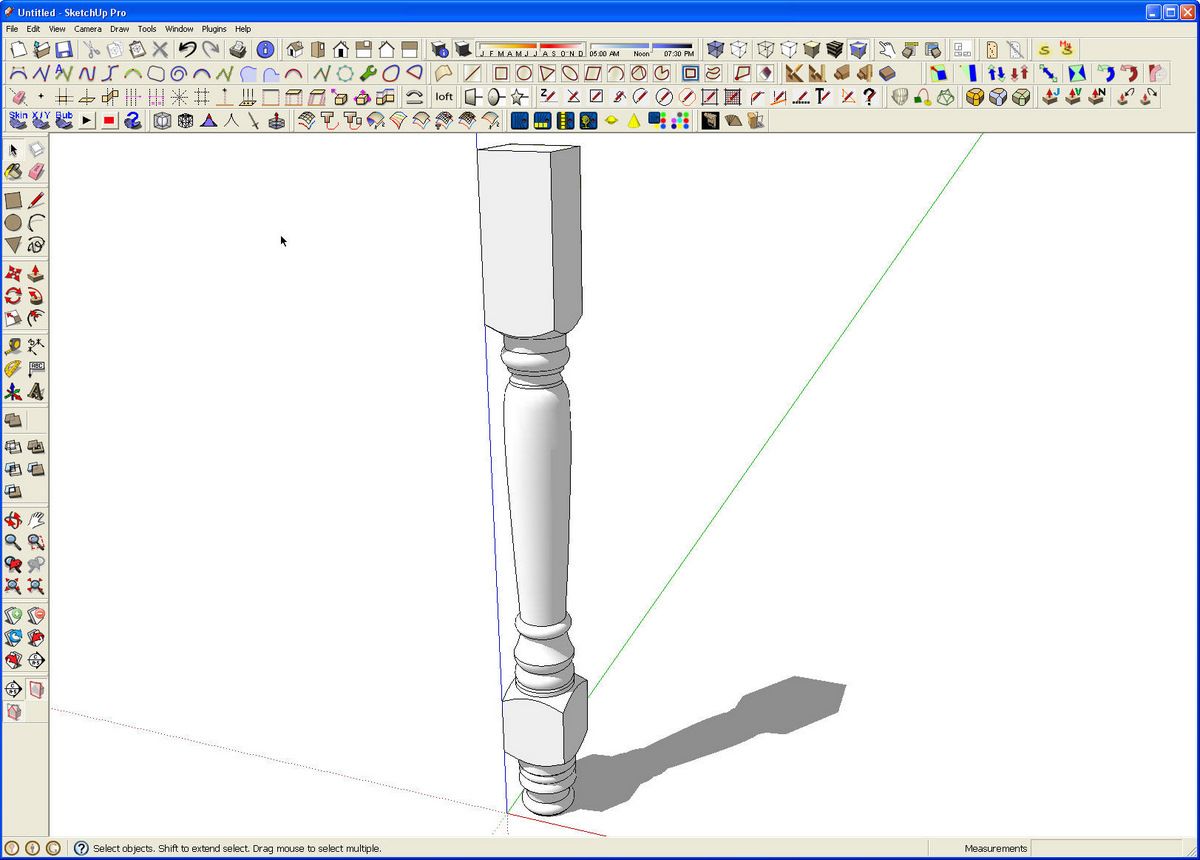
After starting the Intersection tool, click on both in turn and you’re left with what you see above. I did the same for the square section near the foot of the leg as well.
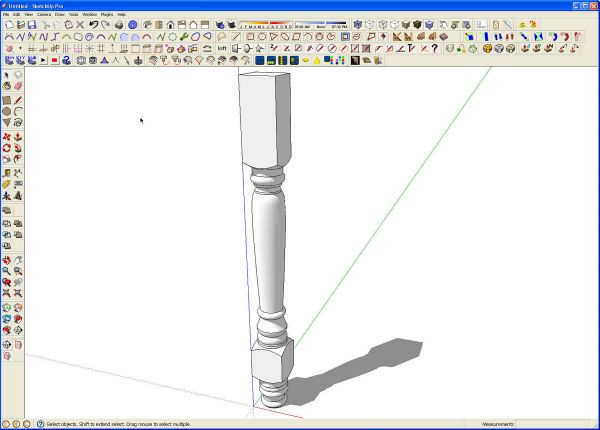
After making the turned sections of the leg, I added in the square parts with the pommels, exploded those groups and made a single component of the entire leg.
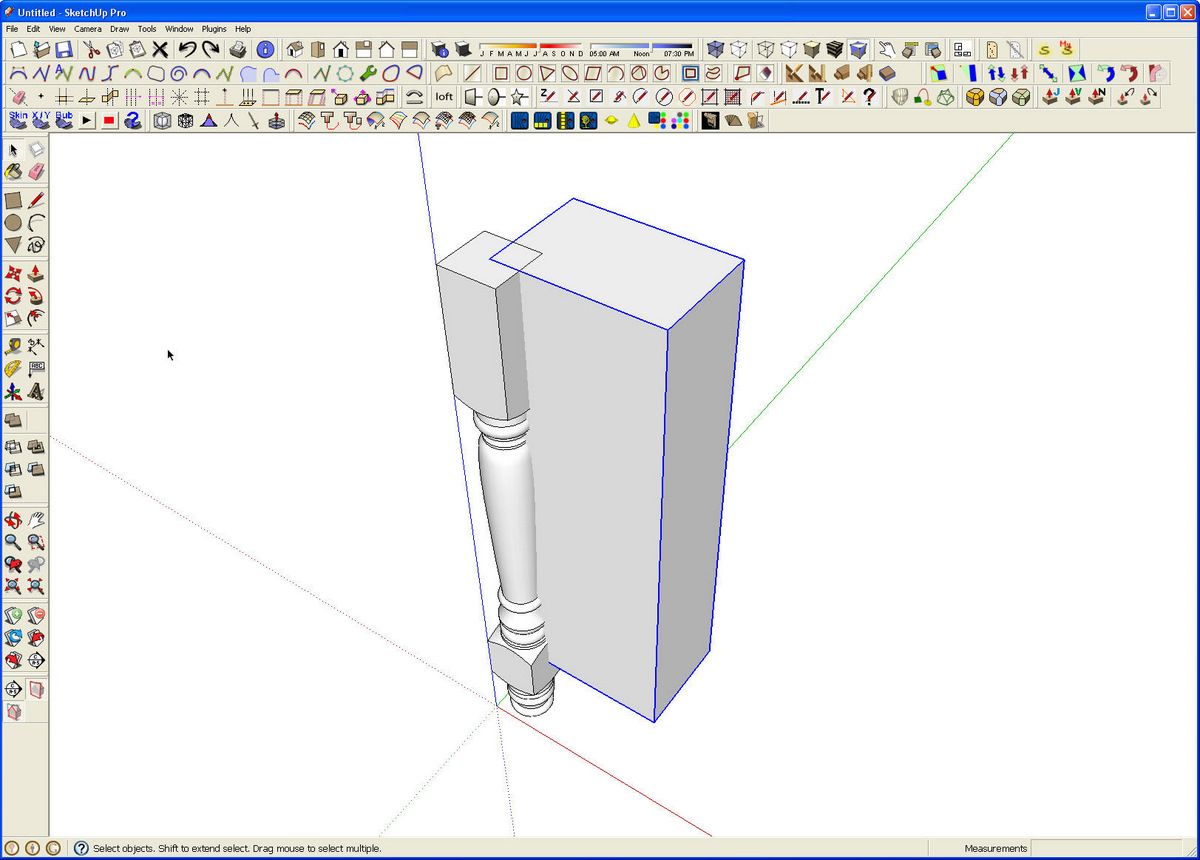
The last tool for now is Subtract![]() . Suppose we want to cut a quarter out of that turned leg to use it on a kitchen island.
. Suppose we want to cut a quarter out of that turned leg to use it on a kitchen island.
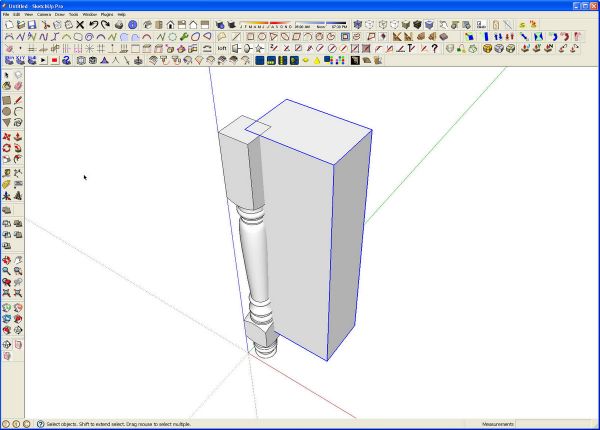
Draw a box representing the case and place it so it intersects the leg. Start the Subtract tool and subtract the box from the leg. Click on the box and then the leg. With geometry as complex as this turned leg, it might take a few moments for your computer to process this so just be patient.

When it completes the operation, the box will be removed as well as the portion of the leg the box cut through. It is much faster than using the traditional Intersect and then deleting the waste. Remember to make the leg into a component before copying it to the other three positions.
I think these tools are a great addition to SketchUp. For those of you who use the free version of SketchUp, you can try solid tools by installing the trial version of SketchUp 8 Pro. You might decide that between these tools and LayOut, it is time to step up. If you choose not to upgrade to Pro, the program will revert to the Free version after 8 hours of use. In any case, at least give it a try.


Comments
Anyone else having a problem trying to use new solid tools with a full sphere. Tried to create a sphere by drawing a circle, doing a rotate copy, and using follow me tool, which is also not changing to the follow me icon. Half sphere and pommel example of Dave's worked fine but when I try to intersect a sphere and box it comes back with the error message that one or more objects not a solid. No oddball lines either.
Tenbears, There is an error in the software in which the Follow Me tool cursor shows as Push/Pull. It still works as Follow Me, though. The Google folks are aware of it and I wouldn't be surprised if that is corrected in the first maintenance release.
Which of your groups/components is not identified as "Solid"? You can check by looking at Entity Info and selecting them one at a time. I would guess it is the sphere that is causing you the problem. Making it the way you did results in an internal face which will prevent the group/component from being regarded as "Solid". Either delete the face of the circle that you are using as the path or draw one circle above the other so they are not intersecting each other.
I hit Submit a little too early.
I prefer the second method for creating a sphere because I don't have to stop to delete the face and that face isn't needed in anycase.
Dave
David -
I'm just about ready to pull the trigger and purchase a SU8 license. Do you know if one license will allow me to install the software on my work laptop AND my home computer?
Yitz
Thanks Dave, by taking the sphere shell apart, deleting the one internal face,and putting the sphere back together works. Also tried with two circles perpendicular but not touching eachother, follow-me, and the surface of the follow me object appears to be a must delete otherwise also unable to use the solid tools. Must be those "stray" lines or objects. This also solves the problem I was having trying to make solid objects with bezier curves. Thanks
Yitz, yes. One license will allow you to install SketchUp on more than one machine as long as you aren't trying to run both at the same time.
Tenbears, taking the sphere apart to delete the face is kind of the long way but as long as it works for you, that's all that counts.
As far as drawing the sphere, if you set them up as shown in this image http://flic.kr/p/8AL8D6 when you run the Follow Me tool you'll end up with a sphere with nothing to prevent it from being a Solid Component as you can see in this image. http://flic.kr/p/8AL8Ee
Glad it helped you sort out things out.
Dave
Just came accross your SketchUp tutorial very impressed. I am tried of doing my own hand drawing and thinking about moving up to SketchUp but when I Google it there are a number of different SketchUp's and companies to buy from. What do you suggest starting with and who to trust with the purchase, I'm not sure I want to commit to $495 but maybe. Any recommendations?
Tim, thank you.
I'm not sure what you mean by "a number of different SketchUp's and companies to buy from." Google used to own SketchUp but this past summer it was sold to a company called Trimble. Trimble is the current owner and seller of the software although they have a few resellers in foreign countries. You can by SketchUp 8 Pro for $495 from Trimble at sketchup.com but since you are just getting started with it, why don't you start with the free version from this link: http://www.sketchup.com/intl/en/download/gsu.html You won't get the Solid Tools (the topic of this blog post) with the free version but you'll get all the other drawing and modification tools. You can get proficient with SketchUp and decide if you need the additional features of the pro version. You could also download the pro version and try it for 8 hours (drawing time not straight clock time) to see what you think but when the trial period expires you'll either have to buy it to license your copy or download and install the free version.
--Dave
Log in or create an account to post a comment.
Sign up Log in