
I imagine many of you are aware of the new SketchUp version 8, and have already downloaded the new version. I think it is a good idea to upgrade as there are always beneficial improvements and additions. Also you will be able to view new models built in version 8 only with the new version. That is, version 7 will not read models built in version 8. If you save a version 7 model while using version 8, the .skp file is changed in a way that prevents its opening in the old version.
You can review the new features of version 8 in the website link here. Although there are a number of additions and modifications to the program, many of the changes relate to functions applicable to buildings, geo-positioning, and terrain domains, not woodworking, And others are included only in the Pro version.
A significant new capability has been added to the Pro version in a set of tools for additive and subtractive modeling called Solid Tools. Many of the Intersection procedures used in woodworking will be facilitated by these new tools – however, only with the Pro version. An example of using Solid Tools is shown in the next two pictures for making a cabriole leg.


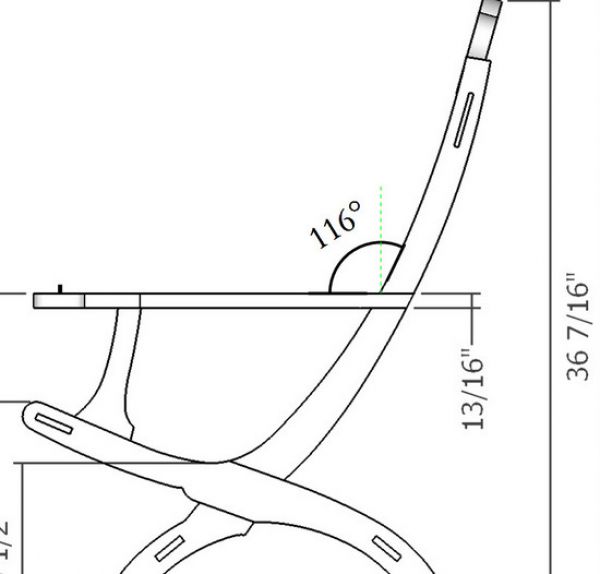
Also in the Pro version, are improvements to dimensioning in Layout. Here Google has finally added an angle dimension. The angle dimension for the arm in the chair below, illustrates this new capability.
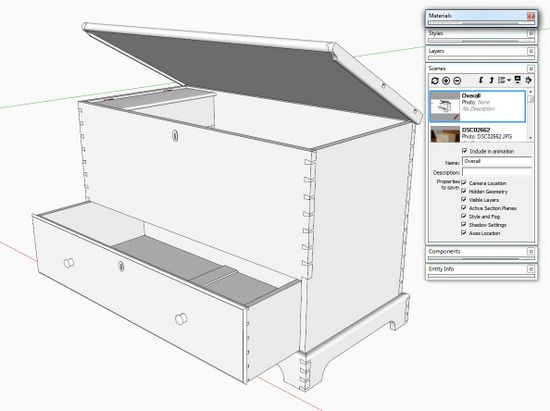
I will point out a slight adjustment to the Scenes dialog box or panel which is applicable to the free version. Thumbnail images of the scenes now appear in the Scenes dialog box. This changes the look of the Scenes dialog box, but the overall function is unchanged. The picture below shows the Overall assembly view or scene. The dialog box on the right shows the small thumbnail equivalent of the overall view.

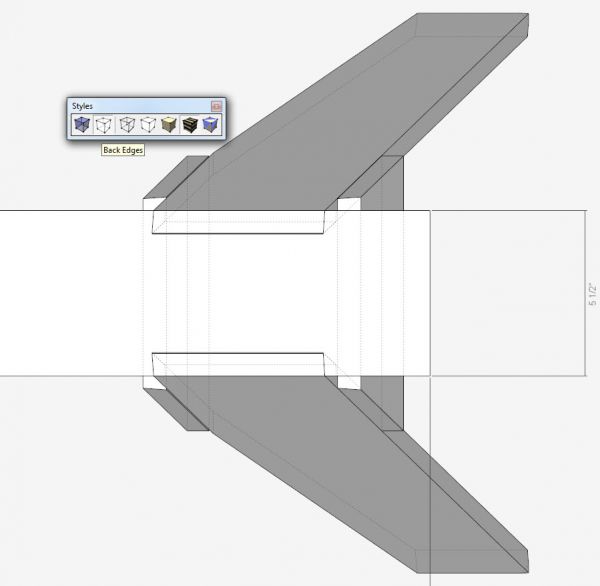
Also applicable to woodworking and the free version, is a new Back Edges style in the Styles Toolbar. You can click on this style to see your model’s obscured edges as dashed lines. This could be an alternative to the use of X-Ray mode which is often used in orthographic and template views. Below is a top view of a sawhorse with dotted lines showing the hidden edges.
I expect we will be exercising and showing more procedures and cases of the new capabilities in future blog entries.


Comments
Downloaded the pro upgrade yesterday and we are going to love the solid object tools. Did a mortise and tenon intersection with trim - one step worth the price of the upgrade.
Hi,
I have one problem with Sketchup 8
When i print from Sketchup 8 the lines are jaggered and not smooth like in Sketchup 7 What can i do to solve this problem. I have already opened version 7 files in version 8, so i can not go back to version 7 whith these files
There are a couple of things to be aware of with the Solid Tools.
One is that they will convert components to groups. So, while a mortise can be made in one step on, say, a table leg, you'll have to cut the mortise in each leg individually instead of cutting them in a single step like you can if you use Push/Pull as I have demonstrated in several videos.
The other is that they are extremely picky about the components or groups you are using. There must not be any stray line segments nor holes.
I'm working on a blog post to detail the Solid Tools and will cover that.
Nolly, it sounds to me as if you aren't getting anti-aliasing in your images. Go to Window>Model Info>Rendering and tick the Anti-aliasing box. Also, go to Print Preview or Print and check to see what you have Print Quality set to. It may be set to Draft. Set it to a higher quality option and see what you get.
As to going back to version 7, yes, you can do it. When you save the file, go to File>Save a Copy as... and, at the bottom, choose the SU version you want to save for.
Dave
The ability to save/restore your tool bar layout is one of the most welcome new features.
Thanks that worked ( print reselution)
Log in or create an account to post a comment.
Sign up Log in