About two weeks ago, I showed the beginning steps involved in making the SketchUp model of a Ladder Back Chair – mainly the creation of the Back Posts. In this post, I will continue the modeling steps for this Ladder Back which primarily involve a Centerline Model (my term) or a framework on which to place the chair parts.
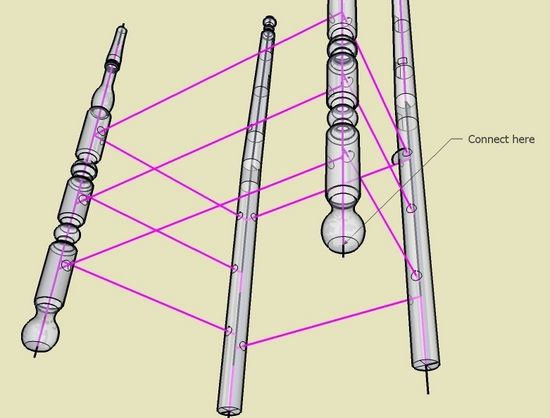
When working with rectilinear projects – say a chest of drawers – the movement and precise placement of components is a matter of finding and connecting coincident mating corners. However, when working with turnings and other organic shaped components, there are no corners to match up. This is often the case when working with chairs, particularly Windsors and Ladder Backs. Because of this positioning dilemma, I make my turnings with a centerline that is included in the component, and also extends an inch or so beyond the ends of the turnings. With this centerline, I now have a precise connection points for all turnings – the centerpoints at the top and bottom.
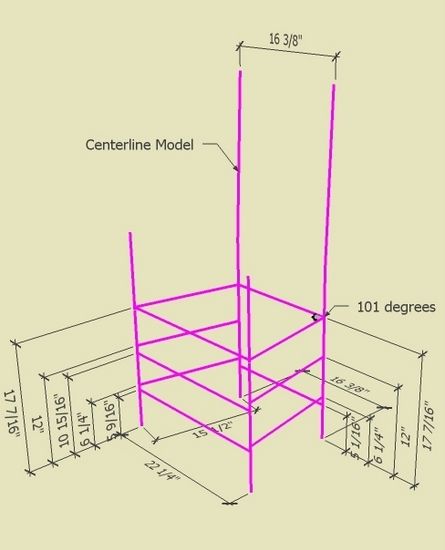
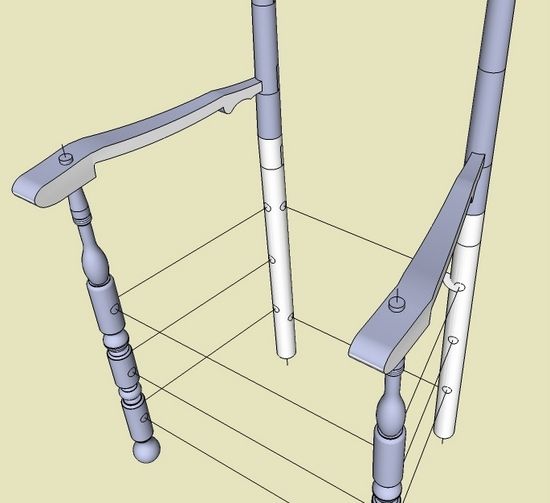
After making the Back Posts, I build the Centerline Model for the assembled chair. That is, I draw lines representing the connection of pieces of the chair – centerlines only. See below:
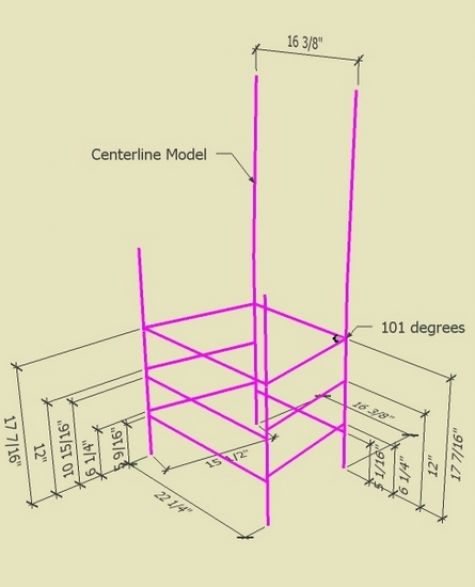
Not only do I use this “framework” to precisely position the turnings, but also to determine angles for socket drilling. Note in the above centerline model, the 101 degree angle shows me how to drill the sockets in the Back and Front Posts.
By the way, the new version 7 of SketchUp changed what happens when you place lines crossing each other. In the old version, the lines did not “cut” each other and remained single lines. In version 7, the crossing lines automatically cut each other to make multiple line segments. I find this to be helpful, and particularly when I want to show an angle dimension. I draw a circle which cuts the two lines whose angle I’m measuring, then delete all the extra line segments of the circle so I only have the arc representing the angle dimension.
After building the centerline framework, I place the Back Posts in their respective position. I connect the Move Tool to the bottom centerpoint of the Back Post and connect this to the endpoint of the centerline model.
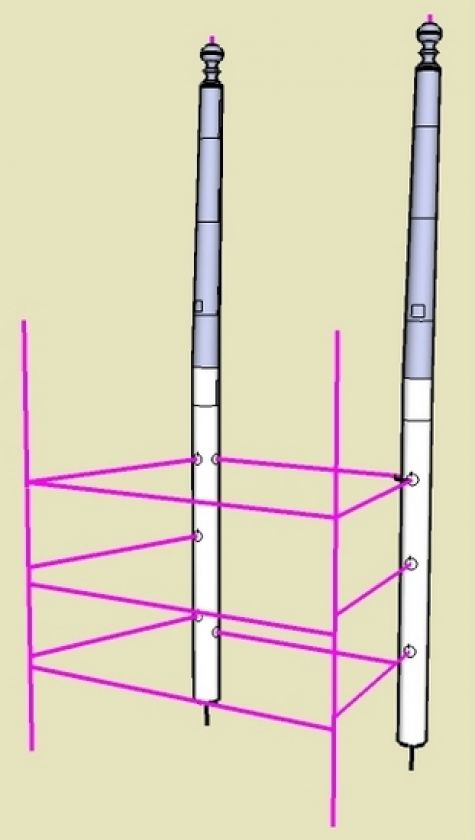
I’ll skip the process of making the Front Posts, since the method is identical to that shown in a previous blog entry for the Back Posts. Now that we have Front Posts, we can connect to the Centerline framework.

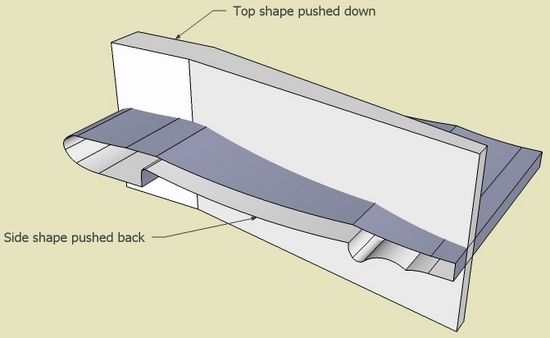
The Arm is a complex shape that can be reconstructed from a side and top view. Push/Pull these shapes and roughly position them as shown below. Then do an “Intersect” to create the overall shape of the Arm.
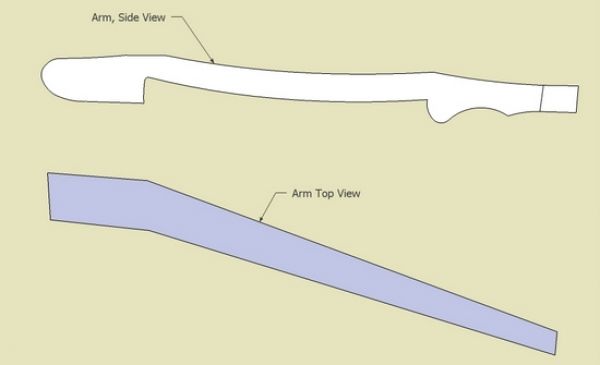

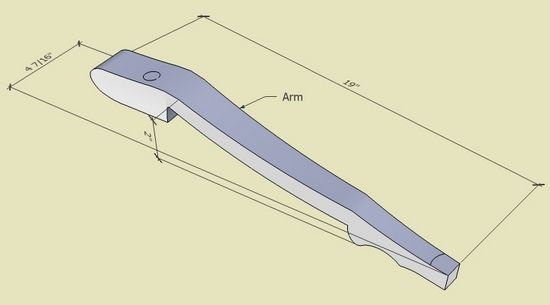
Here is the Arm after intersection and clean-up.

Now I place the Arms in their respective positions on the centerline framework.

The hard part is done. The only remaining steps are:
1. Creating the fancy turned front Stretchers
2. Placing the seat and side spindles
3. Placing the Back Slats (I’ve shown the building of Back Slats in a previous entry)
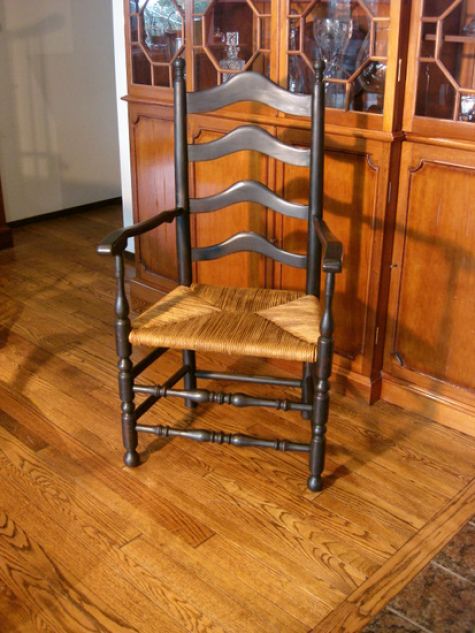
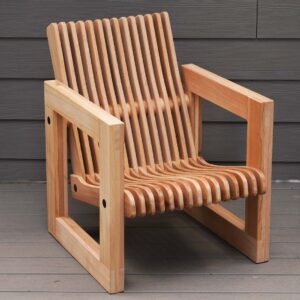
I’ve finished the real chair, using ash and a rush seat. The first coat of milk paint was Barn Red, followed by a coat of Pitch Black. Then I finished with linseed oil.


Comments
Tim. I tried to print your latest blog re Ladderback Chair. I still can only get 1 page to print. Seems like someone at Fine Woodworking.com should be able to fix this. It,s not good if I have to download the blog every time I want to refer to it.
Hoop36: The FWW staff are working this issue. I will let you know when the problem is fixed.
Tim
Plugins??? My SU7 does not have a Plugin on the top banner. SU6 had File Edit View Camera Plugins Windows Help but SU7 has all but Plugins. I have been trying to download the Cutlist plugin to use in SU7 but no luck. Can you provide a detaileds procedure for downloading and using plugins. Thanks
Hoop36, Go to Window>Preferences>Extensions and check all the boxes. Then close and reopen SketchUp. If you've installed the CutList plugin in the right place, it should be available in the now visible Plugins menu.
Log in or create an account to post a comment.
Sign up Log in