

I was chatting with a woodworker the other day about SketchUp. He’s fairly new to it and was asking about how he might go about showing his clients various options for their kitchen projects. He’s coming from drawing out his projects with pencil and paper and is used to having to make several drawings showing the different options. While he could do that, I think there’s a better route.
Here’s my approach. I’m using the model I drew of Christian Becksvoort’s Shaker side tables for Shaker Classic, 2 Ways in FWW210. Although my friend was thinking of different styles of doors on kitchen cabinets and different cabinet arrangements, the process is identical with these tables.
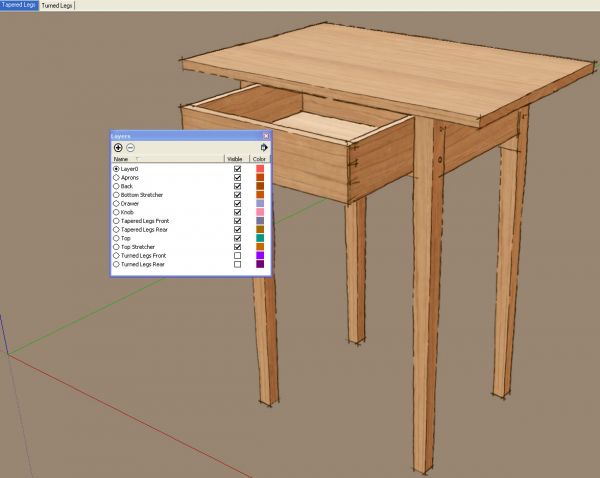
After completing the model with the tapered set of legs, I went created the layers for organizing the parts. Then I made the layer associations with the components. I turned off the tapered leg layers and drew in the turned legs. After making layer associations for them, I could easily switch between leg styles by choosing which layers are turned on and which are not.
Actually I copied the tapered legs, used Make Unique and edited the copies to make the turned versions as this saved me time and effort. I’ll cover that another time.
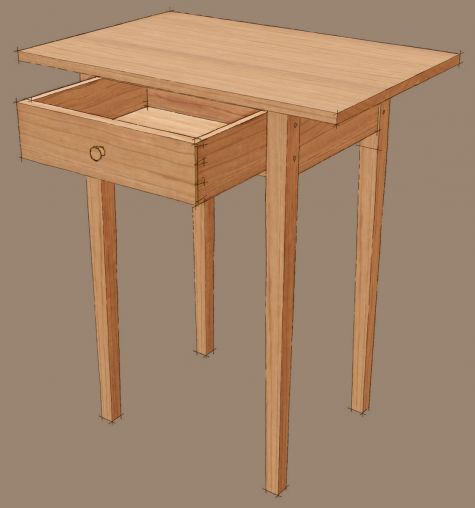
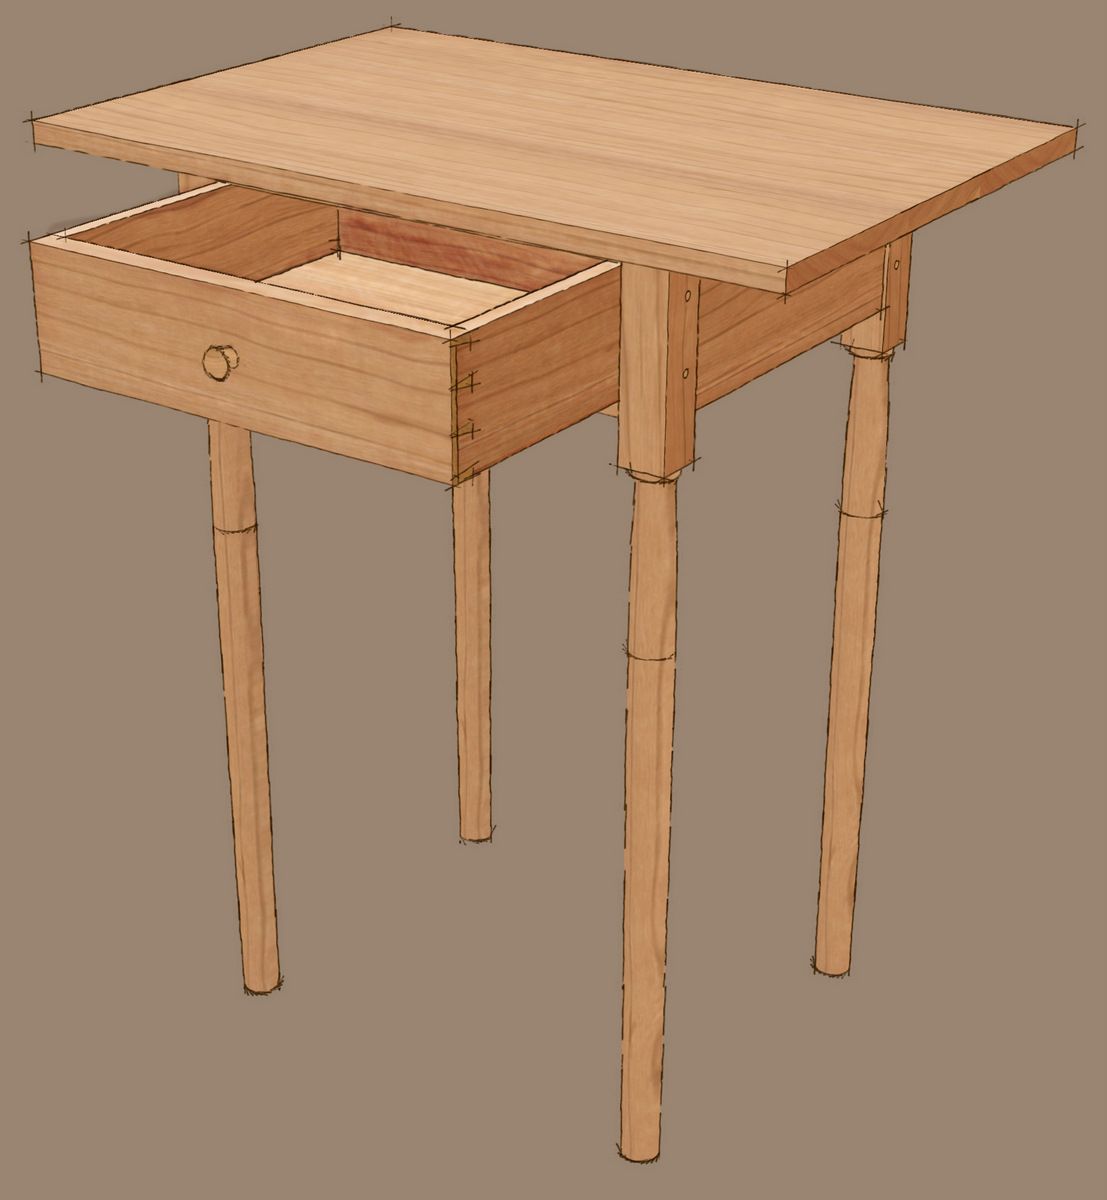
In the following image, the tapered legs are visible and you can see that the layers for the turned legs are unchecked making them invisible. I made a Scene and called it Tapered Legs to make it simple to identify.
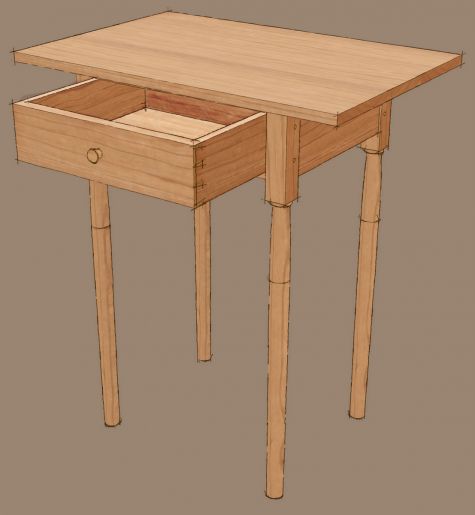
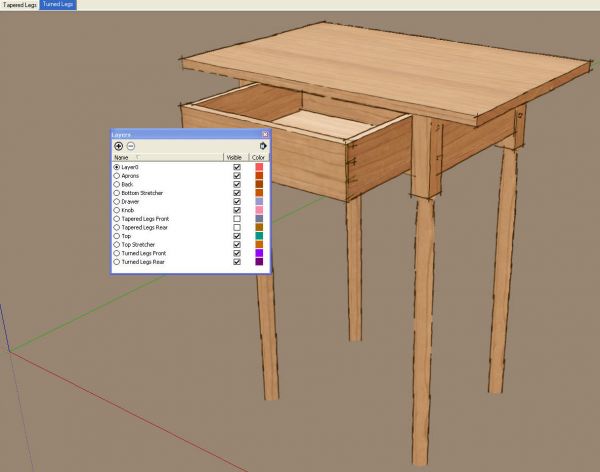
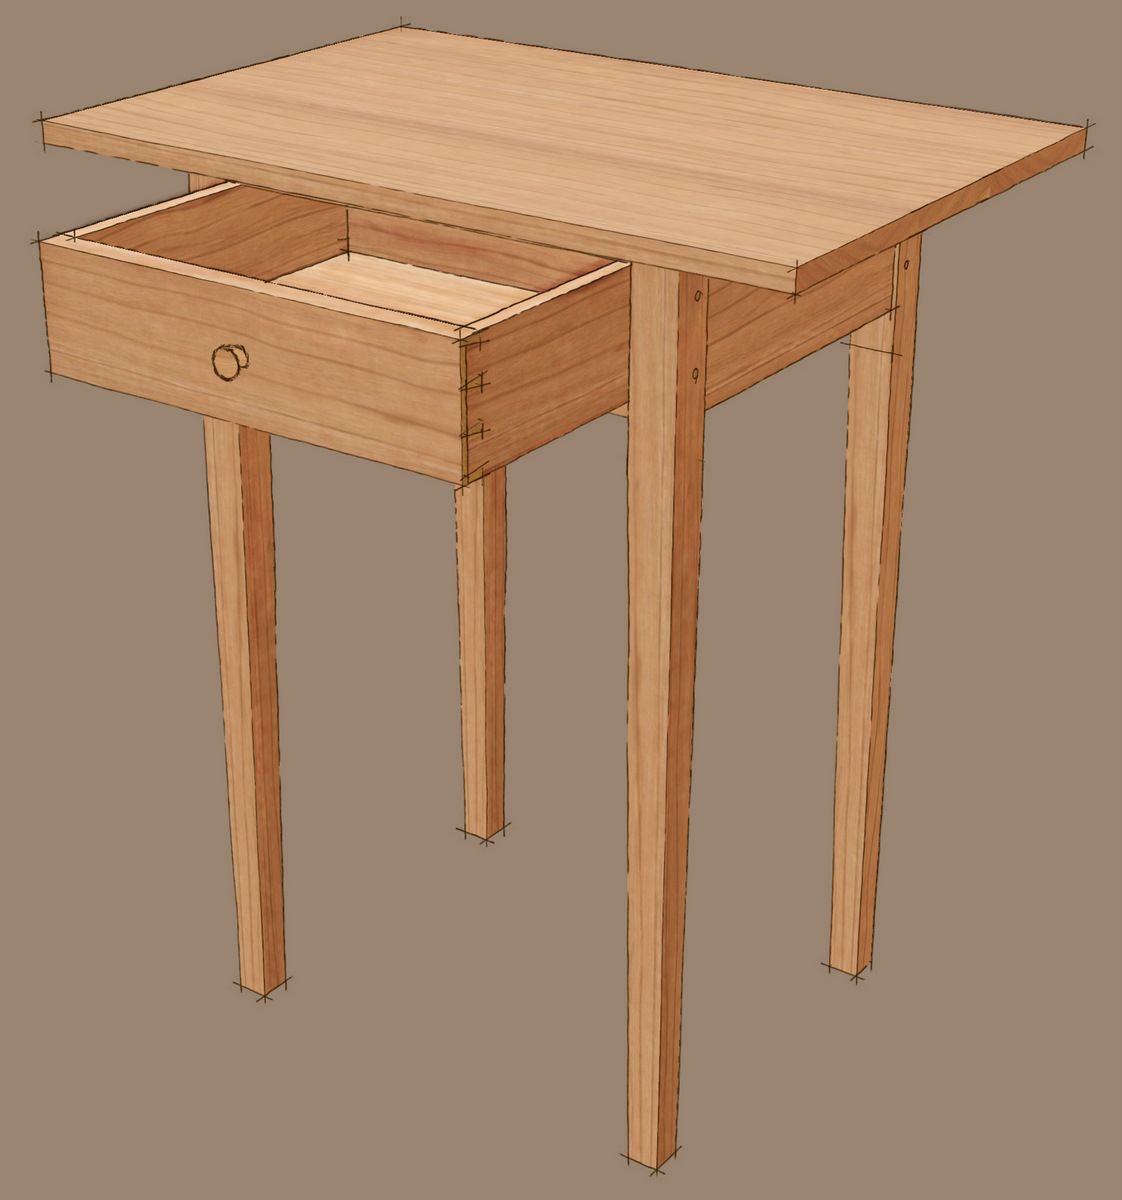
Then I made a second scene with the turned legs visible instead. I didn’t move the camera between scenes so switching back and forth between scenes only changes the legs.
To make the two images at the top, then, I just made JPG exports of each scene.
So for something like my friend’s kitchen projects, he could show raised panel doors and tombstone doors with a couple of different layers. The rest of the kitchen model would be the same between the two views. Or he might show the kitchen with an island or a peninsula. The options are endless. Perhaps too endless for some clients but that’s up to you.
By the way, if you haven’t done so, take a few moments to read the SketchUp Help Files on Layers. It’s well worth heeding their suggestions regarding the way layers should be handled.


Comments
Dave
I have always used the hide function (in combination with the scene function) as the way to show various options. I name the scene so that I can keep track of the various versions. It is not obvious to me what the advantage of using layers is, particularly since it is added work to create the layers. I usually do the managing of the components from the outliner. You do have to pay attention if you are nesting your components, which can cause difficulties, but that can be resolved by proper component creation. I would be interested in hearing why you prefer using layers.
Hide works but I find better control over what is hidden and what is not by using layers. It isn't that much work to create the layers and it only needs to be done once for the model. My models will often consist of 20 or more scenes and I find it much easier to choose which layers are visible than picking components out of the outliner to hide or unhide. With exploded, 2D and detail views, the outliner is often quite a long list.
I create the layers immediately after completing the assembled model. Then I make copies of the model or individual components as needed for exploded views and such. With a single click in a check box for the layer I can hide, for example, all of the drawers in the model or with a couple of clicks I can swap the doors or change the legs. In a kitchen model, one could have quite a list of doors to chase down in the Outliner. If those door components have a layer association, it's a single tick box.
Additionally, there are times when I need to work on some parts of a model with Hidden Geometry turned on. Then all those hidden components would show as meshes cluttering the screen. One can use the hide options under Model Info>Components but when I am editing components, I am often doing it in reference the their neighbors so I don't want them to be hidden.
You are right that nested components can cause problems. Careful management of them is important.
I ended before writing the following:
As with many things in SketchUp, there's more than one way to manage the visibility of components in the model. Use the method that suits your workflow.
For me, the advantage of layers is that they work like "preset" configurations. Once I've set up my layers, I can control the visibility of hundreds or thousands of components with a couple of mouse clicks.
It's not a big deal if you're drawing up a single cabinet or a chair, for example, but it comes in handy when you're working on entire rooms full of cabinetry (or an entire house) at a time.
-Steve
One of the advantages of using SketchUp "Layers" for the way I work (kitchen/furniture design and build) is that when pasting components from one file to another, the "Layer" information is transferred and remains intact in it's new location. This allows me to effect modifications on large individual components in separate SU files instead of in the project master file. I can then paste any modifications to the component back into the master file without the need to change/update scenes with regard to the visibility of the component or its sub-components.
For example, in a large kitchen project I routinely set up a SU "project template", complete with layers for individual components like the island. Since I rarely work on this type of complex component in the master kitchen file itself, any modifications done in the separate island file, opened using the project template with the same assigned "Layer" schema as the master kitchen file, can be easily "pasted in place" back into the master with layer information intact, with no scene updating necessary, and with no "Hide" and "Unhide" in the editing process.
Very importantly, and while the same ultimate effect may be possible using the "Hide" function, those vital elements of "organization", key to managing any large project, seem to be much easier to maintain using "Layers".
YMMV ...
Gentlemen, very good comments. Thank you.
Thanks for the insights on the use of layers. Trying to sort out the differences between using layers and my current organizing methods (my work process and scope sounds similar to swingman's) it may be the way I use nested components combined with the "Hide all Unselected" plugin that allows for (what I believe) is a quick way to navigate a very large and complex model (I use Sketch Up only as a quick visualization tool in my Architectural practice). However, I am always looking to improve my efficiency. In my next project I may try to use a layer organization and see how it goes. Thanks again.
On that note, Joe Zeh at Swamp Road Wood Works reworked a handy layers.rb with added functionality and tool bar icons that makes adding visible and hidden layers much easier to use without risking having to update all project scenes. If you use layers as I do, you'll appreciate this added functionality. You should find it for download in his Sketchup section under his "my favorite ruby scripts" at srww.com.
Another thing about layers is that when you are sitting with a client browsing through the model showing it off or modeling particular parts, it is much simpler and faster to turn off layered external geometry (cabinets) to show inner geometry (drawers) with a single click, as opposed to selecting geometry and hide it only to later unhide it manually.
So interesting!
My hat is off to the authors, contributors, and fellow Sketchup fanatics, particularly Dave Richards and Tim Killen. THANK YOU AND KEEP IT COMING!
Dave, another enhancement would be to uncheck "Camera Location" under "properties to save" in the various scenes, so that you could rotate the model to any angle and switch between leg types without the model moving to a preset position. (I probably got that tip from you, somewhere along the line.)
LTW, true, you could do that with the camera. SInce the legs were in place already I didn't need to do that. It would make it easy to do other work, too.
Hey Dave
Could you possibly provide any input on rendering engines for Sketchup and your experience? Looking at woodworking designs like these tables or other projects, it would be great to simply render them without a lot of training or expense.
Thanks!
neil
Hi Neil,
There are a number of rendering applications available which will take your SketchUp model and allow you to create photo-realistic images or something closer to photo-realistic anyway. In my work I don't have a lot of need for these sorts of images although I do have a Kerkythea which is a freeware program. There's a very nice exported to go from SketchUp to Kerkythea that makes it fairly easy.
I don't have any experience with any of the not-free renders but tomorrow-Friday-I think I'll get an opportunity to see one called Shaderlight being demonstrated here at 3D Basecamp. Perhaps I'll have more to suggest then.
Cheers,
Dave
Log in or create an account to post a comment.
Sign up Log in