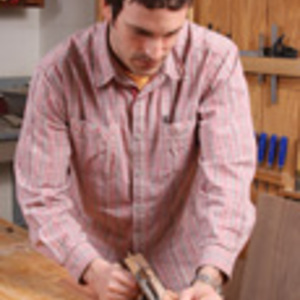
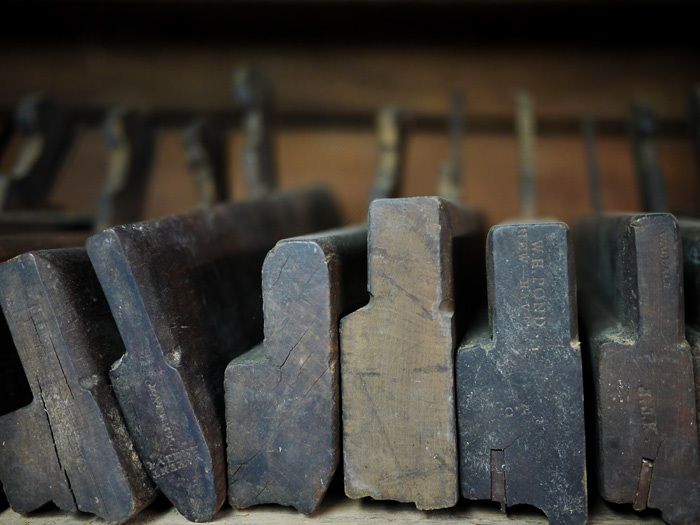
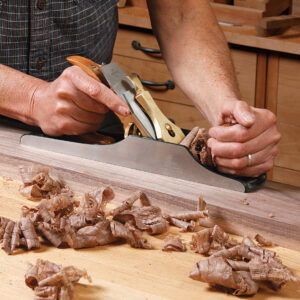
Fine Woodworking associate art director John Tetreault has a rather sizable handplane collection in his detached shop.
A few weeks ago I packed up the car and headed off to the hometown of Fine Woodworking associate art director John Tetreault. We met up to shoot the opening sequence of a new video workshop (due out this September) on how to build his new take on a Roubo-style bench. Now, first of all, John’s house seems to have been pulled straight out of a fairy tale. The little red farmhouse is surrounded by a huge crop of wild flowers out front, and a serious garden out back, where our very own staffer has built a fence from gnarled branches and bamboo in a bid to keep out the critters. Just outside the back door, he’s constructed a dry-stack stone barbecue that gets a heck of a lot of use. Then, over on the west side of the property, just past where the rainbow ends, sits John’s chicken coop, from which he harvests his breakfast every morning. Oh, and did I mention the detached workshop? I mean, come on! Let’s just say, he’s got a great setup.
Anyhow, regarding that workshop, I had my video-capable still camera with me and decided to put together a little shop tour. Consider this to be the first of a series. Over the coming months, I’ll be inviting myself over to the shops of various Fine Woodworking editors and staffers–I think Matt Kenney’s about due for a visit–to see where these guys ply their trade. If there’s anything special you’d like me to look into, by all means, let me know in the comments section at the bottom of this blog post.
|
More on Setting Up Your Shop |
-
Fine Woodworking associate art director John Tetreault has a rather sizable handplane collection in his detached shop.
-
Fine Woodworking associate art director John Tetreault (R) discusses the finer points of gardening with videographer Gary Junken ahead of the shoot.
-
Flowers in bloom beside the drystack fieldstone grill. Some of the scraps on the pile have a really interesting story behind them. Catch the upcoming video workshop to find out what it is.


Comments
Woodstove coming, eh? Woodstove in a woodworking shop... made of wood. Sounds a little scary to me, can anybody point to some "best practices" to making this as safe as possible? Please, no general testimony about how "I've had that exact setup in my shop for years, ain't burned down yet!" It only takes once...
Hi MacMarty,
Call me crazy but this is the same scenario as me having a wood stove in my living room...with floors made of wood, and furniture made of wood, and walls made of wood.
I plan on taking the same safety precautions in my shop as I do in my home. For the house, I checked with the local building inspector and installed the stove to specifications, including a stone base, 1 inch air space behind cement board with fieldstone face for the walls, and the proper setbacks from the walls and ceiling for the stove pipe. One added precaution in the shop is to keep the dust to a minimum, and I'll brush off the stove before use.
There are other ways to heat a shop for sure, but on that occasional Saturday morning when the snow's coming down, I'm comfortable firing up the wood stove. And what better way to use up those shop scraps!
John
MacMarty, You're right that fire safety is a BIG concern in the woodshop. Here are some links with general information on preventing shop fires:
Fire Safety in the Shop:
https://www.finewoodworking.com/Workshop/WorkshopArticle.aspx?id=33276
10 Ways to Avoid Shop Fires:
https://www.finewoodworking.com/item/23927/10-ways-to-avoid-shop-fires
Archive article on fire safety:
https://www.finewoodworking.com/Workshop/WorkshopPDF.aspx?id=24105
A number of my woodworking buddies here in Maine use woodstoves for heat in their shops and they seem to work out OK. Personally, I use a Monitor. It's flame is self contained and it does a great job in keeping my shop warm in winter. Unfortunately, K-1 is getting pretty expensive but I've solved that by wearing an extra wool shirt and keeping the temp at a max of 60.
Enjoyed the tour, John. Hope you'll put a photo of the cherry entertainment center on line sometime in the future!
The biggest problem with a wood stove in the shop is that it can and will dry out the stock lumber causing checking and warping. If you mill or use any "green" lumber, this is a real problem. Store all stock at least 10 feet away from the stove. You will have to add humidity to the room by putting a water pot on top of the stove.
The best part of a wood stove in the shop is that you have an unlimited supply of kindling, scrap & fuel.
I am more productive in the workshop in the dead of winter with the stove going than in the summer with the dehumidifier.
Hey John,
the shop looks great- the thing I miss the most about my old wood shop on the Coast besides the nice big windows is my wood stove. I loved having it in my work space- nothing better than working wood on a cold winters morning- gettin' the fire cookin' with a warm cup of coffee. I'm in a small basement workshop now and when I finally move to yet 'another new space' a wood shop is pretty high on my wish list.
cheers!
I think a wood stove in a woodworking shop is perfect. I live in NC and also use a stove in my shop, but ordinances will not allow me to have a wood stove because of the neighborhood. (Just barely slipped by setting up the shop, so can't push that too much).
I use a wall mounted Ceramic Natural Gas heater and maintain my shop at 60 to 70 degrees, depending on how strenuous the work is that I am doing. I check for dust several times a day and blow dust off the heater every time I turn it on.
The city inspectors have signed off on my operation as required by local ordinances, and everything is fine.
There may be a better way, but then again I could have a larger shop than a one car garage conversion. But best of all, I am happy with it and it serves my purpose. I do not work with green wood, so that "problem" doesn't concern me. I also buy my wood for each project since I have minimal storage, that way the wood doesn't sit long enough to start cracking, checking, splitting, from drying too quickly.
You have a nice, cluttered shop in progress.
Andy
I'm in the very early stages of planning my shop (as opposed to simply having somewhere that is not planned out that I use to work in).
That little Vid has already given me a few ideas so please keep this sort of thing coming.
The video was great - gives me some ideas for improving my shop as well since it's still being worked on. John, any possibility of getting some pictures or additional writing on the landscaping/gardening in your yard on Fine Gardening? Ed's right, it does sound like a great setup overall!
Thats a nice shop.
I am a hobbiest who's goal is to replace my furniture with furniture I couldn't possibly afford, so far so good. As I get better, I visit local woodworking shops and go on line and am disappointed. These huge shops tend to be so poorly laid out that given the choice, I'd rather work in my one stall garage shop. At work and home my rule is: setup has priorty over the job. Whenever a person thinks of a better way or is irritated by something, they must stop and redesign. People who work through the problem, planning to fix it when they finish,never do.
Hi George,
I agree that a small shop can work just fine. If it's well organized, it can be a very efficient way to work. I think woodworking in general brings out the creativity in people. That can be shown in furniture design, or just how you use the space you have to woodwork in. Woodworking is simply fun...a workbench in a hallway works too!
John
woodsyguy81: Stay tuned... you may see posts from the garden at John's house here: http://www.vegetablegardener.com/ they've got a lot of veggies growing.
I have found the most important is a dust collection system and a air filter system. all you need is a blower and filters. I'm sure we can get creative.
Time to put that new Roubo Workbench to work! I am thinking of building one for myself. I would appreciate it if you would answer a few questions about it. I watched the video series. Great job btw. Roubo is making a splash.
1) There is no end cap. How do you then prevent cupping? What is the thought behind not having one; extra beefy top perhaps?
2) The top is bolted down with 2 at each end opposed to just one. Won’t that cause an expansion problem? One to hold is down sure, but two seems likely to put the top in a pinch.
I am worried about building it in the dry winter only to have to flatten it when humidity rises. My main shop is not climate controlled.
Hi caryhson1,
I must say the new bench is an absolute joy. You can clamp any workpiece anywhere! To answer some of your questions:
1. You're right that there's no need for the end caps because of the extra thickness of the top.
2. I slightly elongated the holes at the back of the bench where the top attaches to allow for movement. From summer to winter, the difference was less than an eighth of an inch overhanging the back legs. The front stayed perfectly in line with the front of the legs.
My shop is not climate controlled either and I have not re-flattened the top yet. Take extra time at the glue-up stage to get it as close to flat as possible and after a little hand planing you'll be in good shape. Close to quarter-sawn wood helps, but I think the mass of the top helps to keep things more stable.
One of the features I've been enjoying the most, is the front leg that is in line with where the tail vise closes. It's great for supporting legs and long workpieces when you're working on the top end of the piece.
Glad you enjoyed the video!
John
I just watched the video series showing your bench being built from beginning to end and I think your design and execution is great. I am very much wanting to build this bench but I am having trouble finding reclaimed wood for the benchtop and legs. I would greatly appreciate it if you or anyone could direct me to a good source of reclaimed maple. thanks for any help you can provide.
Log in or create an account to post a comment.
Sign up Log in