
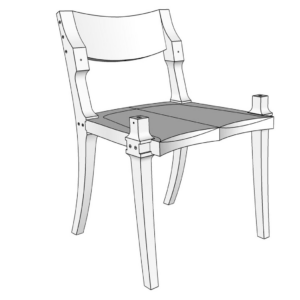
Suppose you’re drawing a dresser and you’re working on the drawers. Rather than draw each drawer separately, modify a copy of the first one to fit each of the other openings as needed. Remember to use Make Unique on the components that will be modified or you’ll modify the drawers you don’t want to change.
In the attached video, I demonstrate how to add height to a drawer by making a left to right selection around a portion of the geometry and then Moving the selected geometry. If you need to make a drawer wider or narrower, you could use the same sort of technique to move the geometry on one end of the drawer front, back and bottom. Then just move the affected side component.
Although I didn’t show it in the video, it is a simple matter to add dovetail sockets and pins if needed as the drawer gets deeper. Drag a left to right selection box around an existing socket or pin and with Ctrl+Move copy the selection and move it into place. Use guidelines to layout the locations for these new details.
As always, questions?


Comments
Can I assume that once a "supercomponant" is made unique that all it's subcomponants are as well?
No, if you have nested components, you'd need to make the individual components inside the nest unique as well as the super-component. Actually you'd only need to make the super-component uunique if you'd need to change the positions of the components inside relative to each other as in moving the sides to make a wider drawer.
Since the copy of the drawer wouldn't be the same as the original, you'd probab;y want to make the super-component unique anyway so you could give it a new name. FOr example if you drew the top of three drawers first, you might give the super-component the name, "Top Drawer". Then after making a unique copy for the middle position you might change its name from, "Top Drawer#1" to "Center Drawer" and so on.
Hi Dave,
Excellent video as always. Quick related question. Do you have another video or tutorial where you show how to make a quick dovetail joint?
Thanks,
Erick
EricO It seems kinda hard to find but here is the link to the DCB archives I believe in it's entirety
http://blogs.taunton.com/n/blogs/blog.aspx?webtag=fw-designforum
Nope..that doesnt get the archive either. hmm. I get there by clicking the archive link under "about design.click.build over on the right hand side of this page. THEN finding anther archive button on the next page too...it's kinda odd having it set up that way.
Erick,
I've done something in the past but even I am having a hard time finding it in the blog archive. I've cleaned up my process though and made it more efficient. I'll make a new turoial for that.
mics_54, thanks for giving it a go.
Dave
I am working (when I have the time) on a couple of ruby scripts that are intended on resizing things like drawers, panel doors etc. that resize only the things you want. The scripts are intended to work on a 'group' of components. So the drawer or door would be a group of milled and shaped boards that are components. The first script makes a unique clone of the original group of components. The key here is to make unique from the original group of components but not internal to the new group. ie the sides of the drawer are new instances of a new component.
The second script allows one to pick a spot on a face of a component, and then you input a dimension - say 1". then all components or faces or vertices in the group to the left of a plane perpendicular to the selected face and through the selected point move 1/2" to the left and the other side 1/2" to the right.
If you wanted to widen a panel door you would execute the script twice. Once on each side of the center stile.
So in a couple of mouse clicks you can resize complex groups leaving the jointing and thickness intact.
Anyone interested?
I have some other simple woodworking tools that I have written scripts for too.
Log in or create an account to post a comment.
Sign up Log in