
In the recent Williamsburg Conference – Working Wood in the 18th Century – Mack Headley gave an interesting talk on various furniture examples from Monticello. One of the pieces he described and showed in pictures was Thomas Jefferson’s Universal Table. As mentioned in my previous blog post, Thomas Jefferson seemed to favor furniture that was dynamically complex, such as unfolding, sliding, ratcheting, rotating, hinged, etc. The Universal Table certainly fit in, with its gliders and expanding flaps.
The Universal Table was a design by Thomas Sheraton and is displayed and described in his book “The Cabinetmaker and Upholsterer’s Drawing Book”. I used this reference to create the SketchUp model by scanning the drawing and importing as an image. The Sheraton drawing provides a scale, so I was able to use this to make the scanned image full size.
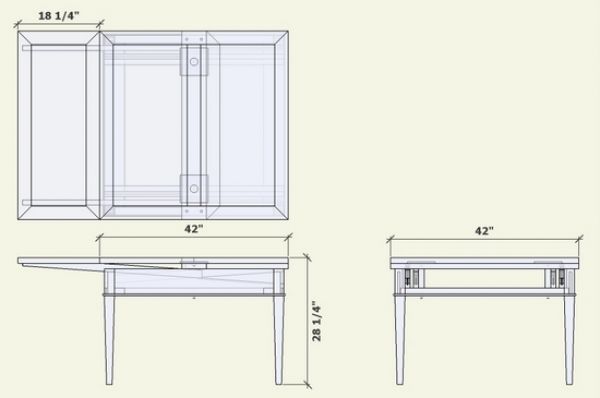
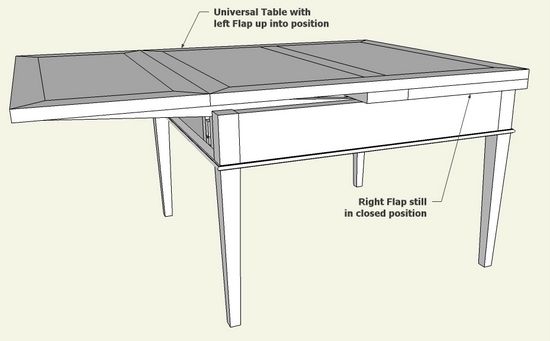
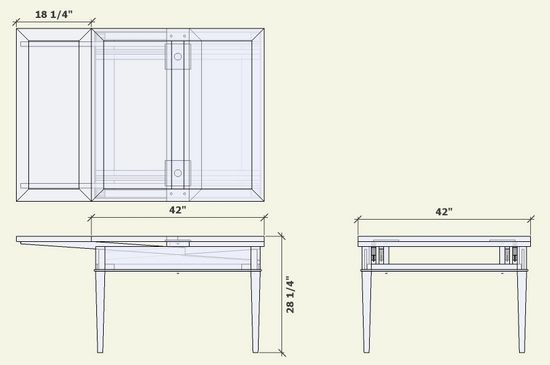
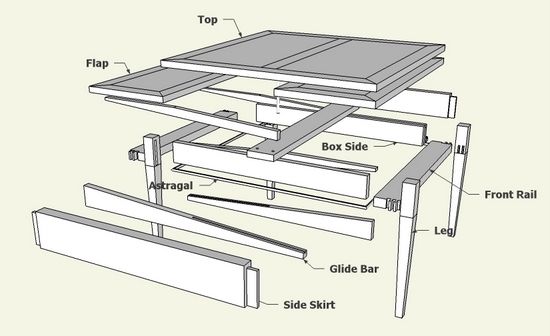
Here is the assembled, orthographic, and exploded views.

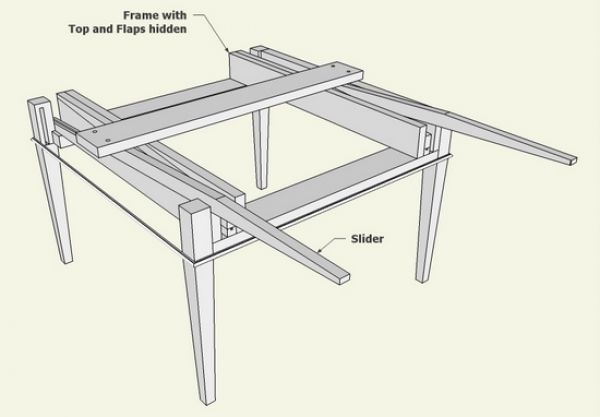
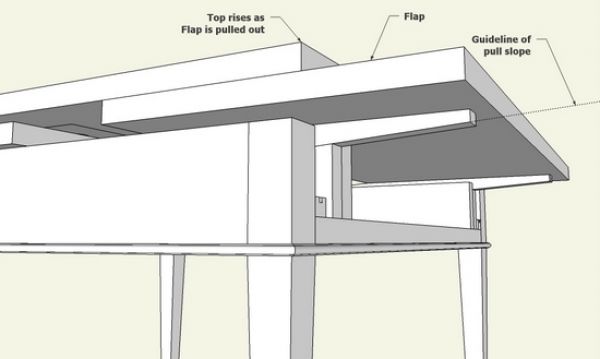
One motivation for modeling this table was to find out how the Flaps slide out and increase the table’s size. It was not so easy to “see” the details of construction in Sheraton’s drawing, but I was hopeful that SketchUp could help uncover the complexities.
Here is a close up of the inside of the table frame (with the Top and Flaps hidden) showing the grooved glide bars and sliders which provide for Flap extraction.
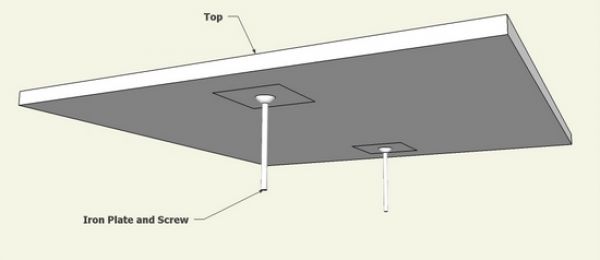
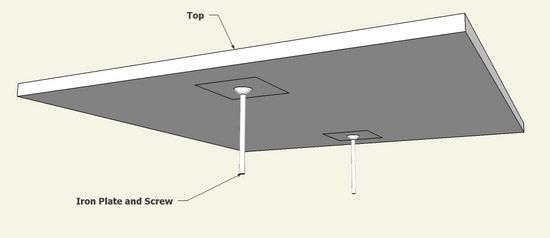
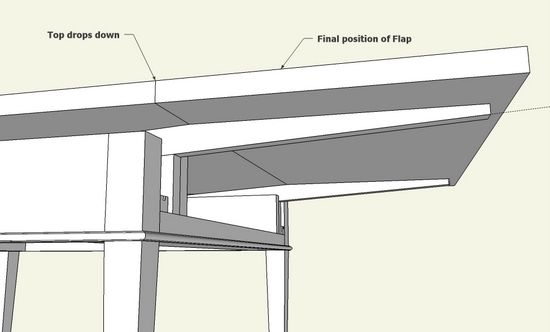
Also, as I understand Sheraton, the Top is fastened with an iron plate, screw, and nut. This allows the Top to be loosened and raised to provide clearance for the extraction of the Flaps. Here is an underside view of the Top showing the position of the plates and screws.
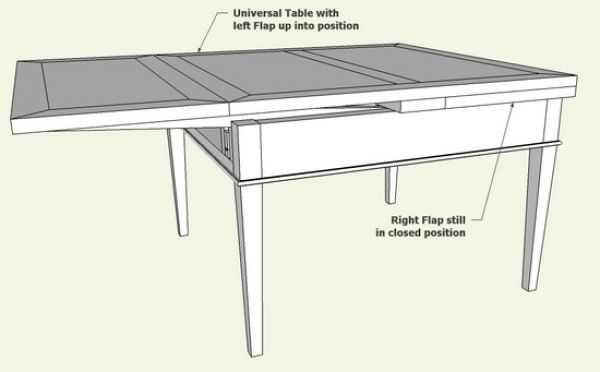
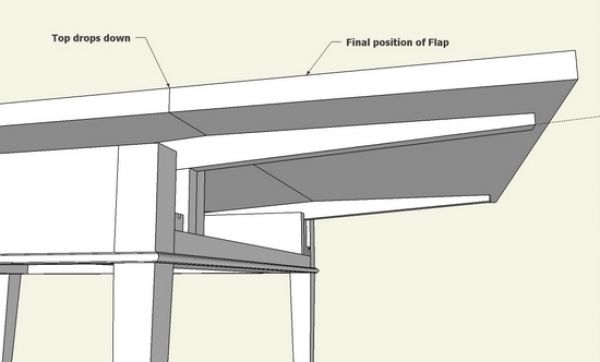
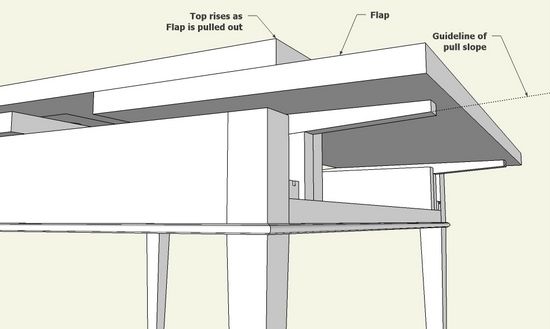
Here are several views of the right Flap being pulled out on the glide slope.
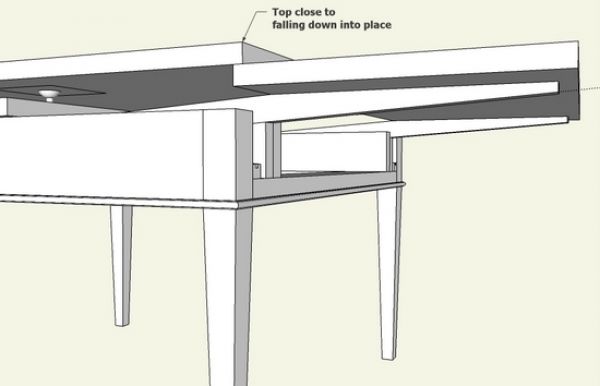
Here is the final position after the Top drops into position flush with the Flap.
I continue to study this table and the Sheraton design as I’m not confident about the slider mechanism and Top bolting scheme. Also, I plan to experiment with SketchUp’s ability to show an animation of the Flap extraction.


Comments
Tage Frid had an article on a table using this style of extension way back in FWW #9:
https://www.finewoodworking.com/FWNPDF/011009034.pdf
In the article, he calls it a "Dutch pull-out."
-Steve
And check out a recent blog about the model table one of our readers made while trying to figure out this table.
https://www.finewoodworking.com/item/20750/i-might-have-the-answer-you-need
Cool!
To BetsyE and saschafer: Thank you for referencing the Tage Frid article. I was not aware of this one.
The results are the same, but the details are slightly different. As I understand the Frid article, there seems to be sliders but not guide bars as shown in Sheraton. The guidebars are grooved to accommodate a pin within the end of the sliders. Also, Sheraton has the iron plate and screw/nut combination to fasten the top in place. Frid provides vertical dowels in the top. I can't be sure of these differences, but this is my current understanding.
Tim
How do you make your screws for your design? Or for that matter, how do you build screws in Sketchup?
To WWinCCFL: I simply show the shaft and head of the bolts or screws (usually nuts also) with a call-out on its specs. I do not show threads. Dave Richards has a blog entry on making threads (I believe this was associated with a workbench and its vice screws. This entry is temporarily not available as the archive is being transfered to the new system.
Tim
Hi Tim,
I really admire what you are capable to produce with Sketchup! ;))
I have a question regarding the exploded views: how do you create them? Via a plugin or manually?
I am currently creating a (second) bed for my son and I am struggling on this particular point.
Cheers!
Stephan
How could we get the file?
Log in or create an account to post a comment.
Sign up Log in