

If you’ve been using SketchUp to model your woodworking projects, you’ve probably gone through the exercise of drawing in dovetail joints. I’ve demonstrated ways to draw them in previous blog posts. They aren’t difficult to draw but you need to be careful with your layout to make them look proper. I guess its the same way in real wood, though, isn’t it?

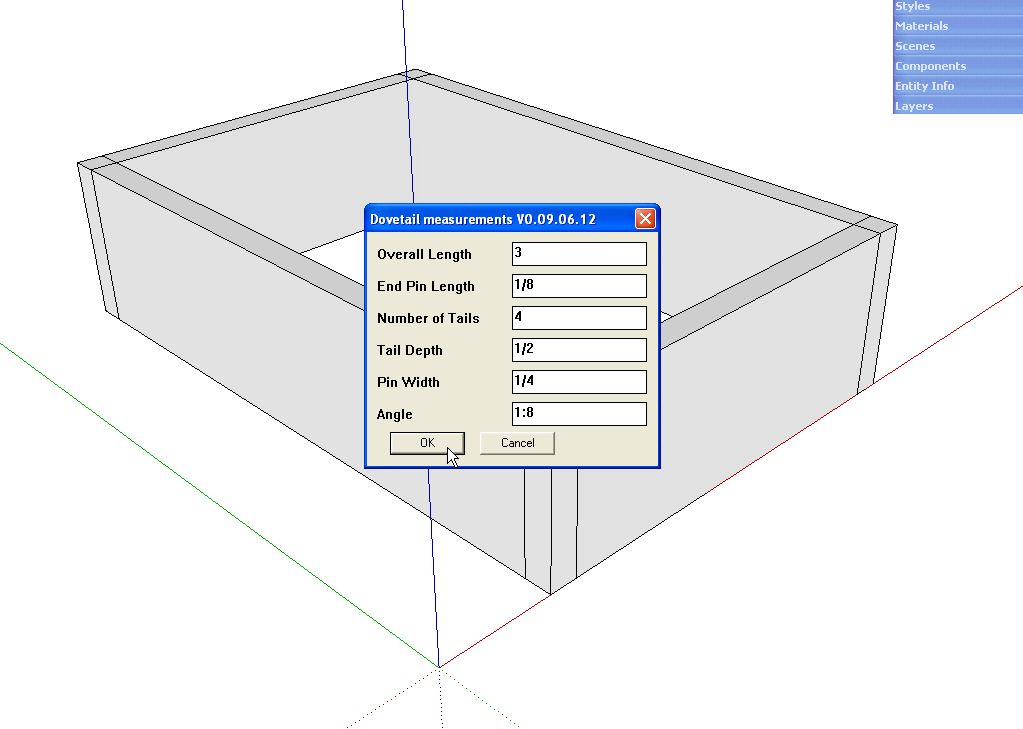
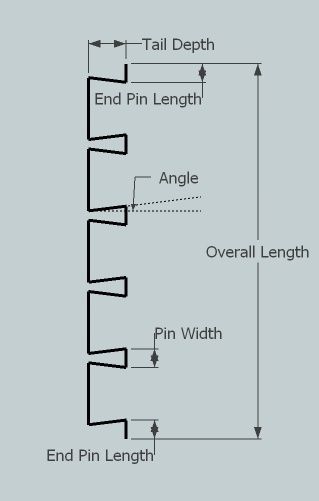
The other day I received an e-mail from Tim, a fellow woodworker, SketchUp user and blog reader asking me to take a look at a plugin he’s written. I couldn’t wait to get a chance to try it out. He’s done an excellent job of simplifying the task of drawing this common joint with a dialog box. After you enter the values for the layout, The lines for the joint are drawn vertically at the origin. If your dovetail joint is located in the right spot, all that remains is to use the Push/Pull tool to push away the waste. More likely though, it’ll be something like this.

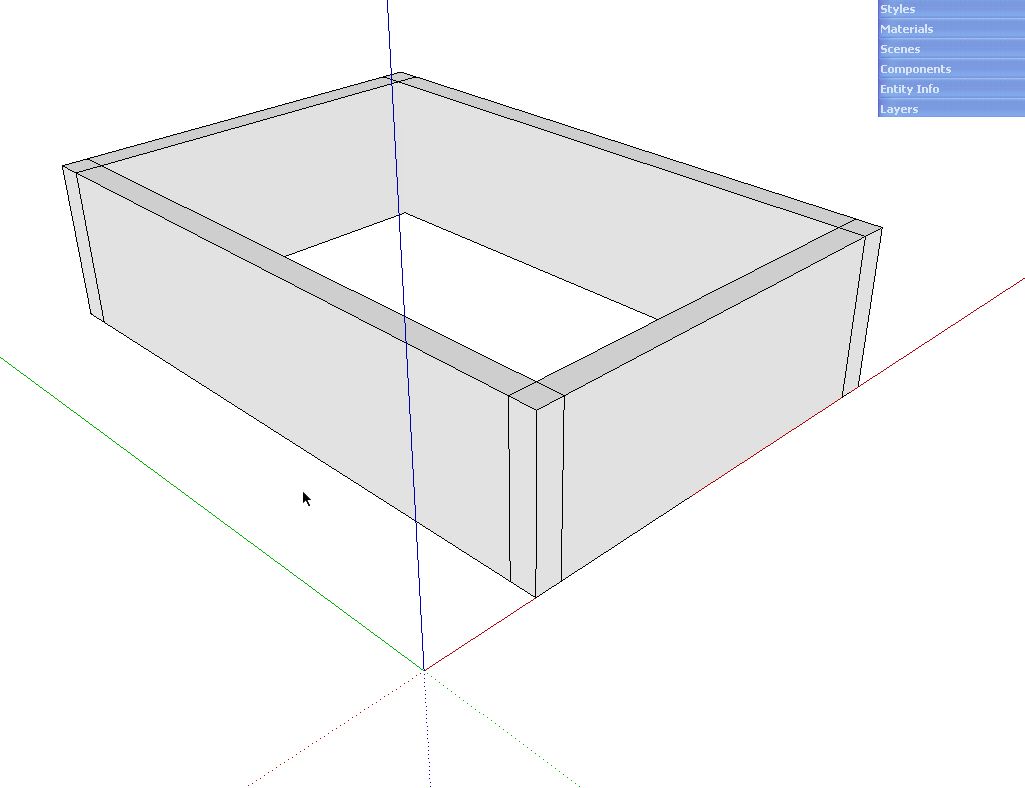
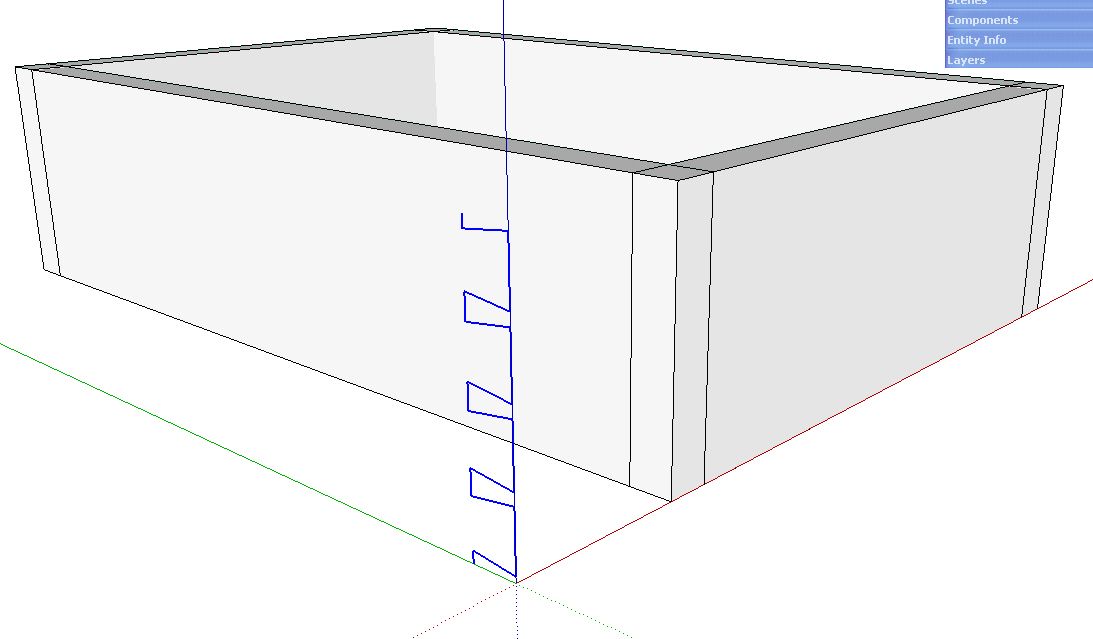
Here I’ve drawn a simple box. The pairs of sides are instances of the same components and I’ve flipped one copy of each the the outside faces are properly oriented all the way around. I used the Flip operation but you could also use Scale and -1 to do the same thing.

Next I chose the plugin from the Plugins menu. I made the desired settings and clicked OK. The dialog box will accept entry in decimal or fractional units and the angle can be entered as a ratio, i.e. 1:6, 1:8, etc. or in degrees. If you enter 8, it will be understood as 8° while 1:8 will be recognized as a slope ratio.

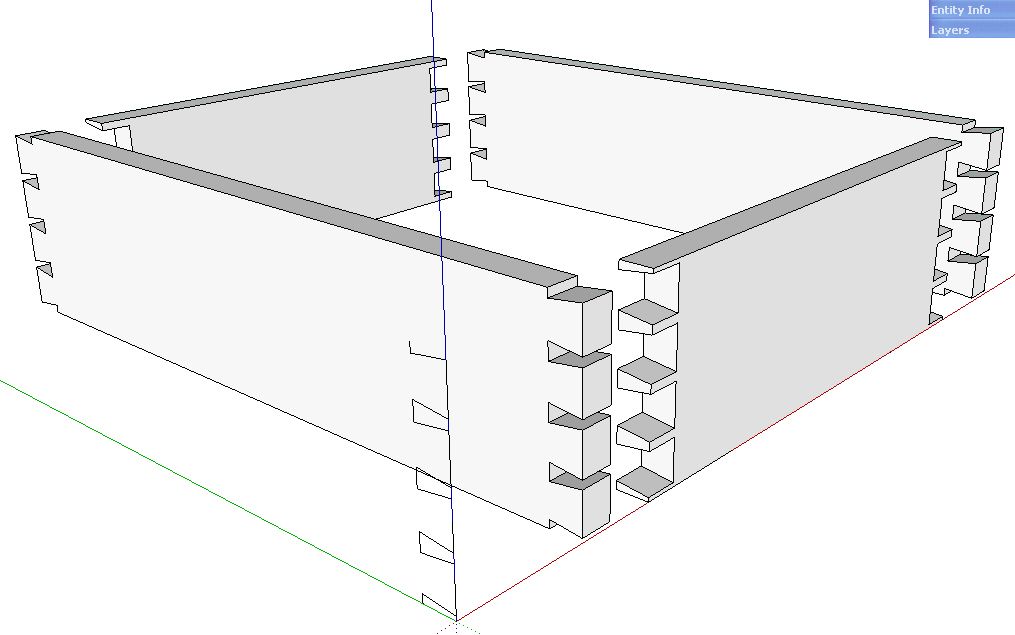
The dovetail joint is drawn as a collection of line segments. I show it as selected in the image, above.

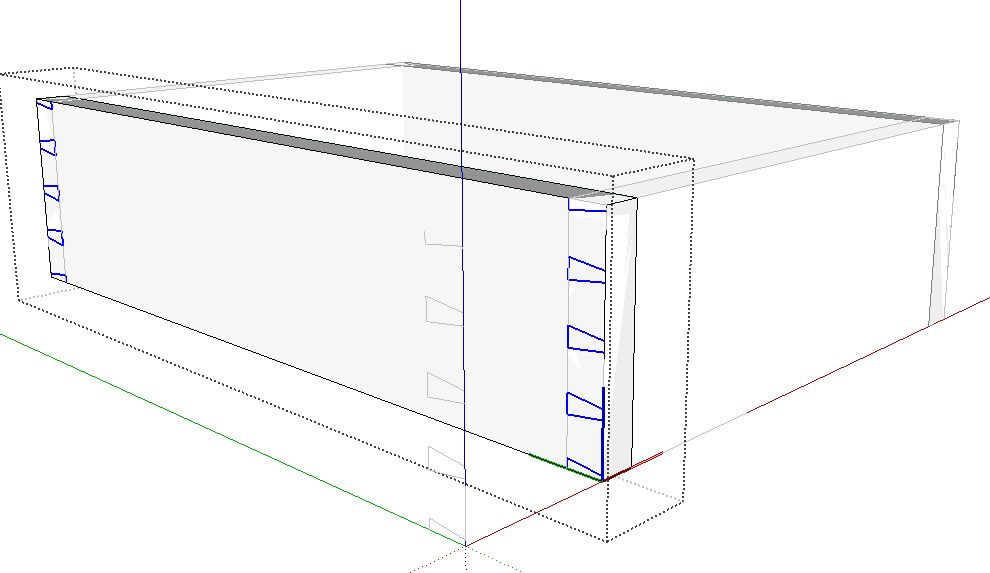
Since I want to use the same joint on all four corners I copied the lines with the Move tool and placed it at the corner of the box. I also copied the lines to the opposite end of the long side and flipped them so they were oriented correctly.

With both sets of lines select, I chose Cut from the toolbar. You can also use Ctrl+X on the PC or Opt-X on the Mac or pick it out of the Edit menu. Then I opened the component for editing and, from the Edit menu, chose Paste in Place.

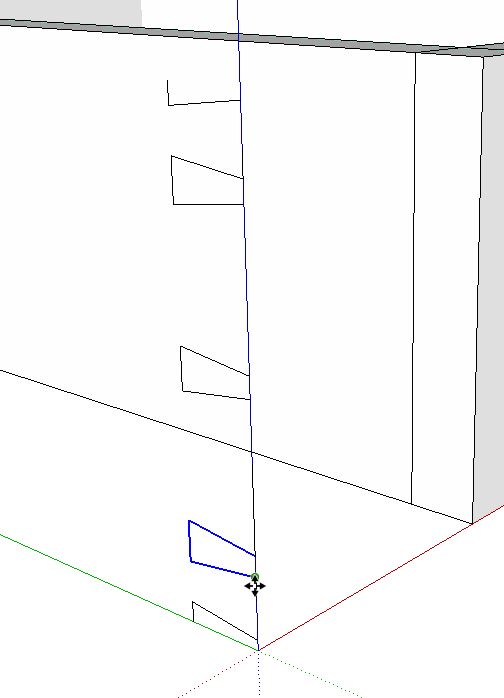
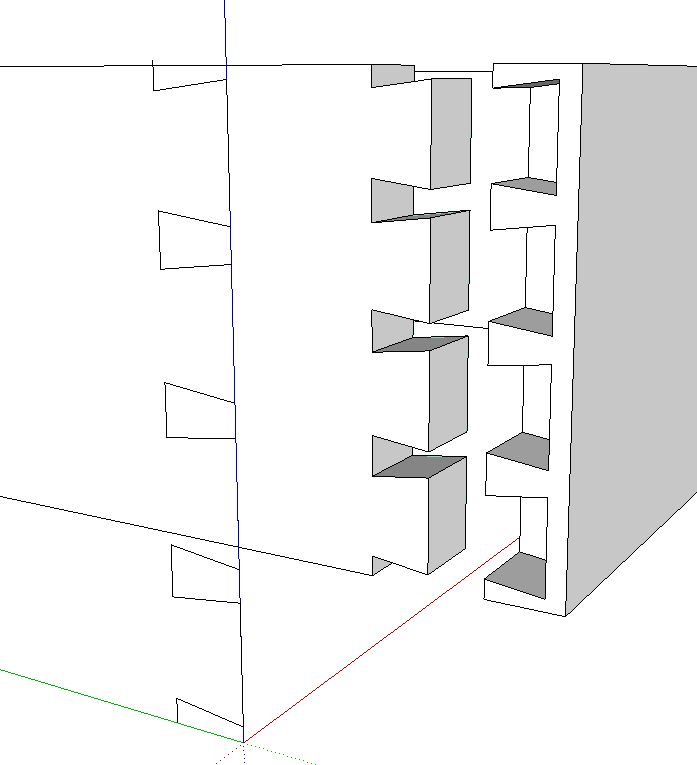
A little Push/Pull action to get rid of the waste came next. Then I copied the original lines again and placed them at opoosite ends of the pin board.Push/Pull again to get rid of the waste and The dovetail joints are complete all the way around.

If you’d like to make variably spaced dovetails, you can edit the location of the pins before adding them to the components. Simply select the three segments you want to move and use the Move tool to place them as needed. You could also make variable width pins by selecting only the angled edges and moving them.

Half blind dovetails are just as easy. Make sure you set the Tail Depth correctly and copy the lines into the right place. If you set the angle to 0, you’ll get box joints, too.
You can download the plugin from Tim’s site, here. There’s likely to be an update to the plugin over the weekend but even so, it’s definitely a plugin that a woodworker can use.


Comments
Dave/Tim,
A excellent plugin which I'm sure many woodworkers have been waiting for.
A work around I have found with your program to use with metric dimensions, on the pop up dialog box, use some simple math. i.e 50mm/25.4 will give you the imperial dimension.
Thanks again.
Nice! This one has been in the back of my mind for some time. I imagine with a little thought and some more coding, the plugin could also do the push-pulling for you. I'll definitely have a look at this plugin!
Thanks for the review. I updated the plugin to use the default units from the model. You can download it from my webpage using the link above that Dave provided.
I've been fooling around with this on some small boxes and have run into some difficulties. Does anyone know if there is a minimum "overall length" that the plugin will accept? On my boxes (3 1/8" tall) the layout that is produced is too big
I just tried it with a 3" long run of dovetails with no problem. Here's a link to a JPG export of the result.
http://farm4.static.flickr.com/3547/3825134906_48533f30d1_o.jpg
Perhaps you could send me the SKP file showing the problem you run into?
Dave
I found that you can't enter lengths in the plugin as a combination of whole inches and fractions, or it generates incorrect results. You just need to enter the decimal equivalent of the fraction (eg, 3.125" rather than 3 1/8") and it works properly.
Yes. That is a known issue but the work around isn't hard. I haven't heard from the author since I posted this blog entry and it doesn't appear that there's an updated version so decimal entries it'll have to be.
having a few problems with dovetails. draw out a sample box and find the plugin enter my values click ok but nothing appears!have tried selecting edges surfaces etc. am i missing something. using most up to date sketchup on mac. any ideas?
smaher, the plugin draws the layout of the dovetail joint working up from the origin. Is it possible that your box is covering the lines drawn by the plugin?
Have you tried just running the plugin with a blank drawing window?
Note that I ran the plugin outside the components and then copied it into the components to actually cut the joints.
e-mail me about this if you wish.
Dave
thanks dave that was it i always start my drawings from origin so must have been covering it all the time. thanks.
Glad that took care of it. Normally I also start my models at the origin as well but because this plugin does the same thing, it's a good idea to move the rest of the model down the red axis a bit. Or you could temporarily hide the component that is hiding the dovetail lines so you can move them away after they've been created.
Dave
I just went to Tim's site and tried to download the dovetail plugin. The download site g(media fire) ave me a "Invalid or Deleted File." Is this plugin available somewhere else?
I have not heard anything from Tim since shortly after I made this blog post so I have no idea if the plugin is still available. There is a better dovetail plugin now, however. I wrote about it here: https://www.finewoodworking.com/item/24751/drawing-dovetails-with-a-new-plugin That plugin isn't free but the price is fair. Check it out.
-Dave
Log in or create an account to post a comment.
Sign up Log in