Turn a Pad-Foot Leg
A graceful leg that's easy to make entirely on the lathe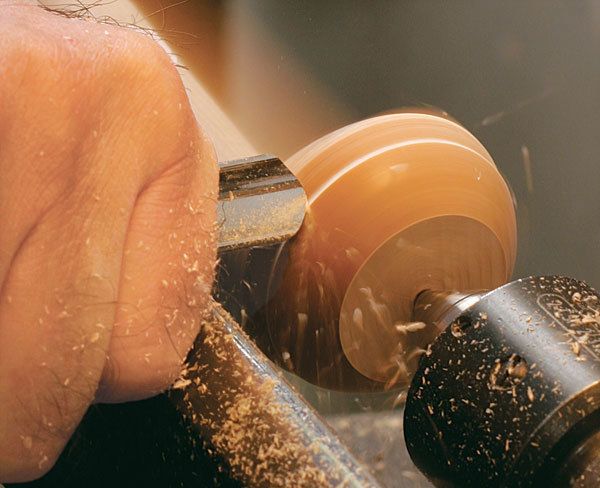
Synopsis: Unlike its fancier cousin, the cabriole, the pad-foot leg is produced entirely on the lathe, with no bandsaw work beforehand or hand-finishing afterward. Jon Siegel demonstrates the multi-axis turning technique that produces this furniture staple. The leg is partially turned while mounted in one pair of centers, then moved to the second pair to finish.
From Fine Woodworking #203
There are many names for the furniture leg that’s less elaborate than a cabriole but more complex than a simple taper. I’ve heard it called pad foot, spoon foot, and Dutch foot. By any name, it was most popular on Queen Anne tables and lowboys. It also can complement Federal or Shaker-inspired furniture.
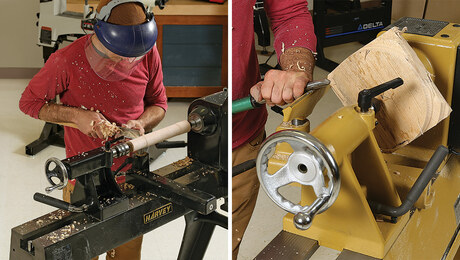
Unlike cabriole legs, pad-foot legs are produced entirely on the lathe, with no bandsaw work beforehand or hand-finishing afterward.
Making a pad-foot leg involves multi-axis turning—that is, using two pairs of center points. The leg is partially turned while mounted in one pair of centers, then moved to the second pair to finish.
One pair falls at the true center of each end of the leg blank. The second pair is offset in from the true centers in two directions by a fraction of an inch at the bottom of the leg, and a smaller fraction at the top. The two axes—that is, the imaginary lines connecting the centers—cross at a transition point. That’s usually at the base of the pommel, the square section that receives the mortises for a table apron or the carcase of a chest.
Accurate layout is critical: To produce these legs, you must precisely locate the two sets of center points and the transition point. That involves careful marking and a little arithmetic.
For the leg shown here, begin with 8/4 stock, milled to about 1 7⁄8 in. square. (I prefer maple, but any hardwood will do.) A blank that size will give you a well-proportioned leg for many tables. The leg will measure 1 3⁄4 in. dia. at the widest part of the foot (that’s the line defining the toe), and 3⁄4 in. dia. at the ankle, where the leg is narrowest. The square pommel can be whatever length suits your design.
To find the true center at each end of the blank, I normally use a marking gauge, but for these legs I use a center square because it gives me diagonal lines for the next stage of layout. Don’t just connect opposite corners, because that method is not accurate enough. If you use the center square at each corner, the lines will create a tiny square in the center. Punch a hole in the center of this square. Next, evaluate the appearance of each of the faces, and choose the outside corner where the best faces meet. Make a distinct mark for reference on the inside corner; that will help you orient the offset centers.
For the full article, download the PDF below:


Log in or create an account to post a comment.
Sign up Log in