Dining Room Table

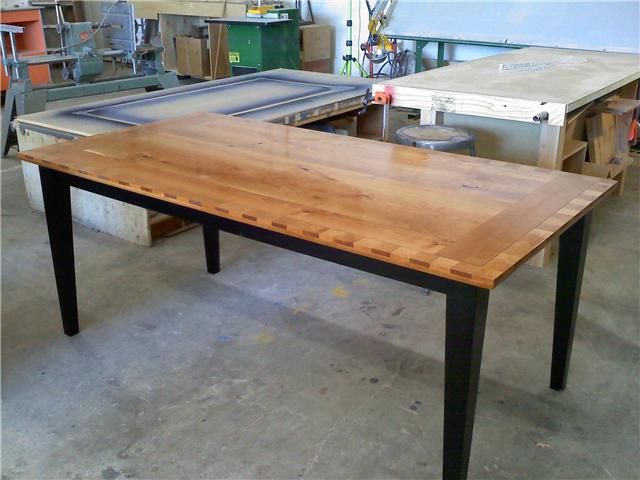
This is my first big project since deciding to rent shop space and take my hobby seriously. It is a gift for my girlfriend and her two daughters made from solid cherry flooring left over when she had her floors done some years ago. The base is made from redwood she had drying in her barn for 10+ years. She recently sold her house and I though this would be a nice way for her and her girls to keep a piece of it.
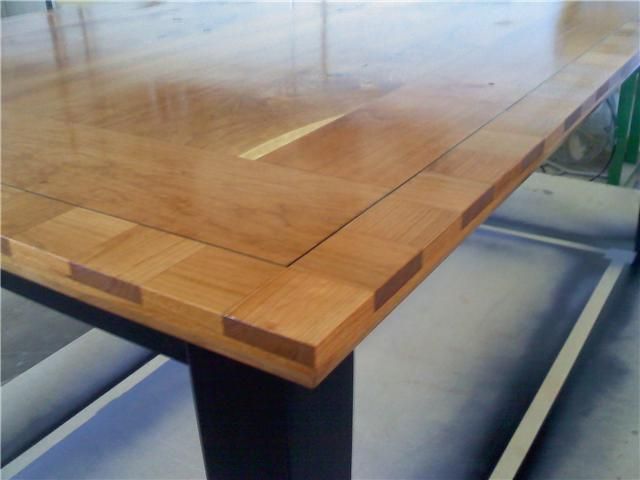
The table border is made up of 108 alternating 2-inch-square pieces. The black line is leftover veneer the shop owner let me have.
The table is 6 feet long and 3 feet wide. I’m working on 3′ x 3′ add-on table and a lowboy with the same woods and design features.
I regret the pictures are so poorly staged. I was in a hurry to get it to her for Christmas and only had my cellphone.


Comments
Mathman, I love the border around the top. I don't think I've seen anything like that before. How did you attach the border to the rest of the top?
Thank you, Aaron.
I routed a 2"-wide tray around the border, half the thickness of the top. I glued the black veneer in place and then just glued each square in place. I had to shave equal amounts from the edges of all the squares so they would meet perfectly at the corners and still be of uniform width.
This border wasn't part of my original design - I was doing something similar with the lid of a small box and thought it would be interesting for the table as well. It took almost as long to do the border as it did to build the rest of the table, but it was very enjoyable work.
Mathman50: Your table is awesome. Couple of questions: What finish did you put on the top and how did you accommodate seasonal expansion/contraction?
Thank you, postandbeam.
I used seven coats of Tung oil, steel wool between coats, and it looks very nice, but I know that won't offer much protection. I'm trying to find a flat or matte polyurethane for the topcoat and so far I haven't had any luck. Meanwhile, everyone is being super careful not to damage the top.
Any suggestions for a durable topcoat or where I might find a flat polyurethane product?
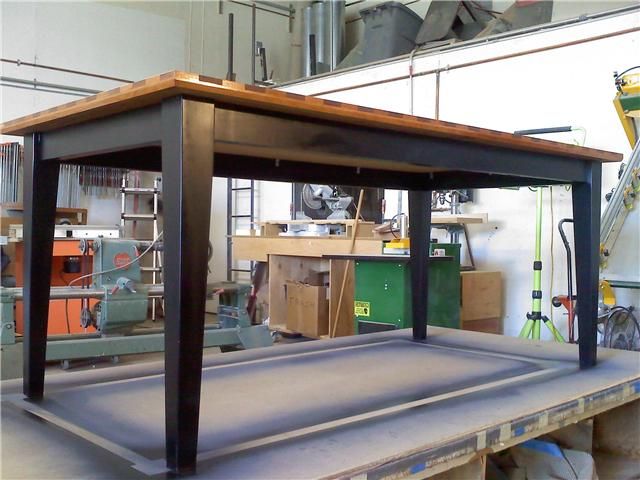
I milled the existing tongue-and-groove for a tighter fit than is used for flooring, but left some room for movement. The top is attached to the base only at the center on the short rails and along the middle 2/3 on the long rails. The redwood rails are very flexible and will move with the top without stressing the leg joints. (Of course, this is only theory as I've never done this before)
Log in or create an account to post a comment.
Sign up Log in