
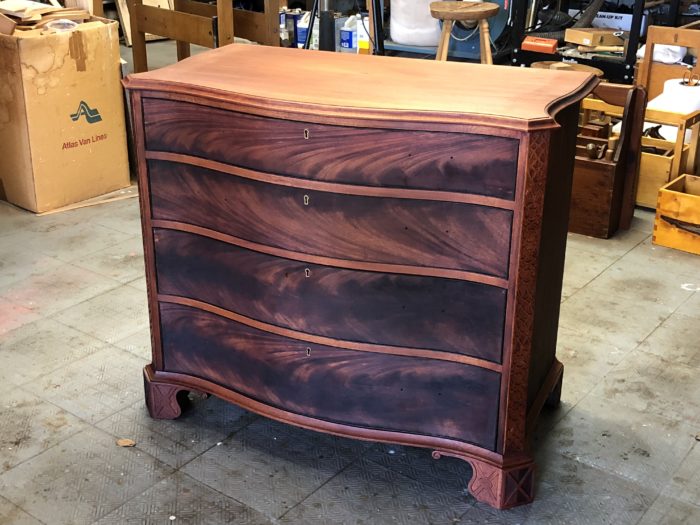
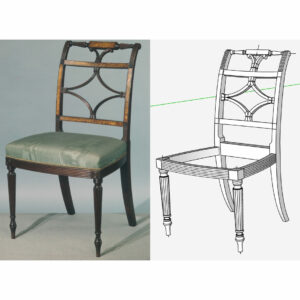
I’m finishing an English 18th C. Serpentine Chest, circa 1750. The primary wood is Honduran Mahogany and secondary, Monterey Pine. Crotch mahogany veneer is used on the Drawer Fronts. Here is a picture of the piece still in the shop for finishing.
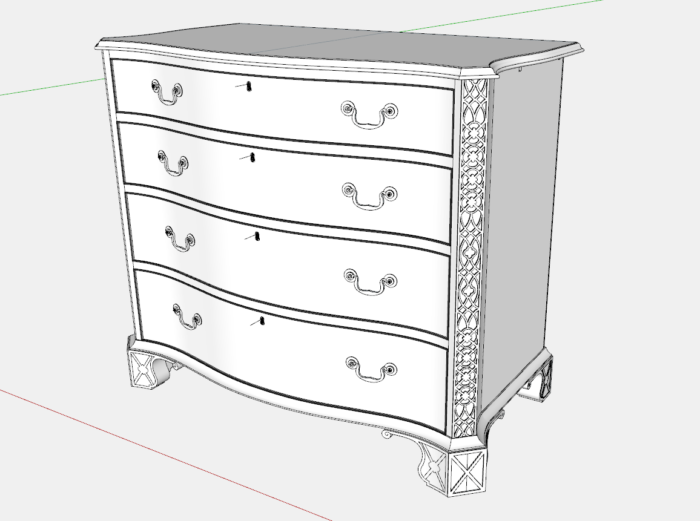
The canted corners and serpentine shapes certainly add complexity to the shop work. But it was also a challenge creating the detailed SketchUp model and its resultant shop drawings. SketchUp has a special feature called Paste-in-Place that was extremely effective in developing the model. I will show you how this feature was used to make the shaped drawer fronts. A video of this process is included.
The final assembly of the SketchUp model is shown here.
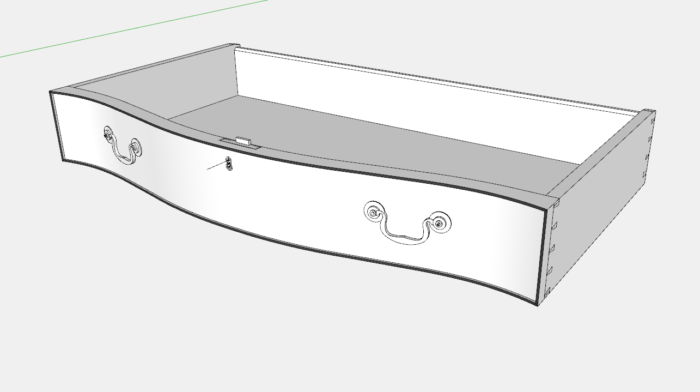
For your reference I show below drawer details for the top drawer shown in the following Assembly and Exploded views.
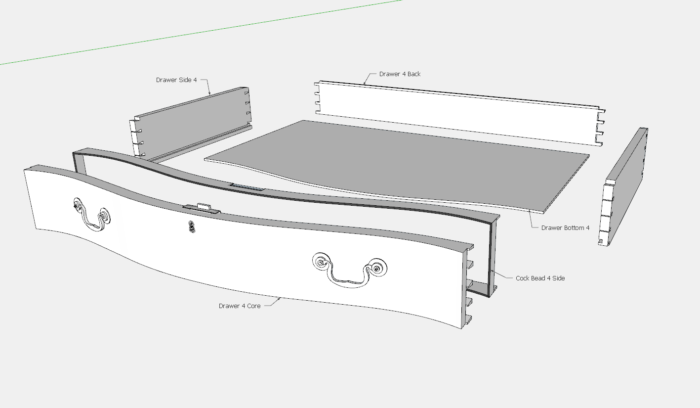
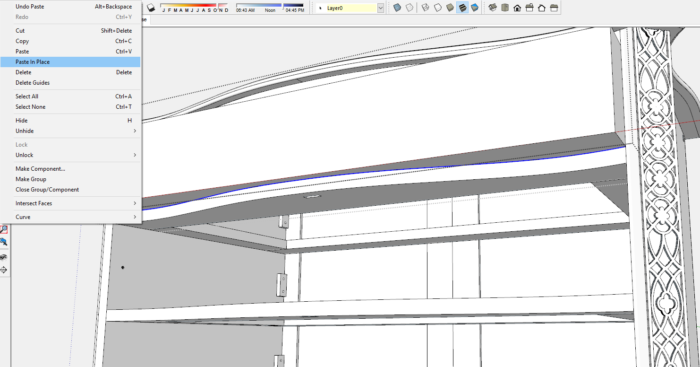
To shape the drawer front, it is effective to reuse the serpentine shape that is already in the Drawer Frame. So you copy that shape (a continuous line shown highlighted in blue below) in the Drawer Frame, then Paste in Place that shape within the definition of the rough drawer front. Once that serpentine shape is in the rough drawer front component, you use the Push Pull tool to remove the waste. You can see this entire procedure in the video.
The Paste in Place command is shown when clicking on the Edit Tab.
Tim
@KillenWOOD
https://www.youtube.com/c/TimothySKillen


Comments
Tim,
Good video. Thanks. On the back of the drawer core, did you go on to modify the shape--flattening the curve a bit at the ends--so that you had a square edge for the half-blind dovetail sockets?
Dheim, thanks Dave. You are right, and I had forgotten about that step. I probably forced a line on red axis for about an 1 1/2" or so.
Tim
Tim
Tim, I think your Youtube URL has changed from this-
https://www.youtube.com/c/TimothySKillen --
To this-- https://www.youtube.com/user/killenwood
-which is where I found your videos.
Thanks for the great content.
Andy
Log in or create an account to post a comment.
Sign up Log in