Shoulder Your Dovetails
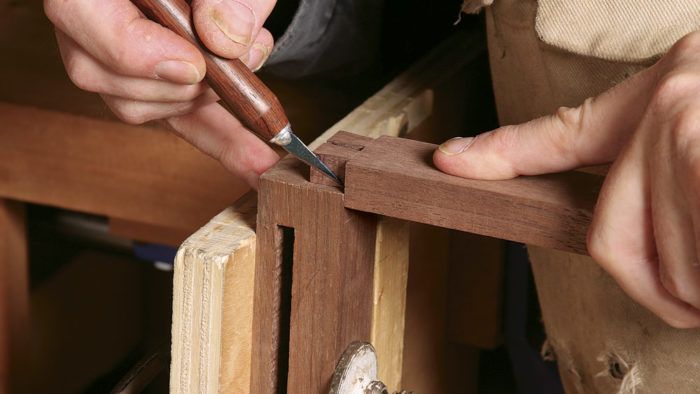
Learn how to cut shouldered dovetails for a cleaner, more efficient drawer joint.
Synopsis: The shouldered dovetail is Steve Latta’s joint of choice for drawers, table stretchers, and carcases. It combines efficiency with a clean look. On drawers, it makes a huge difference to the stability and appearance of the finished product. On drawer pockets, it ensures a dead-square result. And on casework, it guarantees a square box and makes layout easier. As Latta says, “Why wouldn’t I use it?”
I can’t remember when I started shouldering my dovetails, but it has been a regular practice for most of my years as a cabinetmaker. In my early days, I noticed the old-timers shouldered the dovetails on spice chests to avoid cutting half-blinds. They quickly cut through-dovetails and covered the joinery with a molding. This combined efficiency with cleanliness, and in my book that is always a winning combination. I’ve expanded the practice to just about all my dovetails. The lip allows for an easier, more positive registration and covers up any inaccuracies or slight chipping that may occur.
I’ll walk you through this technique. It’s my typical approach for drawer construction, the top stretcher of a table, and carcases. The order of operations is almost the same for all. It is easy and saves time while adding to the overall clean look of the piece. Why wouldn’t I use it?
Drawers with no twist
While creating the shoulder on a dovetailed drawer makes a huge difference to the stability and appearance of the finished product, shouldered dovetails aren’t much more work to create. After you fit the drawer front to the opening, lay out and cut the dovetails on the sides. I cut mine on the tablesaw using a customized blade for cutting dovetails. All the teeth are ground at 10° in one direction, and I tilt the sawblade 10° so its tip is parallel to the saw table (for more details on my method, see “Tablesawn Dovetails,” FWW #152).
I use a scrollsaw to remove the waste between tails. I shoulder the tails on the tablesaw with a rip blade. Hold each drawer side on end against the fence to skim off about 1⁄16 in. or so of material to create the shoulder. Now move on to the pins. Set a marking gauge to the thickness of the tails, and transfer them to the drawer front. Mark one side of the tails, wiggle the board to just cover those lines, and then mark the other side of the tails for a tight fit. With a handsaw, cut to the line on the sides, clear the sockets close to the line with a router, and pare to the lines with a chisel.
Square drawer pockets in tables
Combining the shoulder with a double dovetail on the top stretcher not only makes transferring the layout easier, but it also ensures that the drawer pocket is dead-square. If the shoulder-to-shoulder distance of the bottom stretcher with double tenons matches the shoulder-to-shoulder distance of the top stretcher with the double dovetails and the back stretcher, the drawer box is guaranteed to be square. I typically use a double tail as opposed to a single one, because adding the second tail doubles the face-to-face glue surface.
In this situation, I use the tablesaw with a miter gauge to make the shoulder cuts for the tails. Then, with a tenoning jig, I make the cheek cut on each end of the upper rail.
 From Fine Woodworking #259
For the full article, download the PDF below:
Fine Woodworking Recommended Products

Leigh Super 18 Jig

Suizan Japanese Pull Saw

Festool DF 500 Q-Set Domino Joiner


Comments
This is based on the old Stanley 140 trick that I've been using for a long time. The 140 was a skewed, rabbet plane which was used for cutting the shoulders. Using a tablesaw is quicker without a doubt and having a pair of left/right hand skewed rabbet planes does get pricey!
Log in or create an account to post a comment.
Sign up Log in