
Don’t Fear the Hand-Cut Dovetail
In the first part of this two-part article, a modern master reveals every step of his system for cutting dovetails...tails first.

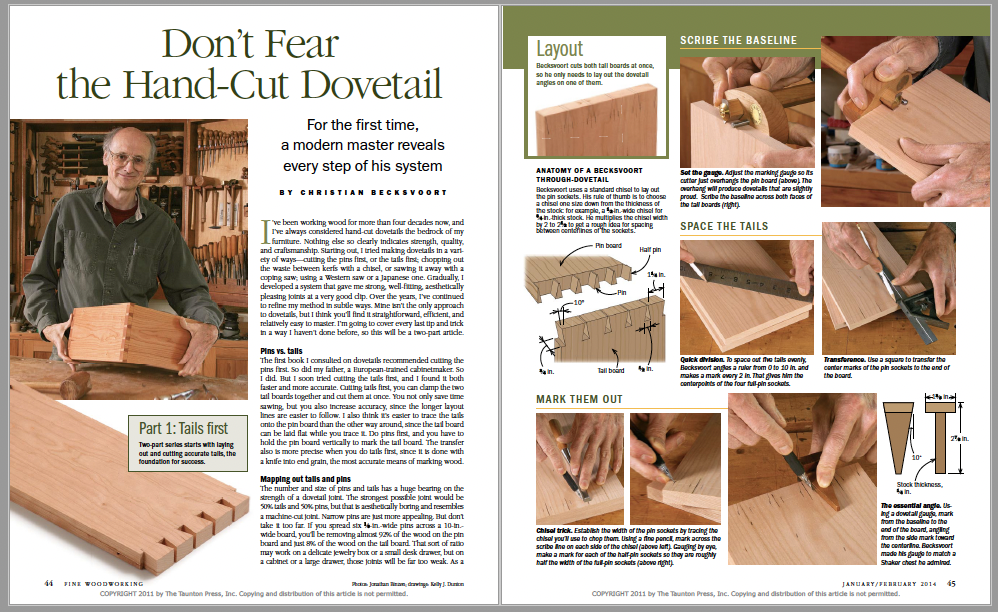
Synopsis: If you’re looking for expert advice on dovetails, you can’t go wrong by turning to Christian Becksvoort. This Shaker furniture master has been cutting dovetails by hand for more than 40 years, and if there is a method out there, he has probably tried it. Here, in the first of two articles, he spills his secrets—starting with the tails. Learn how he lays them out, figures out the best spacing, marks them, saws exactly to the line and chops them accurately. When you’re done, you’ll have a set of perfect tail boards.
I’ve been working wood for more than four decades now, and I’ve always considered hand-cut dovetails the bedrock of my furniture. Nothing else so clearly indicates strength, quality, and craftsmanship. Starting out, I tried making dovetails in a variety of ways—cutting the pins first, or the tails first; chopping out the waste between kerfs with a chisel, or sawing it away with a coping saw; using a Western saw or a Japanese one. Gradually, I developed a system that gave me strong, well-fitting, aesthetically pleasing joints at a very good clip. Over the years, I’ve continued to refine my method in subtle ways. Mine isn’t the only approach to dovetails, but I think you’ll find it straightforward, efficient, and relatively easy to master. I’m going to cover every last tip and trick in a way I haven’t done before, so this will be a two-part article.
Pins vs. tails
The first book I consulted on dovetails recommended cutting the pins first. So did my father, a European-trained cabinetmaker. So I did. But I soon tried cutting the tails first, and I found it both faster and more accurate. Cutting tails first, you can clamp the two tail boards together and cut them at once. You not only save time sawing, but you also increase accuracy, since the longer layout lines are easier to follow. I also think it’s easier to trace the tails onto the pin board than the other way around, since the tail board can be laid flat while you trace it. Do pins first, and you have to hold the pin board vertically to mark the tail board. The transfer also is more precise when you do tails first, since it is done with a knife into end grain, the most accurate means of marking wood.
Part 1: Tails firstTwo-part series starts with laying out and cutting accurate tails, the foundation for success.
|
Mapping out tails and pins
The number and size of pins and tails has a huge bearing on the strength of a dovetail joint. The strongest possible joint would be 50% tails and 50% pins, but that is aesthetically boring and resembles a machine-cut joint. Narrow pins are just more appealing. But don’t take it too far. If you spread six 1 ⁄8-in.-wide pins across a 10-in.- wide board, you’ll be removing almost 92% of the wood on the pin board and just 8% of the wood on the tail board. That sort of ratio may work on a delicate jewelry box or a small desk drawer, but on a cabinet or a large drawer, those joints will be far too weak. As a compromise, I remove 70% to 80% of the wood on the pin board and 20% or 30% of the wood on the tail board. Don’t get too hung up on the angle of the dovetails. There are passionate proponents for dovetail angles ranging anywhere from about 7° to 12°, but the practical difference is minimal. Outside that range, however, things get iffy. Angles above 15° result in weak corners on the tail board. And with angles below 5° or 6°, the dovetail begins to resemble a finger joint, losing its distinctive appearance and mechanical strength. I borrowed the angle of my dovetail marker, about 10°, from the first Shaker piece I restored, and I’ve been using it ever since.
LayoutBecksvoort cuts both tail boards at once, so he only needs to lay out the dovetail angles on one of them.
|
Layout
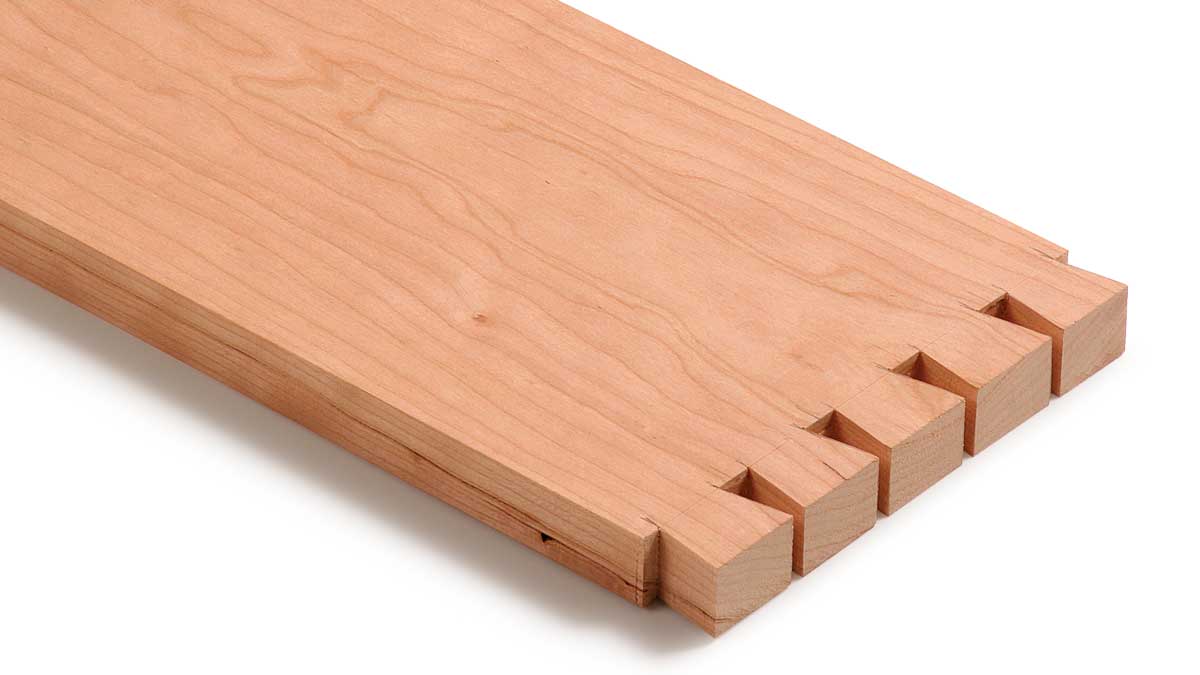
Scribing the baselines with a marking gauge is the first step in the layout process. Any gauge with a sharp, knife-edge cutter will work. When I set the gauge, I let the cutter hang just over the edge of the board. This results in pins and tails that are slightly proud. Scribe both sides of both ends of all pieces.
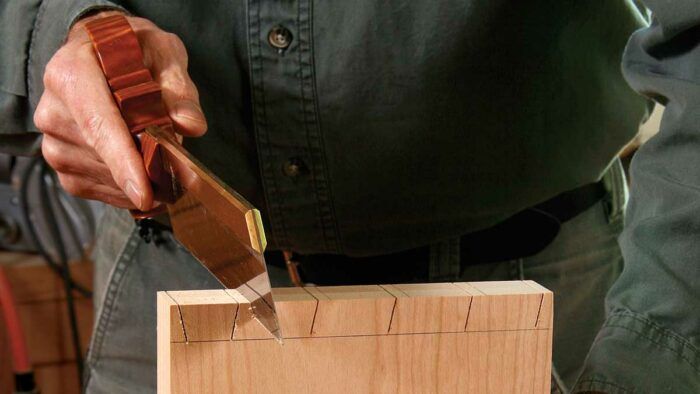
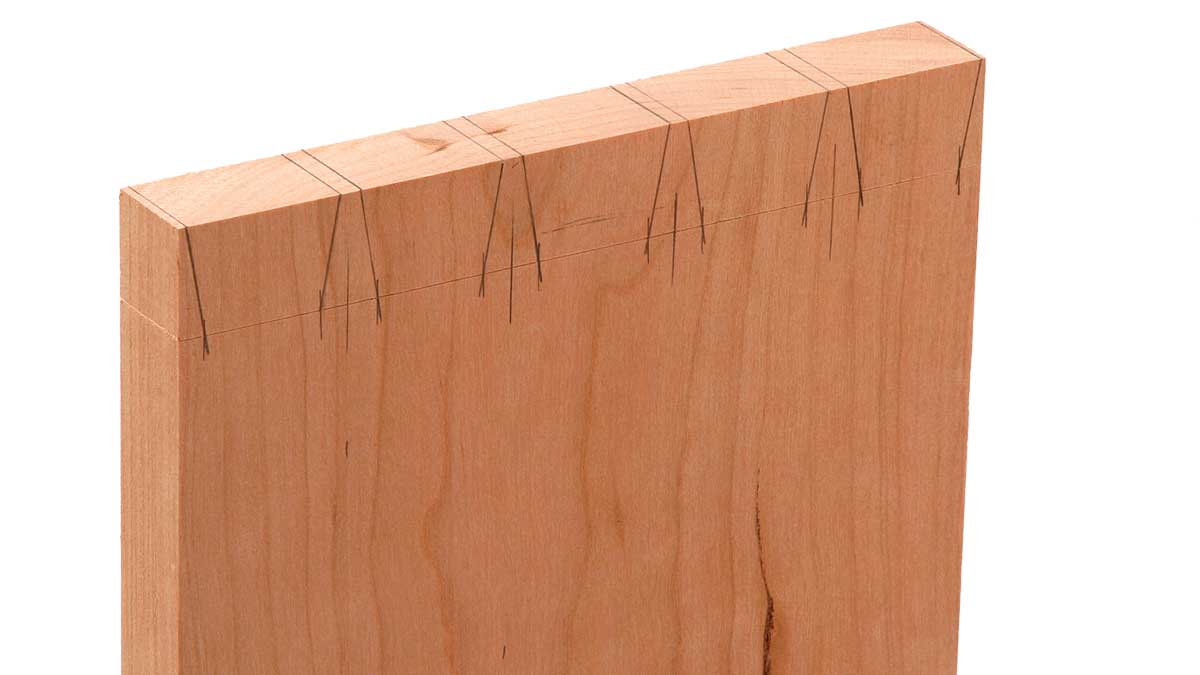
Next, mark the centerpoints of the pin sockets. For efficiency, I make my pin sockets the width of a chisel (1⁄4, 3⁄8, 1⁄2, 5⁄8, or 3⁄4 in.). That way, they require only one setting of the chisel per socket. Use the chisel itself to lay out the sockets. Holding the chisel flat on the tail board with its blade crossing the scribed baseline and centered on the pin’s centerline, draw marks on both sides of the blade. You can mark the width of the half sockets by eye. Then use a dovetail gauge and a pencil with a very fine point to draw the angled sides of all the sockets.
Last, bring the two tail boards together, inside face to inside face, exactly flush on the sides and ends, and clamp them into a vise. Then use a square and a pencil to extend the layout lines across the end grain.
 From Fine Woodworking #238
For the full article, download the PDF below:


Log in or create an account to post a comment.
Sign up Log in