
Synopsis: Glue up panels, edging, joinery, and casework with maximum success and a minimum of stress. Michael Fortune’s formula for successful glue-ups starts with remembering that glue is a slippery film. Once it is applied and clamps are tightened, everything wants to slide. Your mission is to keep that from happening, and the way you do it is with the right combination of cauls and clamping force. Learn this pro’s secrets to great glue-ups, every time.
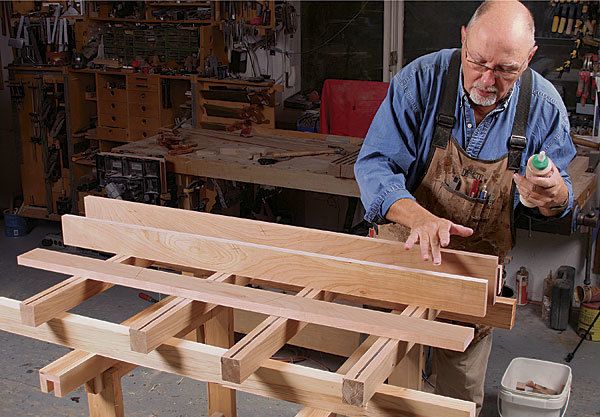
When assembling furniture parts, there is one rule I always remember: glue is a slippery film. once it is applied and clamps are tightened, everything wants to slide. restraining those parts—holding them in perfect position—is just one reason that I use clamping cauls. Cauls are simply extra pieces of wood, usually wrapped with tape or coated with wax to resist glue, held in place with additional clamps.
In this slippery situation, the direction of the clamping force is critical. So I choose and position clamps so that their force will pass through the center of the joint, and at right angles to it.
As a pro woodworker, I can’t afford to invest hours of time making perfect parts only to end up with gappy joints, crooked assemblies, or bumpy tabletops that require a lot of planing or sanding. And with the right clamps and cauls, I don’t have to.
For a full rundown of the glue, clamps, and cauls I’ve come to rely on over the years, turn to Fundamentals on p. 22. In general, I use Titebond III, because of its longer working time, and low-tech F-style clamps and pipe clamps. Their small jaws let me know exactly where I am applying force. As for cauls, I generally make them from hardwood and apply clear packing tape to one edge to resist glue.
The dry run: Follow this checklist
With the exception of panel glue-ups, a dry run is essential to make sure that you have everything you need for the glue-up, that the joints will close perfectly, and that the assembly will be square. Here’s what to do now so you won’t have surprises later.
First, make sure the parts are clearly marked for their positions in the assembly. Marking on a glue face doesn’t work well because the glue will obscure the marks. That’s why I usually employ the triangle method on a visible face, using light pencil marks. Having mistakenly assembled parts upside down before, I am very methodical about marking! Mark on a piece of masking tape if you are squeamish about writing on your project or you are assembling a part that has been prefinished.
The next step is to choose clamps that will direct the force properly, and cauls that will keep the parts in perfect position when you tighten those clamps. But before putting on every last clamp and caul, I lightly clamp the assembly together so the joints close and I can apply a glueresist. If you read my recent article in FWW #232 (“Never Struggle with Squeeze-out Again”), you know I apply wax along every joint during the dry-fit, which makes squeeze-out a snap to remove later. Any silicone-free furniture wax will work. You just rub on a small amount using a piece of scrunched-up tissue. later, when the glue is dry, squeeze-out simply flicks away, usually in one piece. And the wax residue washes away easily with alcohol.
For the full article, download the PDF below:


Log in or create an account to post a comment.
Sign up Log in