Taper Jig Combines Bandsaw and Planer
 Jul 07, 2011
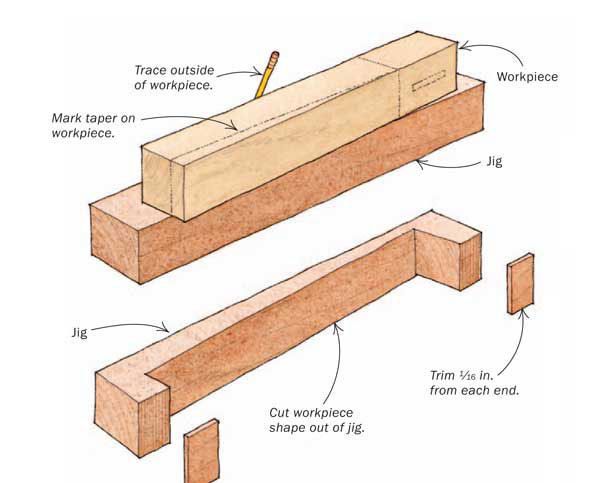
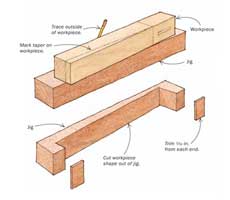
This jig makes tapered parts accurately and safely. To begin, cut the workpiece to size, making sure all the face and end surfaces are planed flat and square. Then cut the jig from a piece of scrap that’s about the same thickness as the workpiece. Cut the scrap about 3 in. longer and 1 in. wider than the workpiece.
Next, mark the taper on the workpiece. Place the workpiece on the jig, centered end to end. Line up the taper marks along the edge of the jig, then trace around the workpiece with a sharp pencil.
Use a bandsaw to cut the jig along the marked line. As you cut, stay slightly on the waste side of the mark. Use a block plane, or sandpaper wrapped around a hard wood block, to straighten and smooth the cut until it meets the line exactly. The workpiece should fit snugly into the cavity.
With the workpiece removed from the jig, use the bandsaw to trim about 1/16 in. from the face of the jig’s two end sections. This provides clearance for the jig as the workpiece is run through the bandsaw and will help you set up the planer for the final cut.
On the bandsaw, set the fence to make a cut about 1/8 in. wider than the jig, then run the jig and workpiece through the blade. For a workpiece with a taper on two adjacent sides, rotate the part 90º and cut again.
|
|

|
|

Jim Richey


Log in or create an account to post a comment.
Sign up Log in