
Shopmade Hand Tools for Better Dovetails
Use a layout guide and small chisels for improved accuracy and refined looks when cutting dovetails.

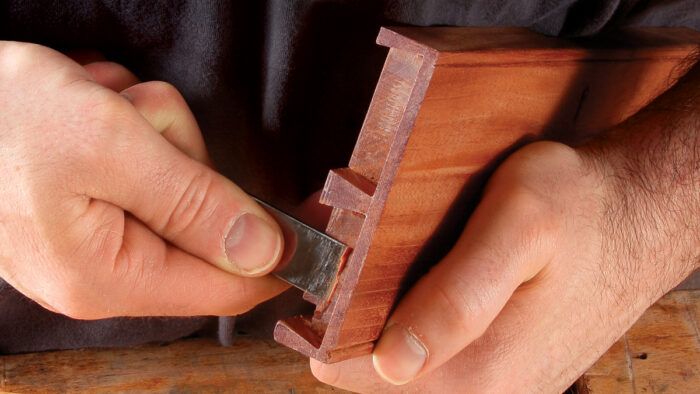
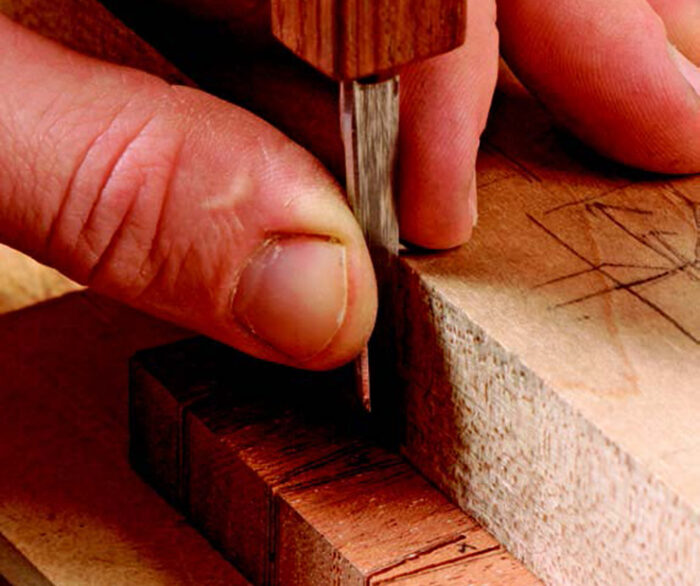
Synopsis: “One size fits all” hand tools didn’t offer the precision and control Clark Kellogg needed to lay out and cut dovetails to his own satisfaction, so he made a set of chisels and a dovetail marker of his own. The dovetail marker enables him to lay out angled and straight lines without moving it, and there are five chisels in his dovetail kit, a 1/16-in.-wide chisel to remove waste between tails, a 3/4-in.-wide chisel for paring pins and tails, a pair of skew chisels, and a detail chisel that’s triangular in cross-section. Learn how to make each of these tools and bring your dovetails to a new level.
For years, I cut dovetails using common layout tools and chisels, usually with what could generously be called lackluster results. Eventually, I figured out that I had two problems. First, I was not able to scribe and transfer layout lines accurately. Second, the chisels I was using, although great for chopping mortises and paring big joints, were too cumbersome for cutting delicate dovetails.
I didn’t find a solution until I was a student at the College of the Redwoods, where I learned that the best tool for a task is often one made specifically for it. So, I made a set of chisels and a dovetail marker that enable me to achieve a level of precision and control nearly impossible with “one size fits all” tools.
The dovetail marker lets me lay out both angled and straight lines without moving it. And there are five chisels in my dovetail kit: a 1/16-in.-wide chisel used to remove waste between tails, a 3/4-in.-wide chisel for paring pins and tails, a pair of skew chisels, and a detail chisel that’s triangular in cross-section to get into tight corners. All but one of the chisels are made from Hock marking knives, so you won’t need to do any heat treating. You can make the entire kit in about one day with a bench grinder, a rotary tool like a Dremel, and a hacksaw.
Start with a tool for efficient and accurate layout
Regardless of whether you cut your dovetails the right way (pins first!) or some “other” way, laying out dovetails requires marking a line down the face of the board and then extending that line across the end grain. It’s common to use two tools to do this: a bevel gauge and a square. But switching layout tools is inefficient and opens the door to error. Instead, I use a dovetail marker that allows me to mark both the face and end grain in one shot, which improves accuracy and saves time.
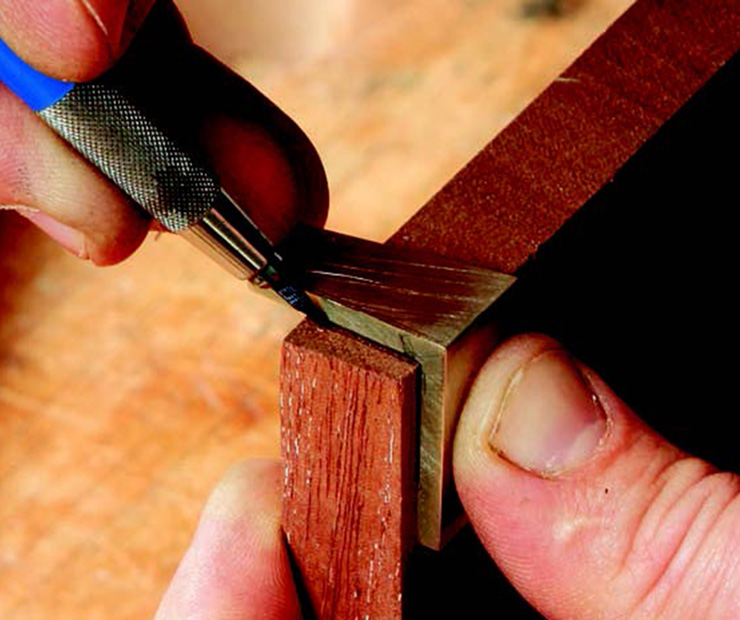
The gauge is made from a piece of 1/8-in.-thick brass angle bar that has 1-in.- wide legs. I buy a piece long enough to make several markers—hardwoods and softwoods require different slopes (1:6 is typical for softwoods, while 1:8 is common for hardwoods). I work primarily in hardwoods and use a 1:10 slope because I think it looks even better.
One leg of the brass is marked with two sloped lines, and the other has two straight lines. Mark them, and then rough-cut the gauge from the angle stock.
I use a disk sander to smooth the brass down to the layout lines, but you could use a file. To set up a disk sander for the job, angle the bed to match the slope used on the marker. Then clamp a 2-in.-square hardwood fence to the bed of the sander perpendicular to the disk. Because you are making a layout tool, take your time to ensure that everything is set up just right. Also, put a fresh disk on before sanding the brass. A worn or clogged disk will heat up small workpieces and burn your fingers.
Now set the rough-cut brass on one side of the fence, sanding the rough edge. To sand both sides, you’ll need to use both sides of the fence.
After sanding to your layout lines, touch up the edges with a small file to remove any sharp burrs. Finally, sand the two outside faces with 400-grit paper, and buff everything with 0000 steel wool and brass polish to bring out the natural beauty of the brass. (Who doesn’t like a great-looking tool?).
From Fine Woodworking #220
To view the entire article, please click the View PDF button below.


Log in or create an account to post a comment.
Sign up Log in