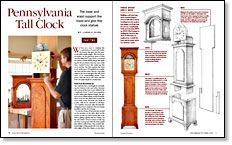
Pennsylvania Tall Clock – Part II
The base and waist support the hood and give this clock stature
Synopsis: Part two of Lonnie Bird’s article on the Pennsylvania Tall Clock includes plans for the base and waist support, the two cases that support the hood and give this tall clock its commanding stature.
Lonnie Bird is an author and woodworking instructor. Visit him online at www.lonniebird.com.
From Fine Woodworking #172
When you stop to examine the construction of most tall clocks, the joinery that goes into the casework really is fairly simple. This clock is no exception. In the previous issue of Fine Woodworking (#171, pp. 60-67), I covered the joinery and the details that go into making the hood, which is the top case of the three stacked boxes that make up this clock and the one that requires the most work. In this issue, I’ll explain how to make the base and the waist—the two cases that support the hood and give this tall clock some of its commanding stature. Compared with the hood, the base and the waist are quite simple in construction.
Build from the bottom up: Start with the base, and begin by dovetailing the bottom to the case sides. Because the bottom of the base is not visible in the completed clock, I used less-expensive poplar rather than figured maple, the primary wood. When laying out the dovetails, allow room for the rabbet that accepts the back of the clock. The back, also made of poplar, will not be attached to all three cases until the very end—after all of the finishing has been completed, the movement installed, and the doors hung.
For the face frame of the base, lay out and cut the mortises on the stiles, then cut the tenons on the top and bottom rails to fit. Before gluing together the face frame, cut the decorative curved corners on the top rail that correspond with the front panel that will be added later. The outside rabbeted edges of that panel will cover the inside edges of the face frame, so you don’t have to be fussy about cleaning up the bandsaw marks left on the edges of the top rail.
Glue up the face frame, allow the glue to set, then glue it to the front edges of the sides and bottom. As you put the face frame under pressure with the clamps, monitor that it sits square to the sides. I like to leave the edges of the face frame slightly proud of the sides and then bring them flush with a handplane and scraper after taking the assembly out of the clamps.
You’ll need to build a base frame, 5⁄8 in. thick, to go on the underside of the base. This frame provides a stable nailing surface for the small molding that gets nailed around the front and sides of the base (covering the edges of the frame) and a place to attach the feet. Glue the base frame to the clock base at the front edge only, attach the remainder with screws, and slot the holes to allow for seasonal movement.
For the full article, download the PDF below:
Fine Woodworking Recommended Products

Stanley Powerlock 16-ft. tape measure

Jorgensen 6 inch Bar Clamp Set, 4 Pack

Festool DF 500 Q-Set Domino Joiner


Log in or create an account to post a comment.
Sign up Log in