A Kentucky Quilt Rack
Shaping and joinery with a router and jigs
Synopsis: Kelly Mehler’s quilt rack can be built in a day from just one walnut board, using a tablesaw, bandsaw, and router. He explains how to make efficient jigs and patterns that will ensure symmetry, reduce trial and error, and be set up to make another quilt rack whenever you want. He explains how to shape with the patterns and jigs and advises you start with a 4/4 board that is at least 11 in. wide and 10 ft. long. He routs the mortises and handholds in the ends and then explains how to cut the tenons and fashion the stretcher and rails. The project is straightforward, but it’s easy to make a mistake, so you must be careful laying out your parts before glue-up.
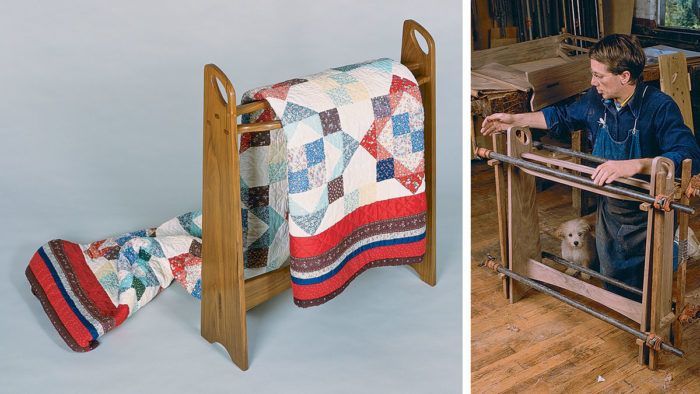
You can build this quilt rack with curved rails and wedged mortises and tenons in one day from a single walnut board. I’ve made hundreds of them using production techniques that require only a bandsaw, a tablesaw and a router. Simple pieces like this rack, which was designed by my former partner Peter Blunt, provided steady income and helped establish our fledgling furniture shop years ago. Having to make a living from these small production runs also taught us how to make efficient jigs and fixtures like the ones discussed here. You can make just one quilt rack by simply following the dimensions in figure 1 on the facing page. But if you take the time to make a few simple patterns and jigs, you will ensure symmetry, reduce trial and error, and be set up to make another quilt rack whenever you want.
Shaping with patterns and jigs
I make a pine or plywood pattern for each part and then use these patterns to lay out the components on the rough stock and to make templates for shaping jigs. You can make the patterns for the end and the side rail from the scaled drawings in figure 2 on the facing page and from the dimensions given in figure 1. When making the patterns, I bandsaw close to the line and then file and hand-sand the edges smooth. As you do this, take care to achieve a fair line, because the pattern is the exact shape of the part. I draw the tenons on the stretcher and rail patterns, but I don’t cut the tenons to width; later I mark their width on the workpiece with a separate tenon pattern. The mortises and handhold should be cut in the pattern for the end pieces, so that you can easily orient the pattern to avoid defects when you lay out parts on your stock. Rout the mortises in the end patterns by guiding the base against a straightedge fastened to the pattern stock. I limit mortise length by stopping the cut at pencil marks on the patterns. To cut the handhold, drill a hole and cut close to the line with a coping saw or jigsaw, and then smooth the edges with a rasp and sandpaper.
After making the patterns, I use them to make shaping and mortising templates. I made the shaping templates in. undersize to accommodate the in. setback between the router’s in.-OD guide collar and the in.-dia. straight spiral bit that I use to shape and mortise the parts. The guide collar is screwed to the router base and follows the edge of the template. Because of the setback between the collar and the bit, the template’s guide holes must be in. larger in radius than the bit for interior cuts, such as the mortises. The handhold cutout must also be in. larger all the way around.
From Fine Woodworking #84
For the full article, download the PDF below:
Fine Woodworking Recommended Products

Stanley Powerlock 16-ft. tape measure

Sketchup Class

Compass


Log in or create an account to post a comment.
Sign up Log in