
This week my scanner malfunctioned and I was faced with creating a turning without the benefit of the scanned-imported image. I was on a tight schedule, so there was pressure to get the turning done quickly. I found out how useful and expedient it is to have the image in SketchUp. Without the picture, it took me at least twice as long to create the shape for the Follow me, and the turning was not as accurate.
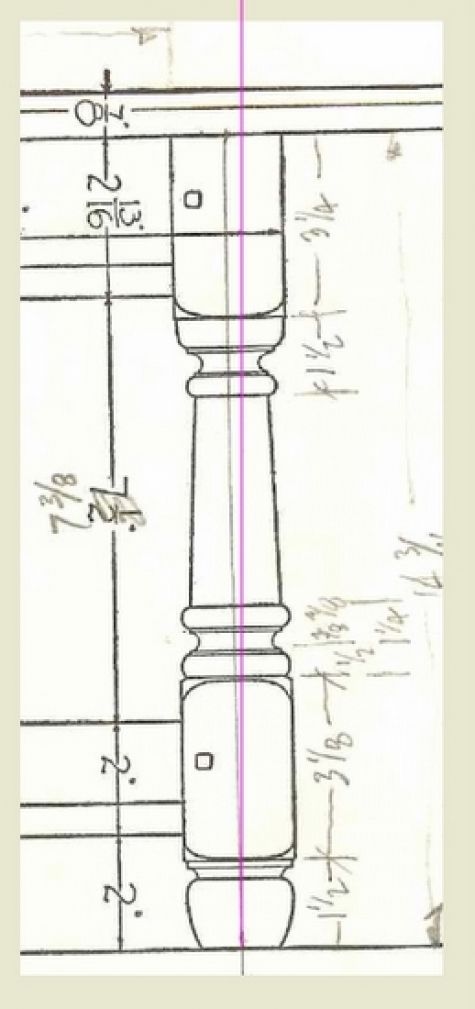
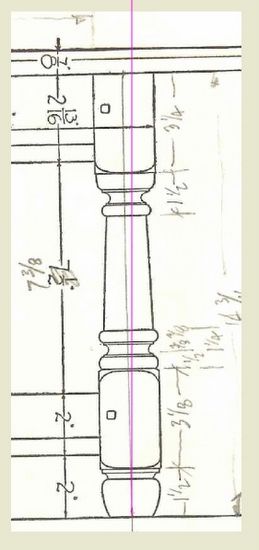
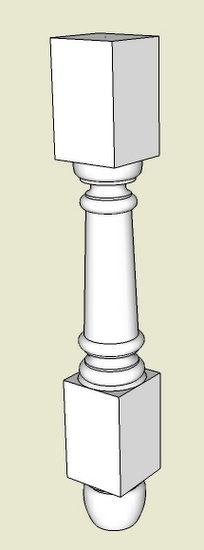
The following shows how I use imported images to expedite the creation of a model in SketchUp. And below is the leg that I needed to replicate. This is the actual scanned image from a book. In this case I import as an image (there are three options for importing).
My first step is to draw a line on the blue axis shown in magenta color. The scan is not square with the axes which is a typical situation. The cant is obvious against the leg’s centerline.
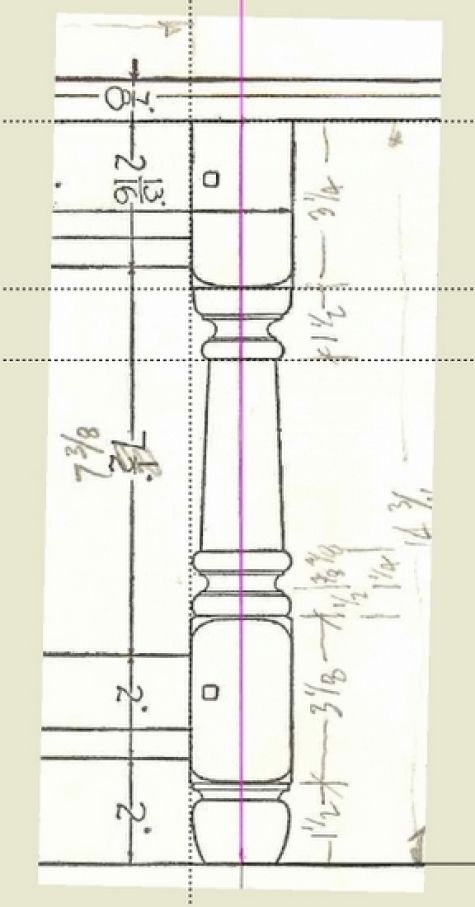
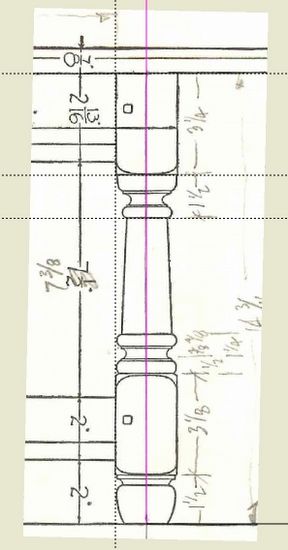
My second step is to draw a line of a length equal to a known dimension in the scanned drawing. I compare the two lengths and calculate the ratio which I use to re-size the scanned image with the Scale Tool. Often a drawing will have two scales, one for close-up small items. In this case, I copy the image and create another different full-size picture with the Scale Tool.
Here is the resulting image after squaring with SketchUp’s axes and re-sizing with the Scale Tool.
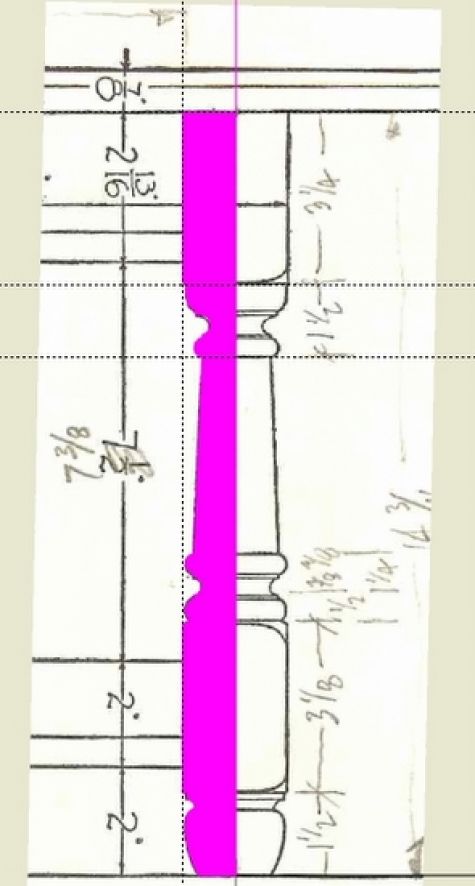
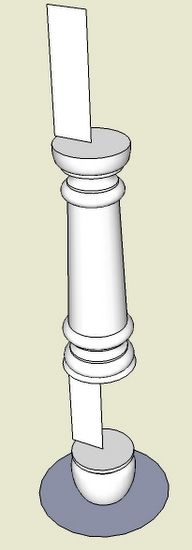
Using the Arc Tool, I quickly trace-over the turning shape and create a face (shown in magenta) that I can use with Follow me. Without the scanned image, the process of creating this shape is a manual time consuming and tedious task.
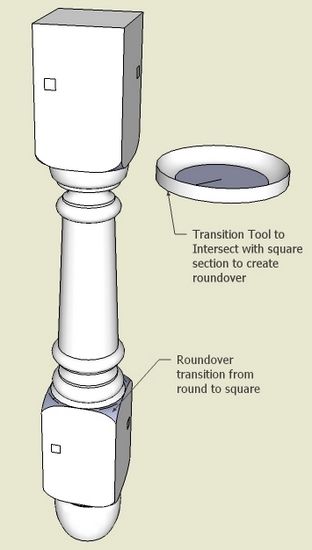
Here I’ve used Follow me to create the two turned sections of the leg. There are also two square sections which support the rail tenons.
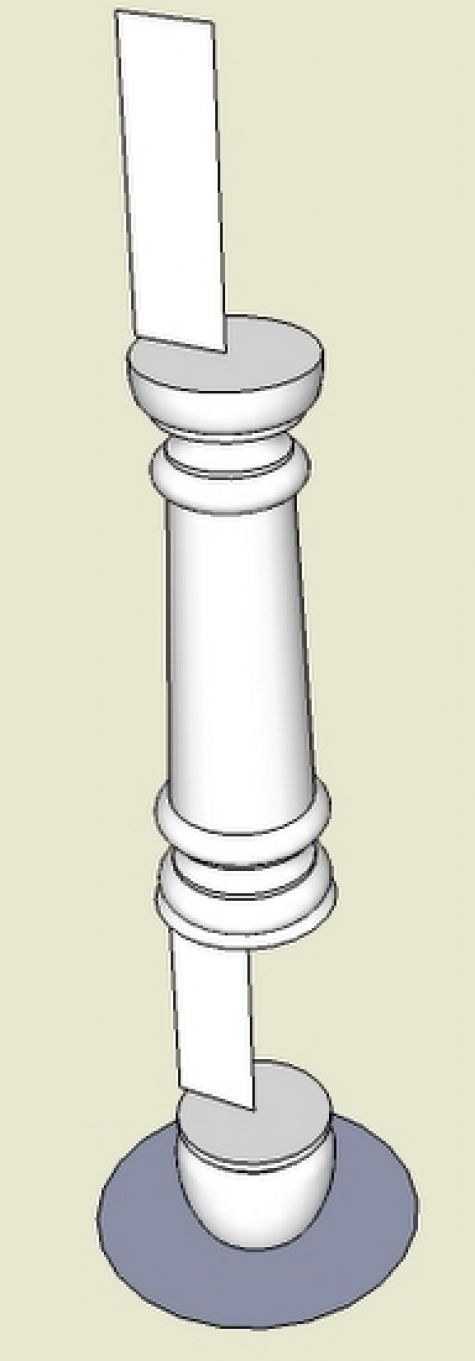
In this step I’ve completed the square sections of the leg.
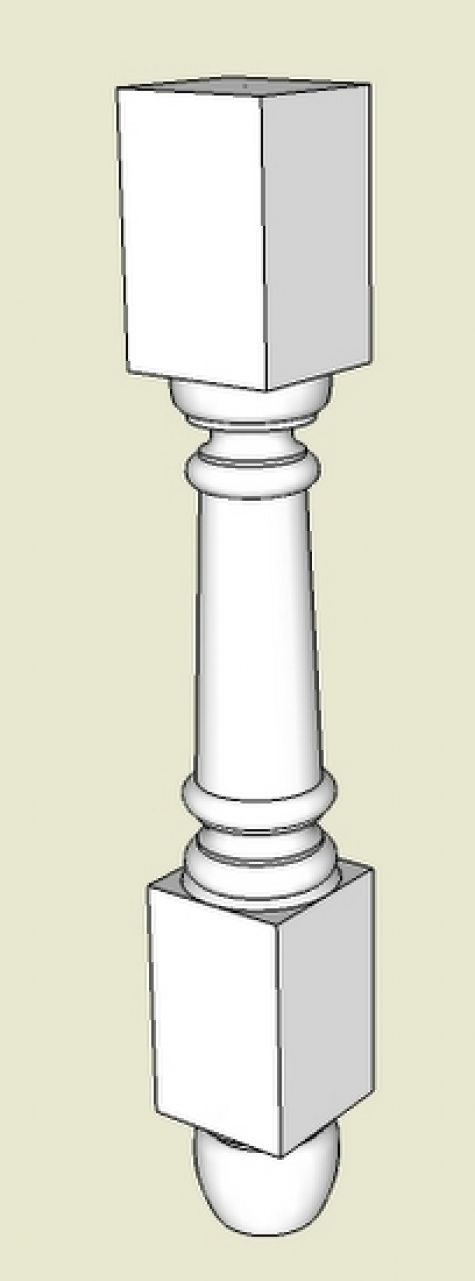
And lastly, I’ve eased the transition from round to square. This requires creating a “turned” shape of the transition area and intersecting with the end of the square sections. I usually have to scale up by 10x when doing this intersection to have a clean roundover. I’ve also added the pins or pegs for the tenons.

I found out how much I rely on the scanner to help with SketchUp work. So I’ve been sorting out back up schemes when the equipment fails.


Comments
Thanks Mr Killen, It inspires new ideas for me.
I too suffered from scanner failure a while back. I used my digital camera instead. :D
Nick JW.... thanks for the idea, i.e., using the camera to capture a picture of a drawing in the book, then importing the jpg into SketchUp.
Tim
Thank you once again, you know your stuff.
p.s.
My local library lets me take photos of pages of reference books, if I don't use a flash. Just another use for a digital camera.
Take Care
I use this technique all the time in my professional work. Use the largest dimension on the drawing to scale your image accurately. Good post.
RundD has a good point about using a large dimension from the original to set the size properly but it is also a good idea to check with a crossing dimension because it isn't unusual to end up with an image that isn't scaled exactly the same in both directions during scanning.
-Dave
Great info. This makes helps with the learning curve.
Can the original tutorial "Turning 2D Sketch into 3D Compenent, 10/31/07" be reposted? This would help me understand this import feature better.
Thanks
Log in or create an account to post a comment.
Sign up Log in